Our mind goes for a bit of a wandering every now & then. What if it went for one when you were supposed to enter some data onto a spreadsheet, only to come back & realise that the entries have been swapped from their intended positions – as in, the columns have been entered as rows & the converse also being true.
Well, it ain’t the End of the World! MS Excel has got your back on this.
In this article, we would be diving into the steps involved in converting the contents of a row into columns & vice versa. It might come as a bit of a surprise for those who were expecting some complicated way around this. The following is the dataset that will be used for this purpose.
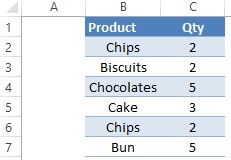
The technique that is going to be deployed here is known by the name, TRANSPOSE! Seems to ring a bell? You have got it right, it is the same method used to swap the rows and columns in a matrix. Matrices do have a real word purpose, after all!
Transposing the Rows & Columns
Transpose in MS Excel has been embedded within its Paste feature. So, in order for us to access this function, we would be needing to use the paste feature and we shall get started with the step that precedes pasting, which is – COPYING!
Select all the contents that are to be swapped in position with their rows & columns as shown in the below image.
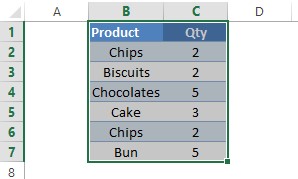
Now hit CTRL+C or for those who prefer using the mouse right-click & select the copy option. Once done, something similar to the legendary SNAKE game in a Nokia phone happens on the screen with the boundaries of the selection being engaged with a perpetual motion of dots as shown in the below image.
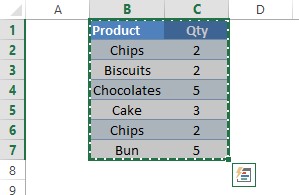
Once done, click on some other cell to switch the rows & columns through the paste feature by selecting the Transpose option within the Paste command available in the Home tab as shown in the following image.
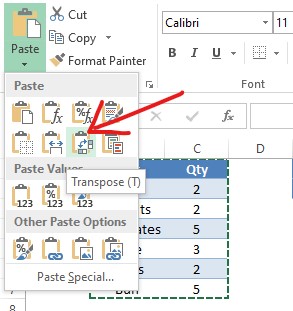
Upon clicking the icon shown in the previous image, the contents magically get themselves in order along the columns & rows swapping their respective positions. All this happens in a matter of seconds and the final results would be displayed before you just in a blink of an eye!

There’s also an alternate way of doing the final step for keyboard shortcut lovers.
The Alternate Way to Switch Rows and Columns
The cells selected & copied can be pasted elsewhere within the sheet, but once done a Paste icon would appear at the bottom of the pasted contents as shown below.
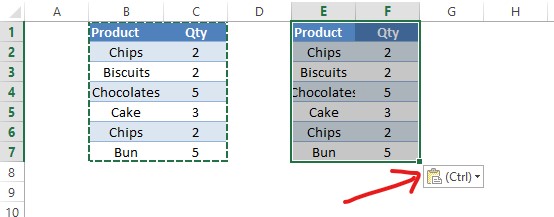
Click on that icon & a pallet of choices that could be made would present itself as shown below.
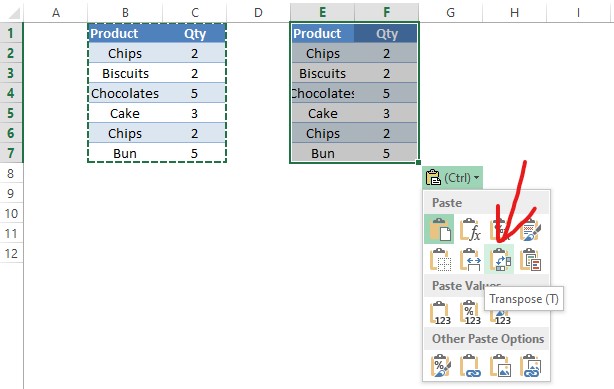
Once the cursor hovers over the list of icons available, the names of each icon would be displayed & one shall click on the icon when it displays Transpose as shown in the above image. The moment the icon is clicked, the contents would be interchanging their positions & would be rearranged as shown in the below image.

Conclusion
We have reached the end of this article & hope that it has given you what you were looking for. Do have a look at this article, to know how to make all the cells the same size in MS Excel. Nevertheless, QuickExcel has numerous other articles, which would be of great help to you when it comes to understanding the nuances of working with MS Excel. Cheers!
