So, we have the data as tabulations, grouped into various rows & columns, but at times they turn out to be really messy in terms of spacing such as the one in the below image.
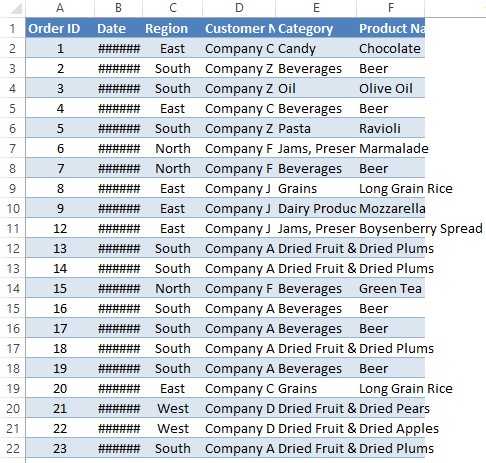
Yeah, yeah, there are hashes for all the entries under column B for the dates, but no need for any panic because there are data still within those cells. Hashes of these kinds appear in MS Excel when the size of the cells is so very teensy tiny when compared to the contents of the cells.
In this article, we are going to see how to make all the cells the same size & make these data readable. To make this happen, we are going to seek all the support we can from the Home tab.
Steps to Make Cells of The Same Size
Now, let’s get to it! We get started by selecting all the cells for which we would like to change the size as shown in the below image. This can be done by clicking on the very first cell A1 of this tabulated data & dragging the mouse all the way down to the last cell F22.
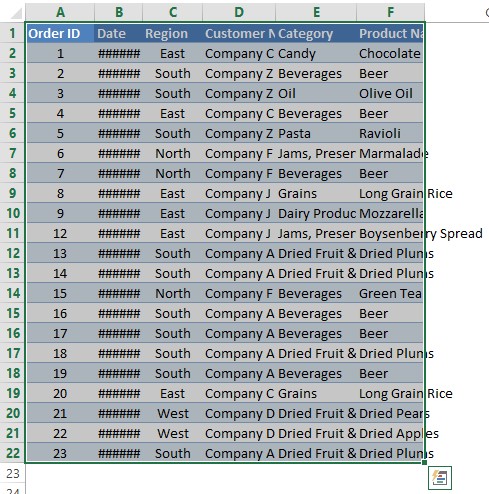
The above selection can also be done by clicking on cell A1 and by using the navigation keys. Press the SHIFT key and then hit the following arrow keys one after the other to select all the cells.
- Down Arrow Key (↓)
- Right Arrow Key (→)
The focus here is to press the SHIFT and the arrow keys one after the other and not at the same time to select all the data properly. Once done, hover the mouse pointer and click on the Home tab.
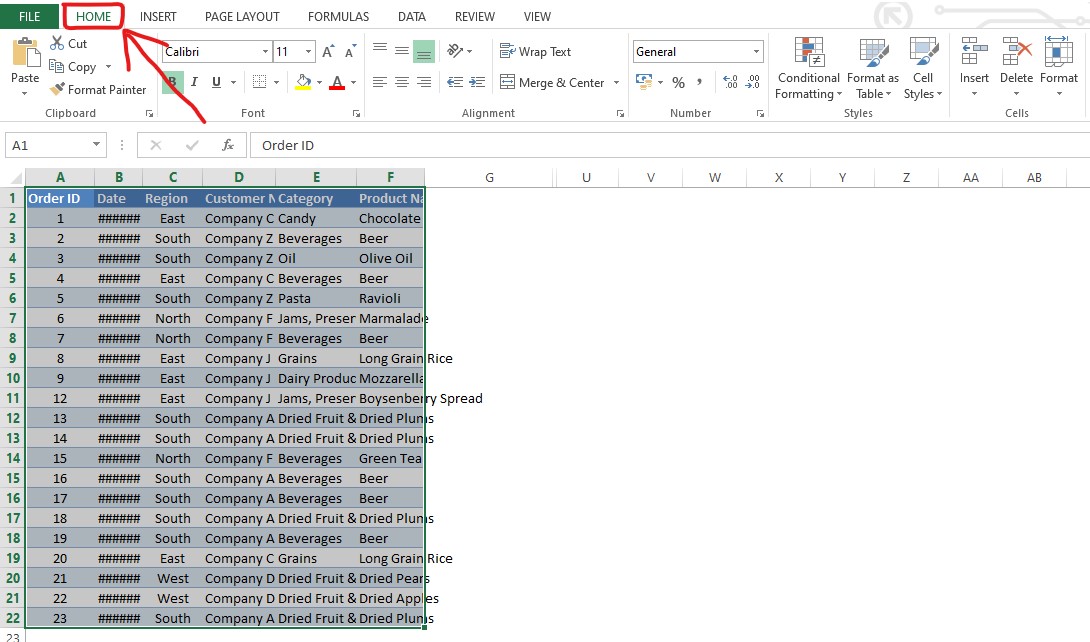
After selecting the Home tab, it’s time to turn our attention to the search for the Cells sub-group which would be present in the location as shown in the below image.
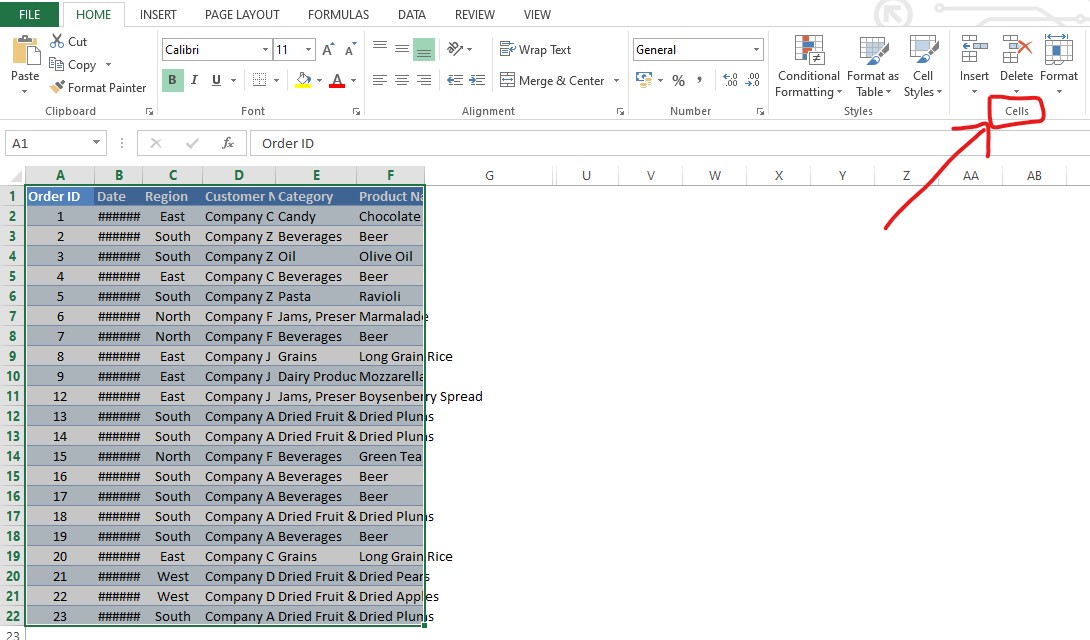
Once that is done, we click on the Format option available in the Cells sub-group. It shall display a list with various options to choose from, as shown in the below image.
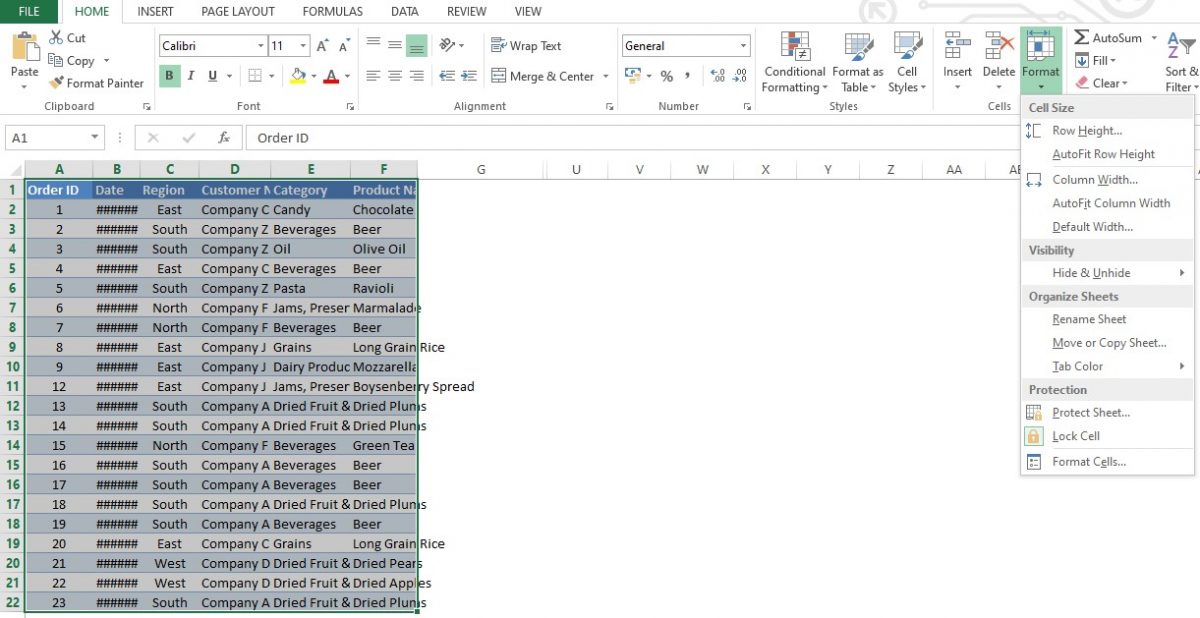
Select the Row Height option which would be at the very top of the list and the following pop-up would appear.
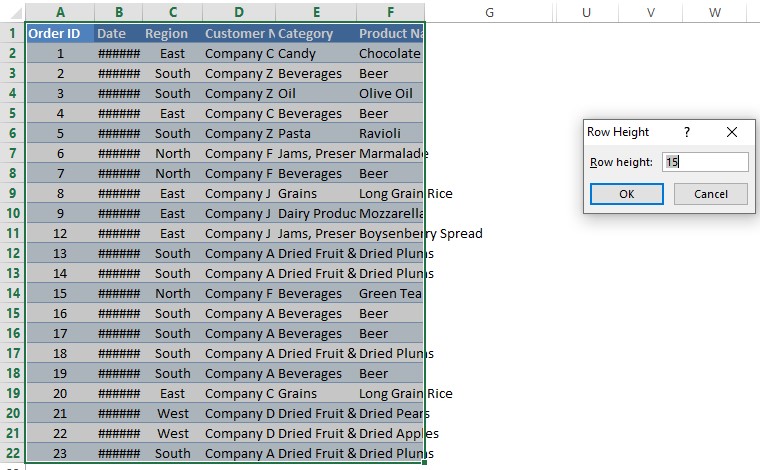
Enter the desired value to change the row height of the selected cells and click OK. The changes would be put into effect as soon the OK button is hit!
The size of the cells is now changed vertically. In order to change them horizontally, we would be needing to repeat the same steps again!
This time, we are going to change the width of the column, by clicking again on the Format option.
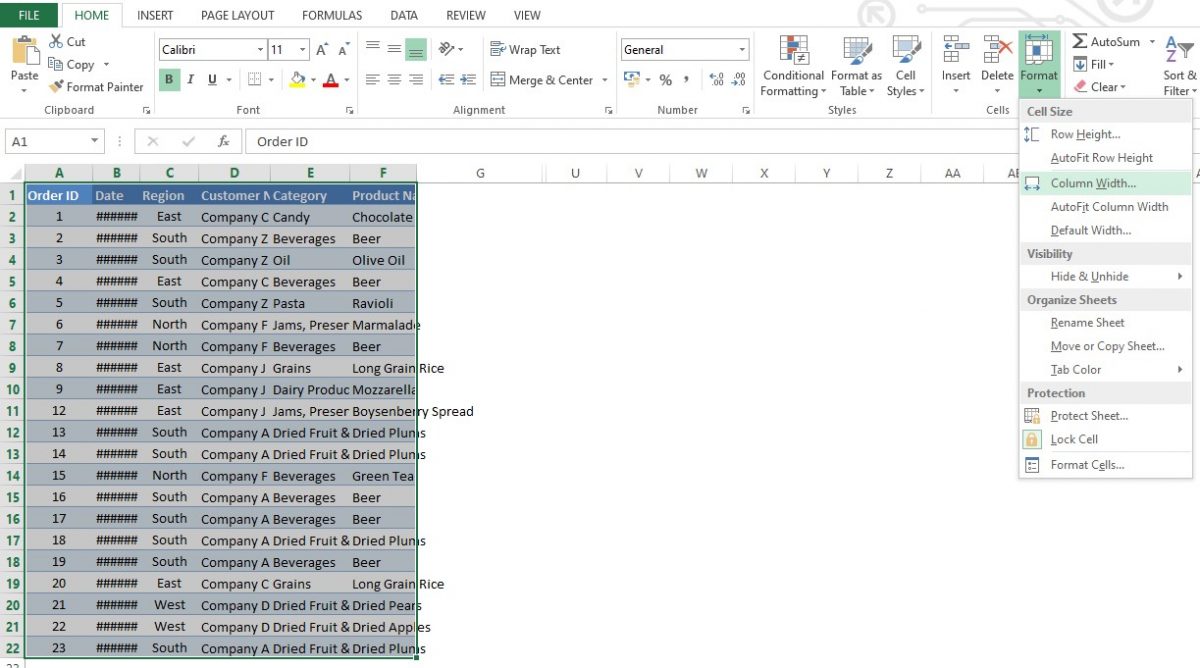
Click on the Column width option as highlighted in the above image, which will in turn make a pop-up appear. This pop-up is where we feed in the size change needed for the column width of the selected cells.
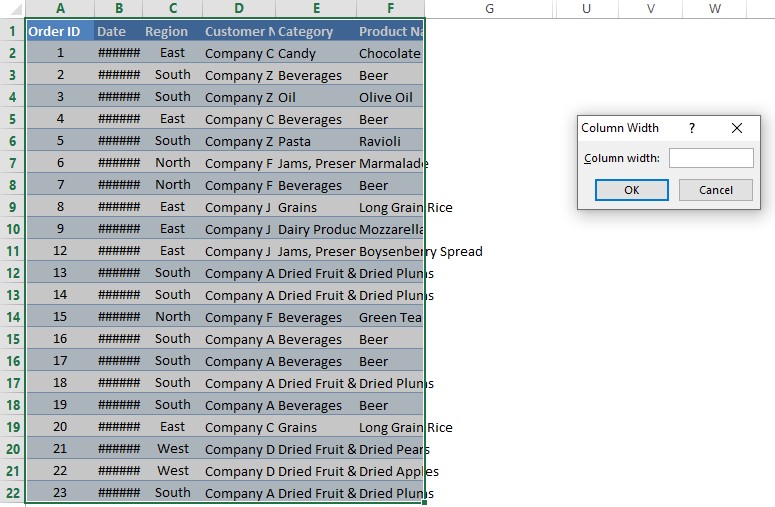
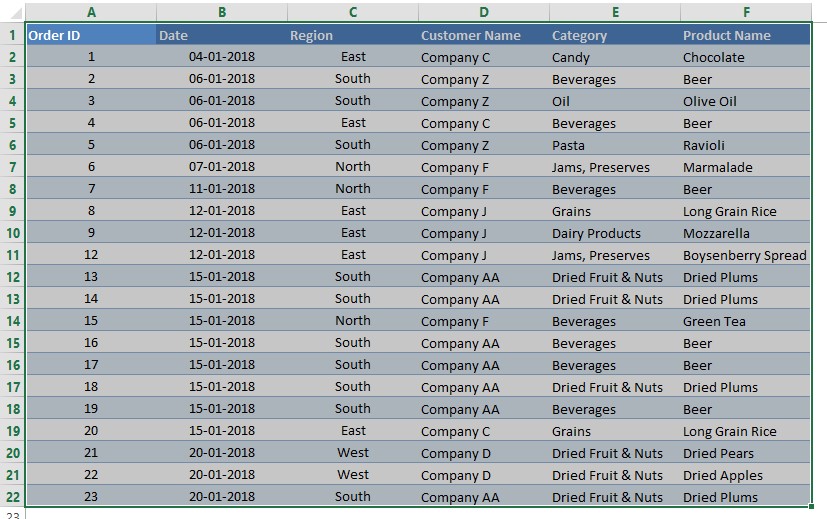
Once done, type in the desired width of the column & click OK. The changes would be made to the selected cells in a jiffy as shown in the following image.
Conclusion
Hope the article was informative. Here is an additional lead to an article that might interest you! To know how to wrap the contents of the cells in MS Excel, do have a look at this article. QuickExcel has numerous other articles too which could help you with that one thing that you’re trying to do with MS Excel right now. Cheers!
