Let’s learn to mail merge a contact list from Microsoft Excel to MS Word. We will learn to use the mail merge tool with the help of crucial examples and supporting images.
You are probably here because you have 100 or 200 people to whom you want to send out a customized but identical email with the personal details of each person on your list.
You’re at the right place if this is your problem.
Steps to mail merge from Excel to Word
To begin with, we will take an example of a sample contact list containing each person’s business address, company name, phone number, and email address, etc. prepared in an Excel workbook.
Recommended Read: How to Create a Calendar in Excel?
1. Creating a contact list and a letter
We will draft a letter in a Word document and will replace the default contact details with custom contact details.
Don’t worry this easy tutorial can help you achieve this!
Here is an example of a contact list to whom we will send emails, prepared in Excel. Let us take a small list for better understanding.

- Note that the headers of your list will be used as fields with details of a recipient in the letter.
- Make sure to add headers to the list and name them appropriately as we have done.
Here is an example of a letter that is to be sent to all the people on the contacts list, on their mailing addresses.
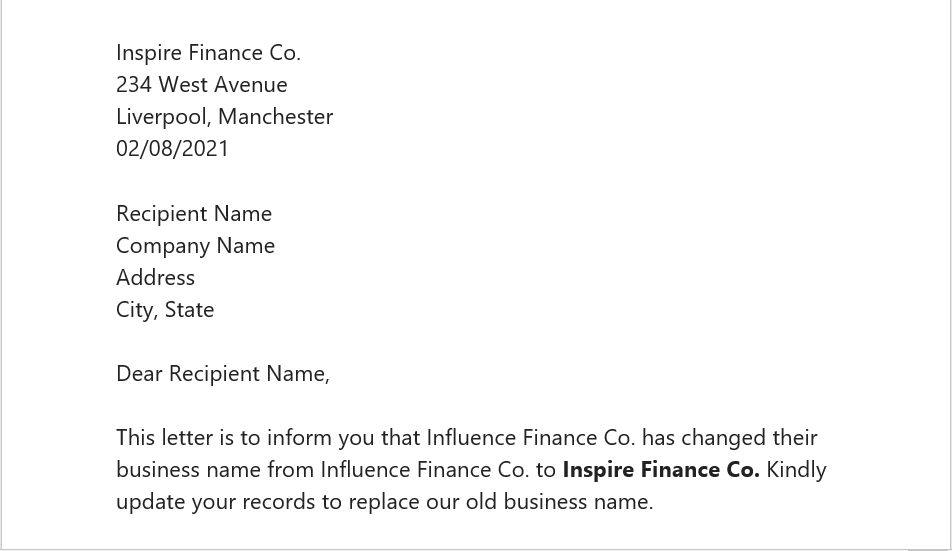
You can observe that there is no specific detail provided for the recipient’s name and address, etc.
2. Merging data from Excel to Word
We simply have to replace the default “Recipient name” or “Recipient address” or their company names with the details provided in the Excel workbook.
Here are the steps to mail merge from Excel to Word.
- Open the Word document with the letter.
- Once your letter is drafted, go to the Mailings tab.
- Beside the Start Mail Merge section, pull down on Select Recipients.
- Select the option Use an Existing List.
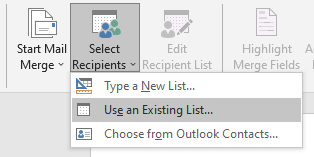
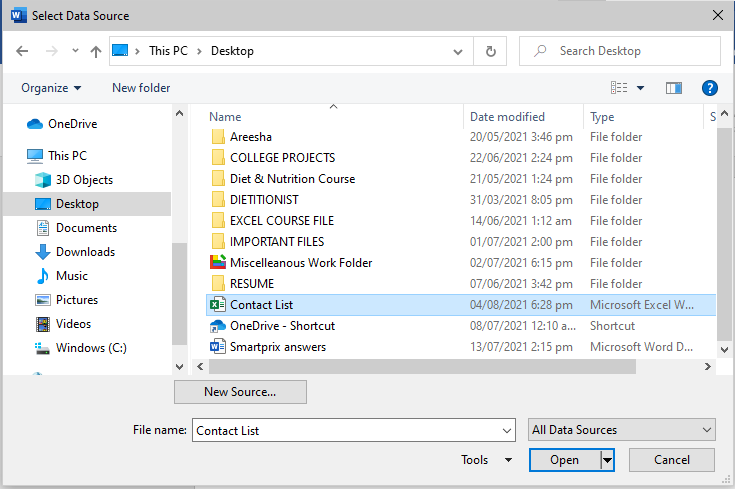
- A new window opens enabling you to select a file with an existing contact list.
- You should know your Excel file’s location in this case.
- Select your Excel file with the contacts list.
- Click OK.
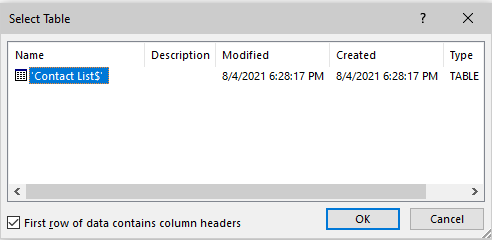
- Now, a window opens displaying the sheet names in an Excel file.
- Select the sheet which contains the list.
- Check First row of data contains column headers to be able to match headers with empty fields in the letter.
- Click OK.
- You can observe that some buttons in the Write & Insert Fields section have been unlocked in the Mailings tab.

It’s time to match the details in the list with empty fields in the letter. Let’s do it now.
- Select or highlight the existing default address block in the letter.
- Select Address Block in the Mailings tab.
- A window opens enabling you to edit the address block in the letter by rendering data from your Excel sheet.
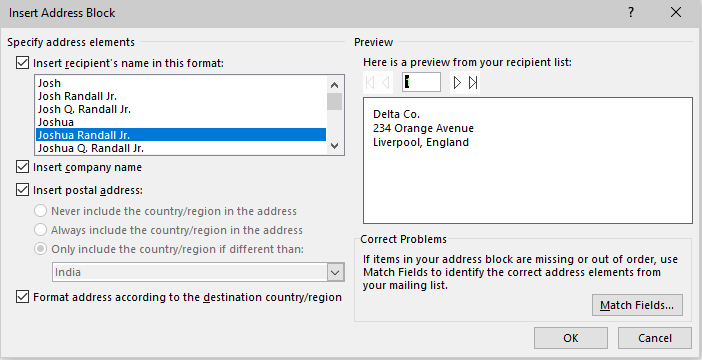
- You can view how your address block looks like in the preview area in this window.
- If the preview doesn’t show the recipient’s name, then check the box that says Insert recipient’s name in this format. This is enabled by default.
- Select a format for the recipient’s name in the box below.
- Check or uncheck the company’s name to add or remove the recipient’s company’s name.
- Check or uncheck Insert postal address to add or remove the recipient’s address.
- You can navigate left or right under the preview section to view how your address block looks like for every recipient.
- The Match Fields option comes in handy if Word fails to identify the elements from Excel correctly or goes out of order by allowing you to choose appropriate headers or elements for a field in the letter manually.
- Click OK.
- You can now delete the default recipient’s address. Keep the «AddressBlock» text, do not delete it.
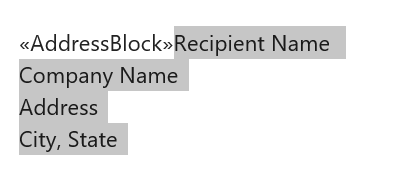
- To preview the address block on the letter, click on Preview Results in the Mailings tab.
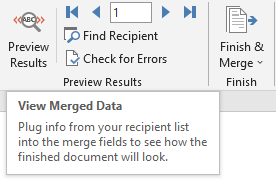
You can see that Word is now displaying the merged data in the letter.

But do you see the problem? There is no name added to our address block. This is where the Match Fields option comes into the picture.
- Click on Match Fields in the Mailings tab.
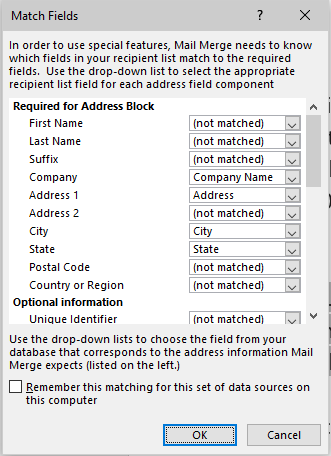
- You can find a variety of options in the Match Fields window. But all of them are not relevant for you.
- We will select the Name header from Excel in the First Name field to display the name of the recipients.
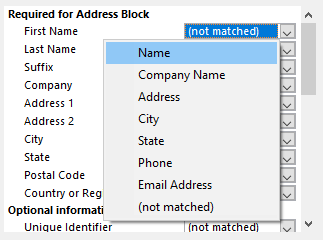
- You can leave the other fields to (not matched) if you haven’t separated first names, last names, and middle names in Excel.
- This is the same for other irrelevant fields as well.
- Click OK to continue.
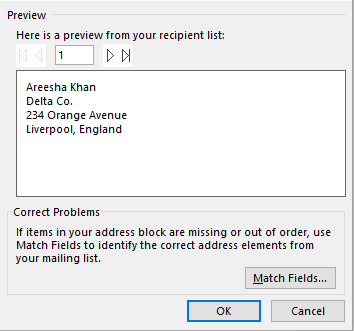
You can now view the recipients’ names in the preview section. Click OK to close this window.

The recipient’s name is being successfully displayed in the address block of the letter as well now.
- Navigate through the Preview Results section to check if other recipients’ addresses and names are being displayed correctly.
Now, let’s add a greeting line to the letter.
- Highlight the default salutation line or simply click on the existing greeting line or salutation of your letter.
- Click on Greeting Line in the Mailings tab.
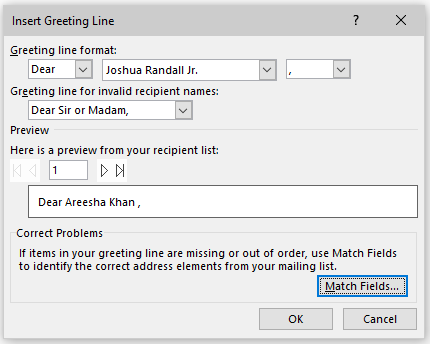
- In this new window that opens, you have multiple options to choose from.
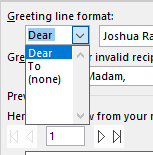
- You can choose if want to display Dear or To or nothing before the name of the recipient in the salutation.
- You choose the format of the name and also whether you want a colon to be displayed rather than a comma or just leave it blank.

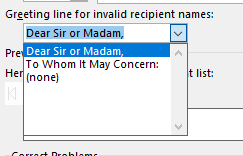
- You can choose to display a default salutation in case Word fails to display the desired greeting line.
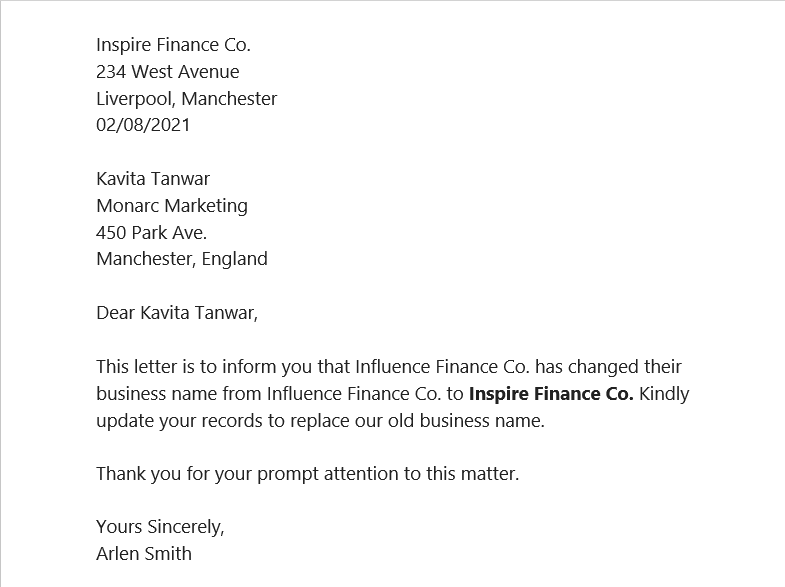
Our letter is completely ready to be emailed or be printed and getting distributed to mailing addresses.
3. Finishing Mail Merge and send the letters out
Once you’re done with merging data from Excel to Word, here’s what you have to do next.
- You can either send an email to all contacts or you can print all letters to send out to their physical mailing addresses.
- Click on the Finish & Merge button in the Mailings tab.
- Click Send Email Messages if you want to email all the contacts.
- Click on Print Documents if you want to print all letters to send out in envelopes.

Conclusion
This tutorial was all about using mail merge from Microsoft Excel to Microsoft Word. If you have any queries regarding mail merge in Excel, drop a comment below and we will get back to you with a response!
References: Microsoft
