There can be times when we need to deliberately add more information in the middle of a table in MS Excel. So, let’s get to know how that can be done by exploring different ways to insert a new row.
When it comes to inserting a row in MS Excel, there are a handful of ways to do it. Four amongst such methods are listed down below, for you to choose the one which best suits you.
- The Keyboard Shortcut way
- The Hotkey way
- The Accelerator way
- The old school Right Click
Let’s say you are working on something similar to the table in the below image.
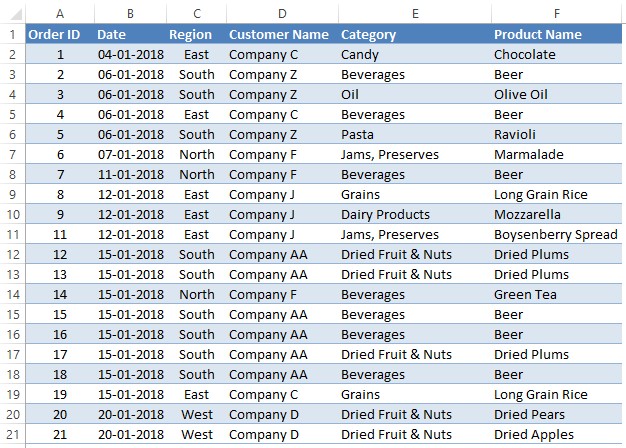
And suddenly you spot a missing entry in this table. The data which belongs to Order ID 10 has miraculously disappeared.
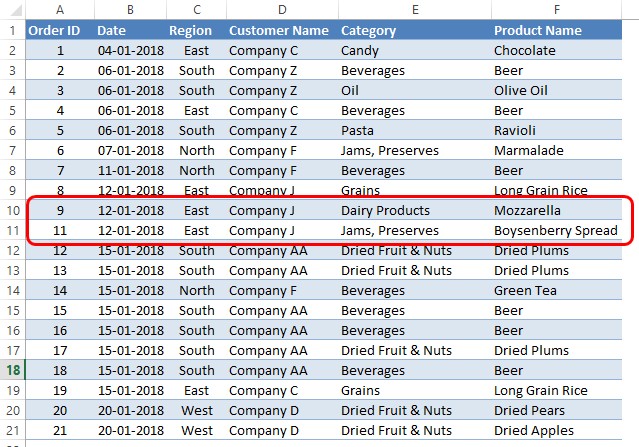
So, to create a space to enter those missing entries, you would be needing to insert a row & let’s see how that can be done in each of the ways listed above.
Method I – The Keyboard Shortcut Way
Select the row above which you want to insert the additional entries as shown below.
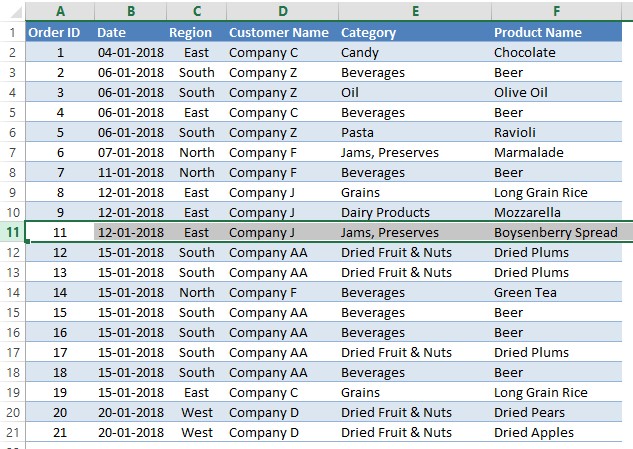
Press the following keyboard keys one after the other,
CTRL, SHIFT, + (PLUS)
The focus here is to be on pressing the keys one after the other and NOT SIMULTANEOUSLY. Doing the latter would only make this method not work.
Once done, a new empty row gets inserted above the row which was selected.

Method II – The Hotkey Way
Knowing this method would just make life with MS Excel easier & a tad bit swift. The first step remains the same as in selecting the row above which you want to enter the new entries.
After selecting the desired row, hit the ALT key of your keyboard & you can notice some visible changes happening around the tabs in your Excel worksheet.
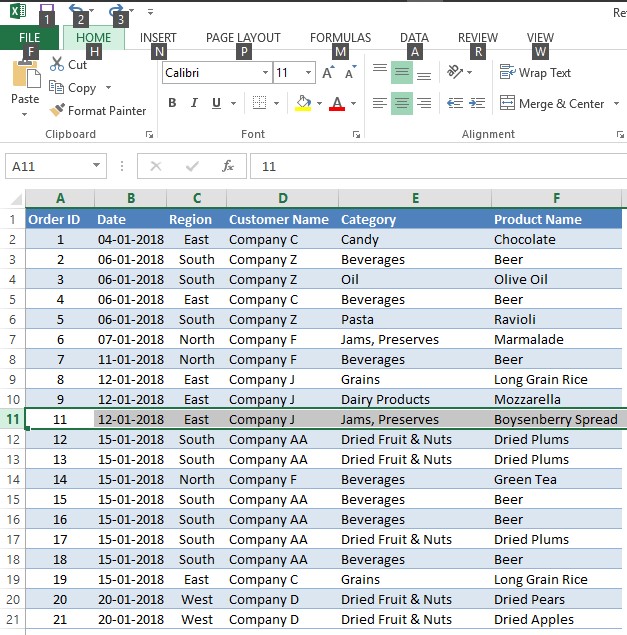
There would be alphabets appearing over each tab & pressing that letter key on your keyboard would take you to access the various tools available within that tab.
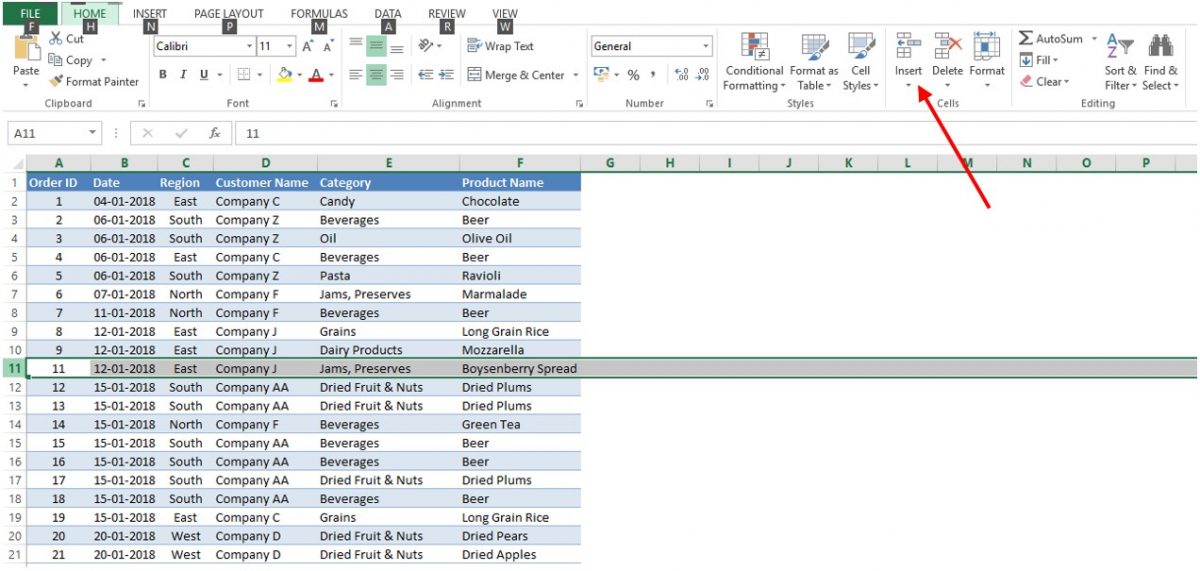
As seen in the above image the option to Insert is available within the Home Tab. So, hit the letter key ‘H’ on your keyboard & the following appears.
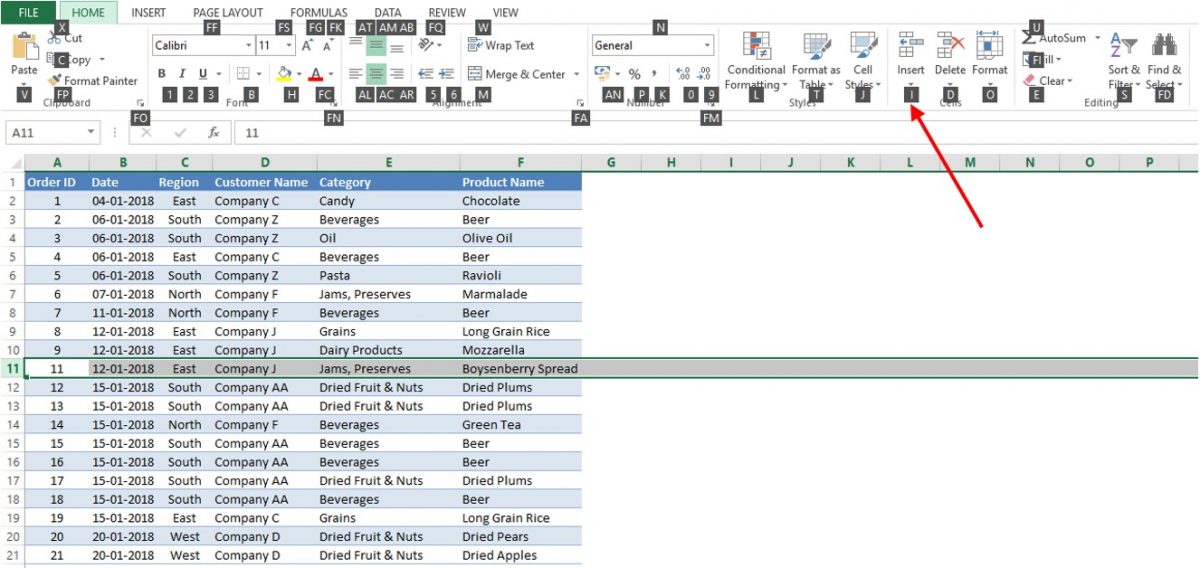
Press the letter key ‘I’, followed by ‘R’ on your keyboard to insert a new row.
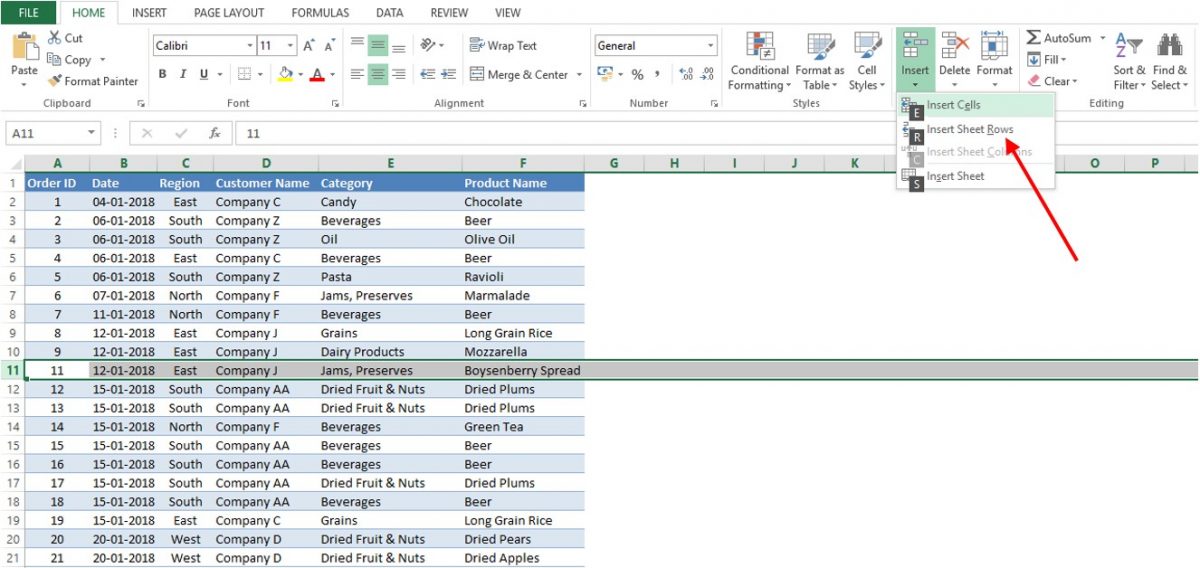
Once done, you could see that a new empty row has been inserted above the row which was selected.

Method III – The Accelerator Way
In this method too, the first step remains the same which is, to select the row above which you want to insert a new row.
Once that is done, hit the ALT key, and following that you’re going to press the letter key ‘I’. This will make a prompt appear in your worksheet as shown in the below image.
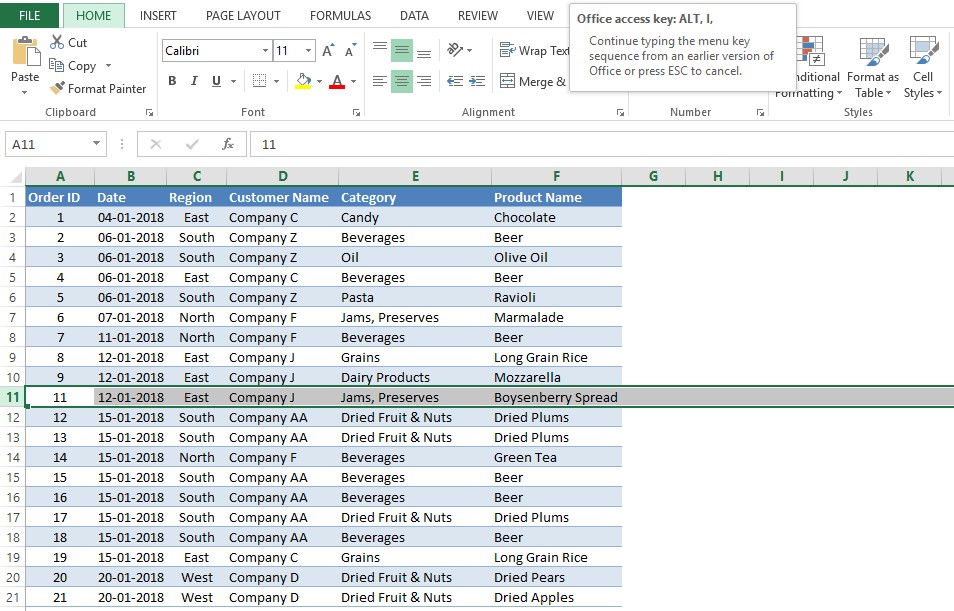
The key here is again to press the keys one after the other and NOT SIMULTANEOUSLY. After the above prompt is displayed hit the ‘R’ letter key & an empty row gets inserted above the selection.

Method IV – The old school Right Click
Hover your mouse over the row number of the row above which you want to insert. Click on the row number, which is ‘11’ in this case, to select it.
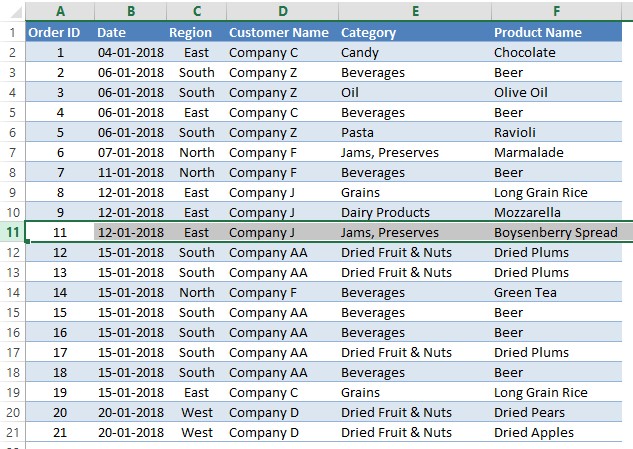
Once done, right-click anywhere on the contents of the selected row & the following box appears.
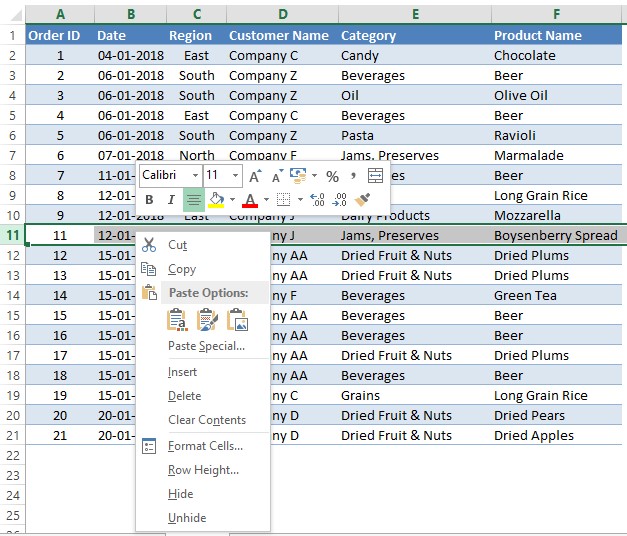
Click on the Insert option available in the list & an empty row gets inserted just above your selection.

Conclusion
Now you’d be knowing 4 different ways to insert a row in MS Excel. Each of these methods would serve the purpose. I personally like the keyboard shortcut way for its instant response.
Stay connected with QuickExcel for more tips on using MS Excel. Until then, Hasta la Vista!
