This article is all about the different ways you can edit legends in Excel. Legends are indicators on a chart that show what every colorful label indicates. There is a lot you can do with legends in a chart in Microsoft Excel.
Steps to edit legends in Excel
Let’s get started with this step-by-step tutorial to understand the different ways to edit legends.
You may want to learn how to create a Bar Chart or Line Chart before proceeding with this tutorial.
1. Hide or unhide legends
Here is how you can hide or unhide legends on a chart.
- Click anywhere on the chart area.
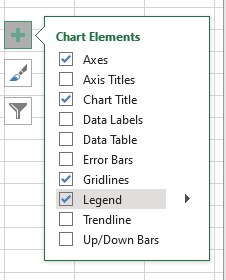
- Click on the Chart Elements icon as a green plus.
- Check Legends to unhide them and uncheck to hide them.
2. Deleting legends in a chart
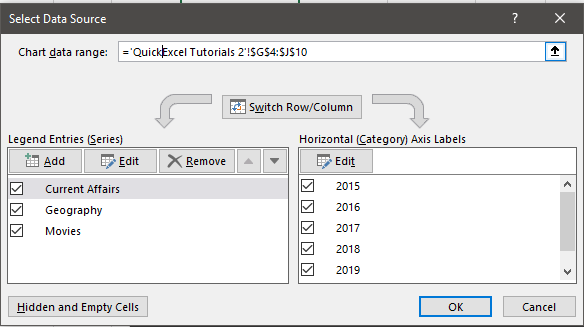
- Right-click on the chart.
- Click on Select Data.
- On the left side, under Legend Entries, click Remove.
Another way to delete or remove a legend is as follows.
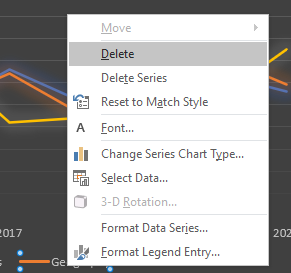
- Double-click the legend you want to delete.
- Right-click on it.
- Press Delete to delete only the legend.
- Press Delete Series to delete both the legend and the series.
3. Changing legend positions on Excel charts
To change the position of legends on the chart, follow these steps.
- Pull on the black arrow to set the position of legends on the chart.
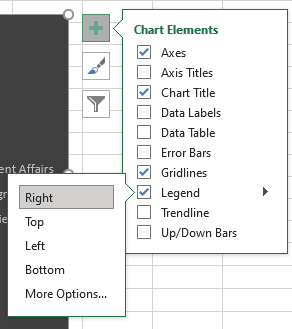
- Click on More Options for more position settings for your legends in the right window pane called Format Legends.
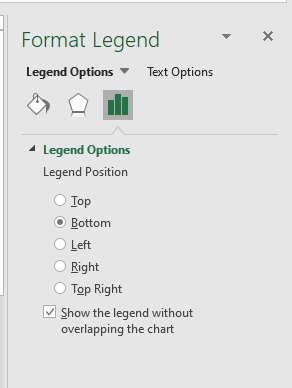
Another way you can change the positions of legends can be as follows.
- Click anywhere on the chart.
- Go to the Design tab.
- Under Chart Layouts, pull down on Add Chart Elements.
- Pull Legends and choose your favorite position.
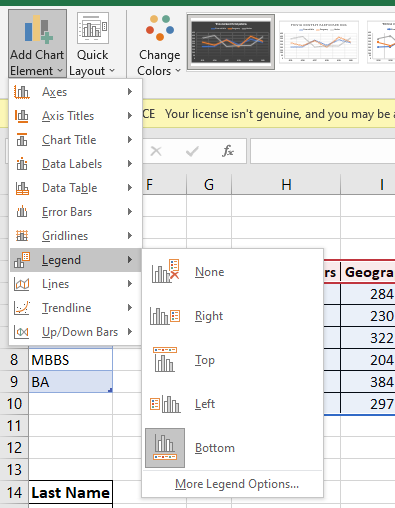
4. Editing or changing legend names
There are multiple ways to change the name of your legends, here is how you can do it.
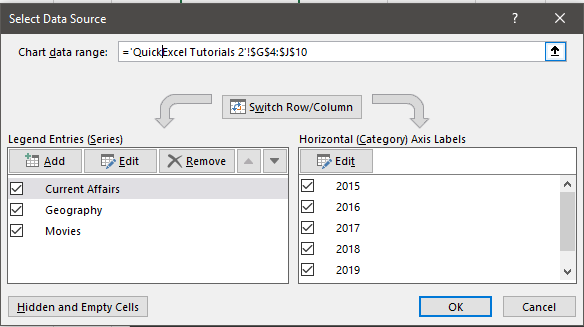
- Right-click on the chart.
- Click on Select Data.
- Look on the left side under Legend Entries.
- Select the legend name you want to change.
- Click on Edit.
- Enter a new name for that legend under Series Name.
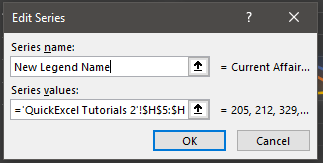
Another way you can edit the legend names can be as follows.
- Click on the chart.
- Go to the Design tab.
- Click on Select Data.
Now, edit the names of each legend as mentioned in the steps above.
5. Customizing font styles for legends
To change the font styles of your legend texts, follow these steps.
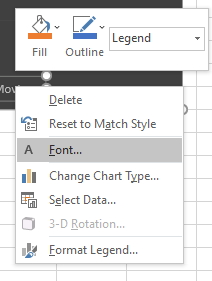
- Right-click on the legend text.
- Select Font.
- Select a custom font under Latin Text Font.
- Choose a font style like bold, italics, or regular or more under Font Style.
- Set a custom size of the text under Size.

- Set a custom font color under Font Color.
- You even have a variety of underline styles to choose from under Underline Styles.
- Once you have chosen an underline style, you can also choose the color of your underline, if you like.

- You can also add some effects to your legends like strikethrough, double strikethrough, subscript or superscript, all caps, etc. in this window.

- Under the Character Spacing tab, you can increase or decrease the spacing between legend text characters.
- You can set the points for spacing between the characters.
- Choose Normal if you don’t want any spacing.
- Choose Expanded if you want to increase spacing.
- Choose Condensed if you want to reduce spacing.
- Press OK, when you’re done.

6. Formatting legend text
You can even format the legend texts in terms of alignment, angles, or direction. Here are the steps to format legends.
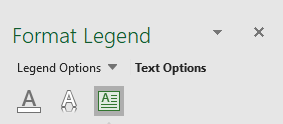
- Double-click on the legend texts.
- A window on right opens named Format Legend.
- Click on Text Options besides Legend Options.
- Click on the third icon named Textbox.
- Select your desired text direction underText Direction.
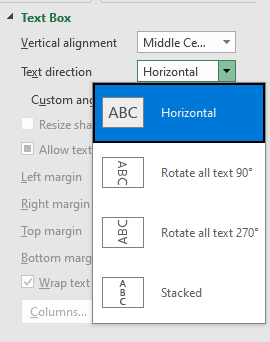
- Or you can set custom text angle under Custom Angle.
Also Read: How to Indent Text in Excel?
8. Customizing legend text
You customize your legend text by applying effects to it as follows.
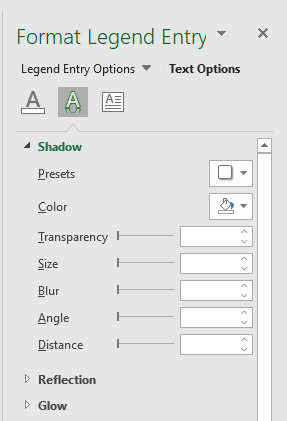
- Double-click on the legend texts.
- Format Legend window opens on the right
- Click on Text Options besides Legend Options.
- Click on the second icon named Text Effects.
- Select shadow effects under the Shadow tab.
- Select text reflection under the Reflection tab.
- Select glow effects under the Glow tab.
9. Text Fill & Text Outlines
You can give custom fills and outlines to legend texts in Excel. Here are the steps to give custom fills and outlines to texts.
- Double-click on the legend texts.
- Format Legend window opens on the right
- Click on Text Options besides Legend Options.
- Click on the first icon named Text Fill & Outline.
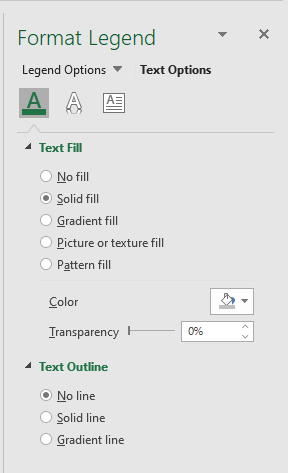
- You give custom fills to your text such as color, gradient, picture, or pattern fills under Text Fill.
- Apply custom outlines to your text under Text Outline.
Conclusion
This article was a complete detailed guide on editing legends in Microsoft Excel. Follow these steps carefully to be able to hide, unhide, customize fonts and texts, or format legend texts, and more in Excel. If you have any doubts comment your thoughts below and we will be happy to answer your queries!
