Working with MS Excel, it is not always the case that one shall get data in the form of spreadsheets alone. There are other formats in which the source data might be provided such as the Comma Separated Values (CSV) or Text Delimited (TXT) format.
Also read: How to Count Unique Values in MS Excel?
Why bother with these formats when one can store data in spreadsheets you ask? Well, we can, but the machines can’t!
It would be a fanciful requirement to load a manufacturing machine with MS Excel just so we can extract data from it, once in a while!
So, what happens here is the alternate format – ‘.txt’ or ‘.csv’ ripping the data of all the formatting gimmicks & saving the data in the same sequence & order as given in MS Excel.
That’s great news, but if someone has to put these data into use then ‘.xls’, a format of MS Excel is the go-to extension. But how could one get on with that? Let us explore that in detail in this article.
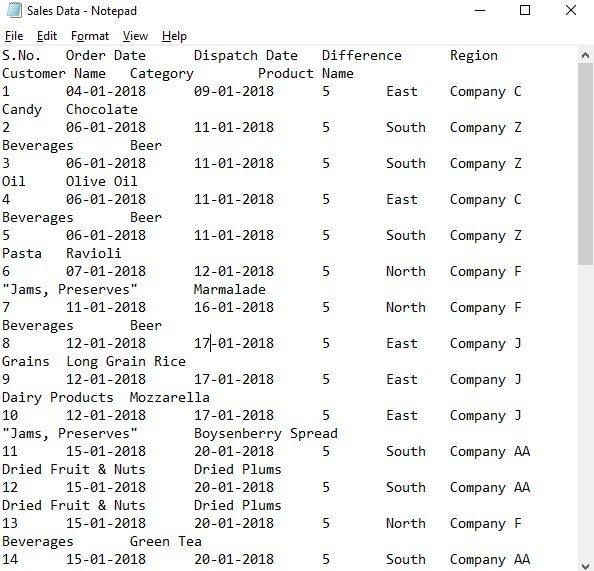
Given in the above image is the ‘.txt’ file which we would be converting into ‘.xls’ format in this article. A glance at this image shows that its entries have been separated by spaces uniformly distanced from each other.
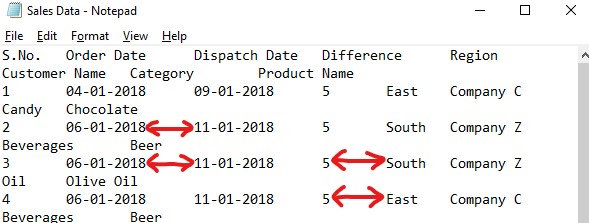
It can also be seen that each data has been categorised falling into the same sequence, for instance, there is always the continuous numbering corresponding to the serial number category followed by dates & so on. By this one shall be relieved of the fear of whether everything would fall in the right place when converted into the Excel spreadsheet.
Open a new Excel spreadsheet & navigate all way down to the Data tab.
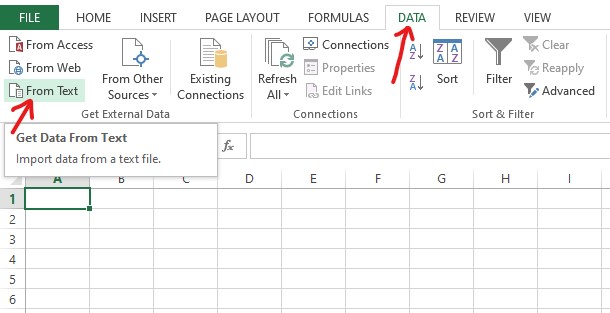
Within the Data tab, the attention is now to be turned towards the Get External Data section within which one can find the From Text option. Click on it & a pop-up prompting to choose a text file shall appear.
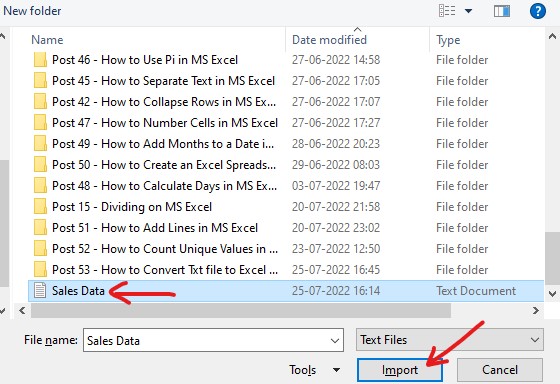
Click ‘Import’ at the bottom of the pop-up as indicated above & a ‘Text Import Wizard’ shall appear.
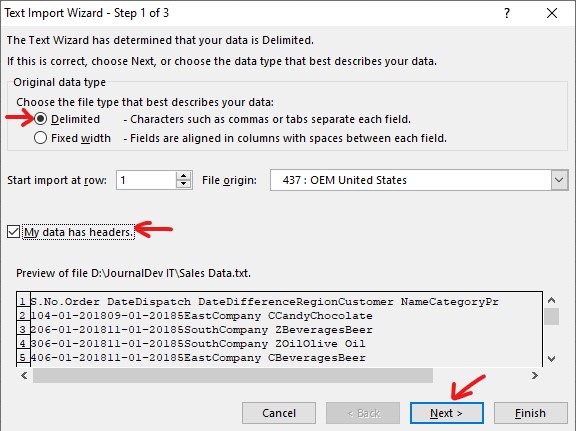
Leave the file type with the default selection as ‘delimited’ since the data are separated only by spaces & check the ‘My data has headers checkbox. Click ‘Next’.
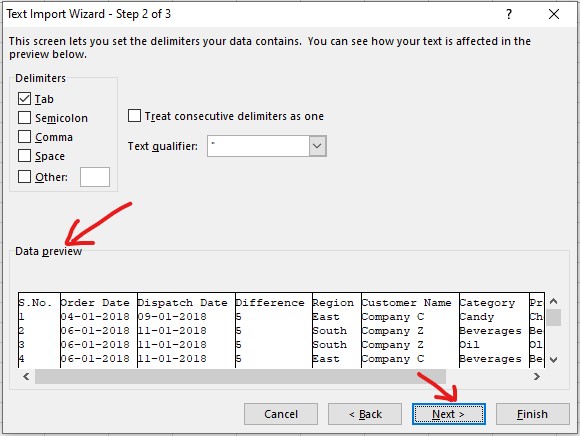
Now one shall be taken to the second step of this wizard where one could get a preview of how the data would be separated in the MS Excel sheet. Click ‘Next’.
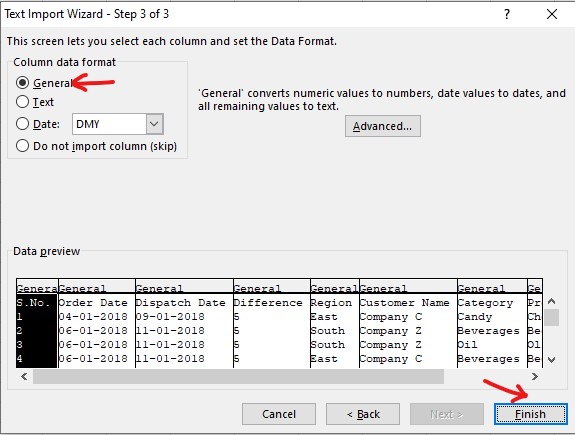
Here one can either leave the data format to be ‘General’ since it would automatically adjust to whatever format the input data might be in or select each column & specify the format in which the data needs to be. In this example, we shall use the former. Click ‘Finish’.
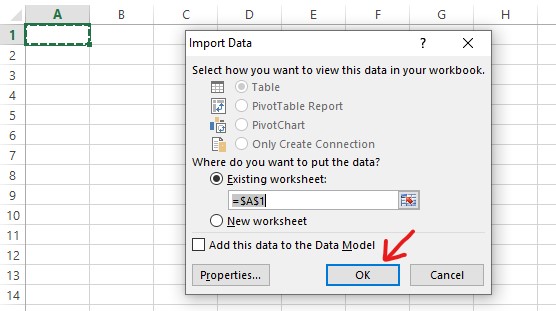
A final pop-up appears prompting the location in which the data is to be imported. Click OK & all the contents from the .txt file shall now appear on the Excel sheet.
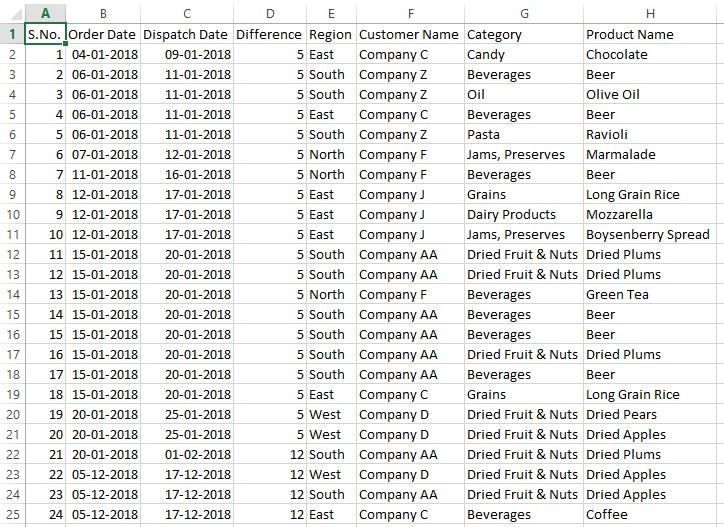
Save this file in the desired location & now we have successfully converted ‘.txt’ into an Excel file.
Summary
Now we have reached the end of this article detailing how to convert a file with ‘.txt’ extension to ‘.xls’ format in MS Excel. Hope it brought to you what you were looking for. But what if you want to know about the conversion of something else, as in the conversion of text to number in MS Excel?
Go on & read this article which elaborates on the necessary details. QuickExcel has numerous other articles too that can come in handy for those who are in a quest to know something more in MS Excel. Ciao!
