Data can be handed over to us from any medium & so it is not necessary that all the entries available in the dataset are necessary for analysis. In some cases, there may be some erroneous entries that have come as a part of the bulk data. What if there are a set of rows without which the data provided is better off for analysing? In this article, we will be tackling one such situation in which we will TERMINATE all those defunct entries out of the spreadsheet.
Following is the sample data which we would be using for this exercise.
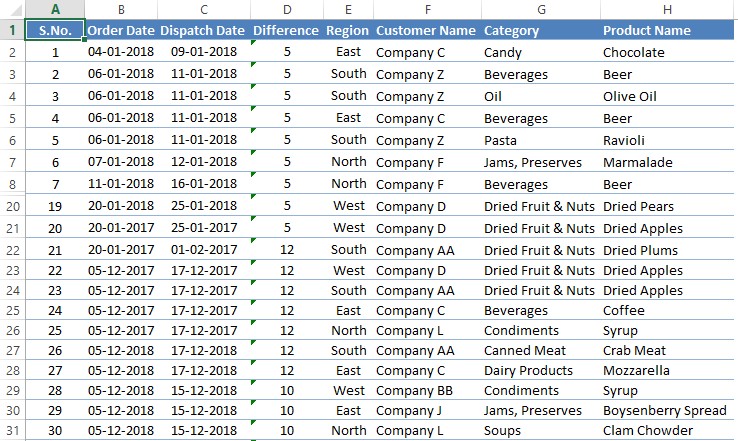
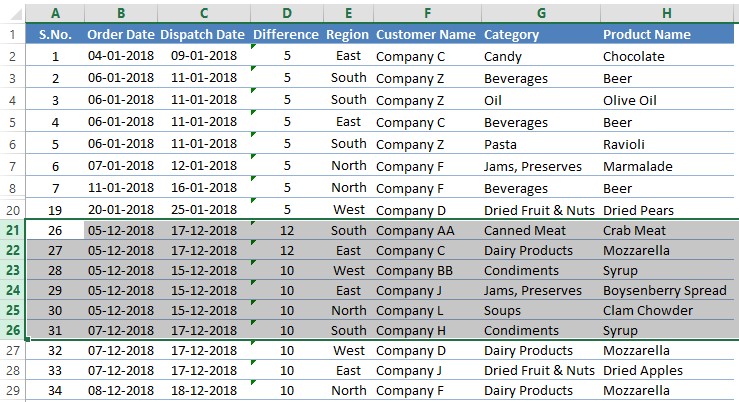
On closely observing the above data, it becomes evident that all the rows contain dates from the year 2018, except for rows 21-26 which fall under 2017!
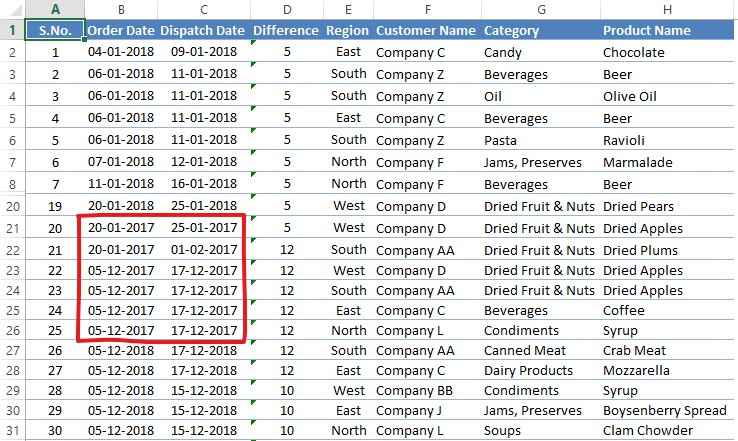
So, the plot has revealed itself & going forward this article would be directed towards deleting these entries using each of the below methods.
- The Conventional Right Click
- The Hotkey Technique
- The Keyboard Shortcut
Method 1 – The Conventional Right Click:
One shall get things started by selecting the rows from 21 to 26 whose purge shall sanitise the data as shown below.
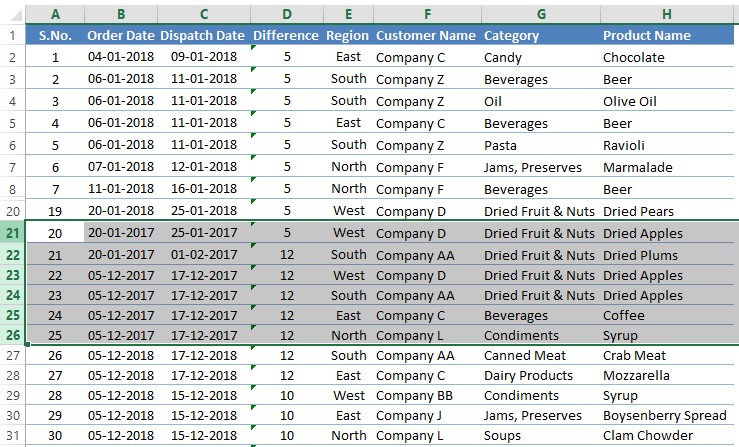
These rows can be selected by left-clicking on row number 21 & dragging the cursor downwards till it reaches row 26. Once done, on any spot between the selected rows 21 -26, ‘right click’ using the mouse & a menu shall appear!
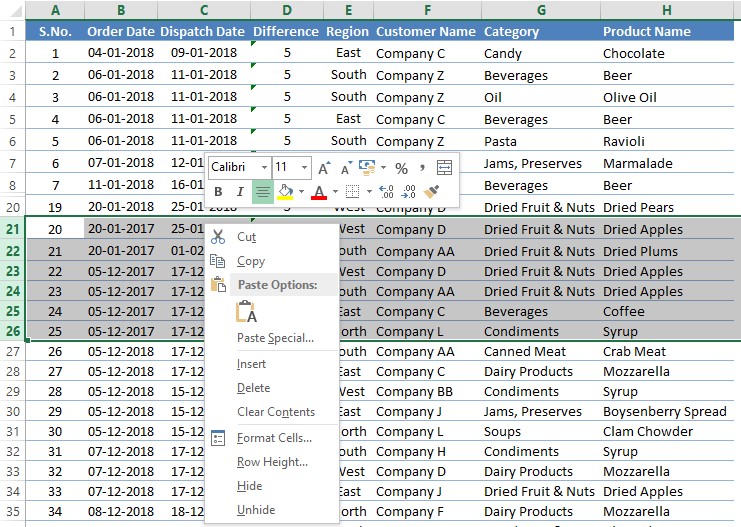
Click on the Delete option in the menu & the selected rows get deleted instantly.
Method 2 – The Hotkey Technique:
The very first step remains the same as that of the previous method in which the rows to be deleted are selected.
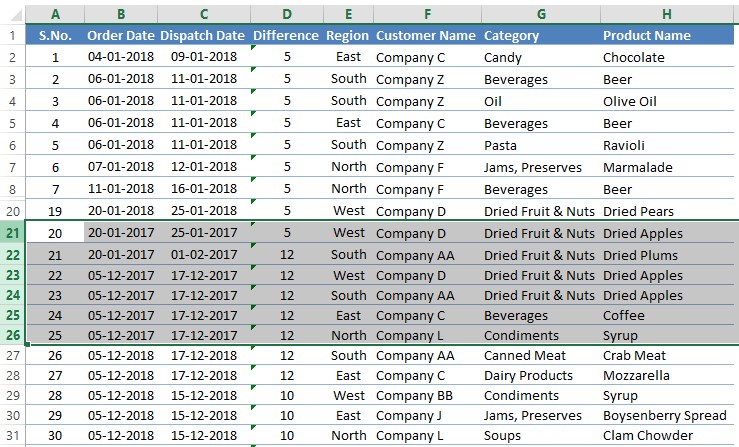
It is from this point, that the sequence of events changes course & now one shall press the ALT key, following which there would be visible changes in the screen where letters appear alongside each tab.
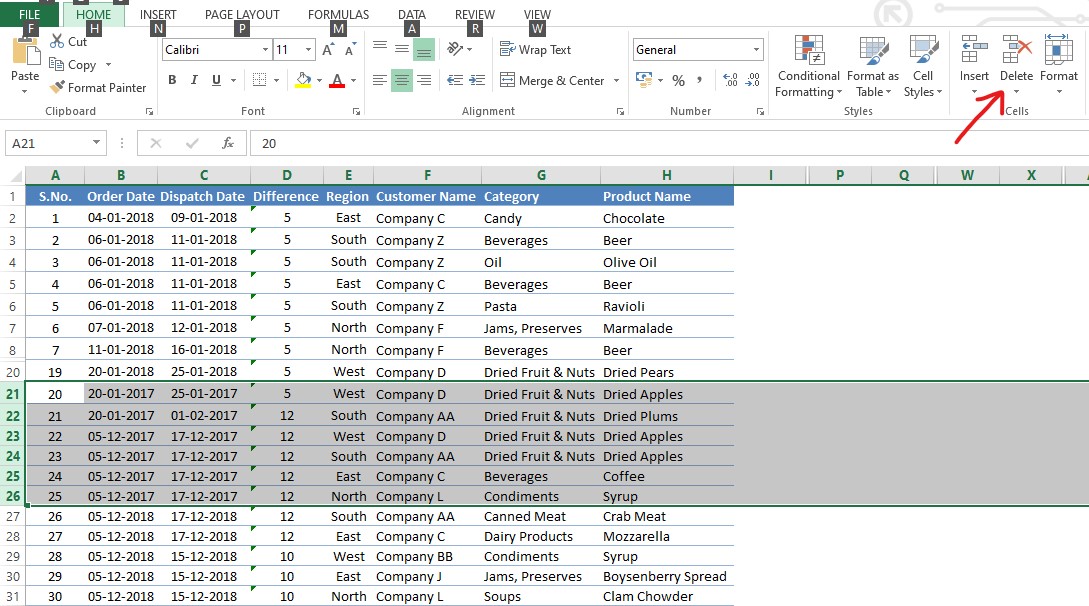
From the above image, it can also be seen that the Delete option is available within the Home tab. So, hit that letter key ‘H’ & the following appears.
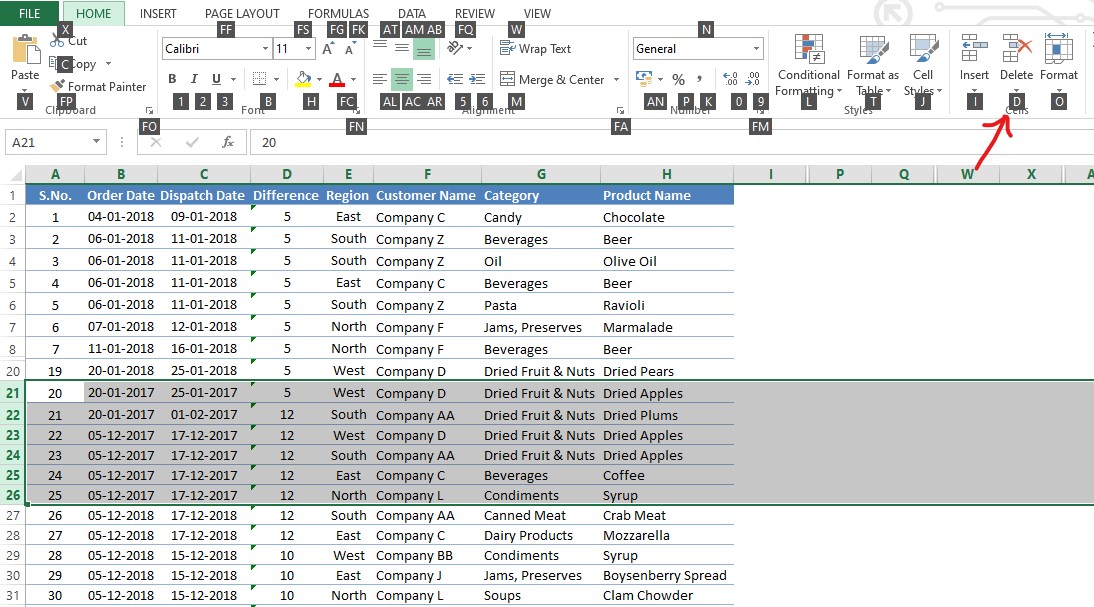
Following the hotkeys, one now needs to press the letter key ‘D’ & then ‘R’.
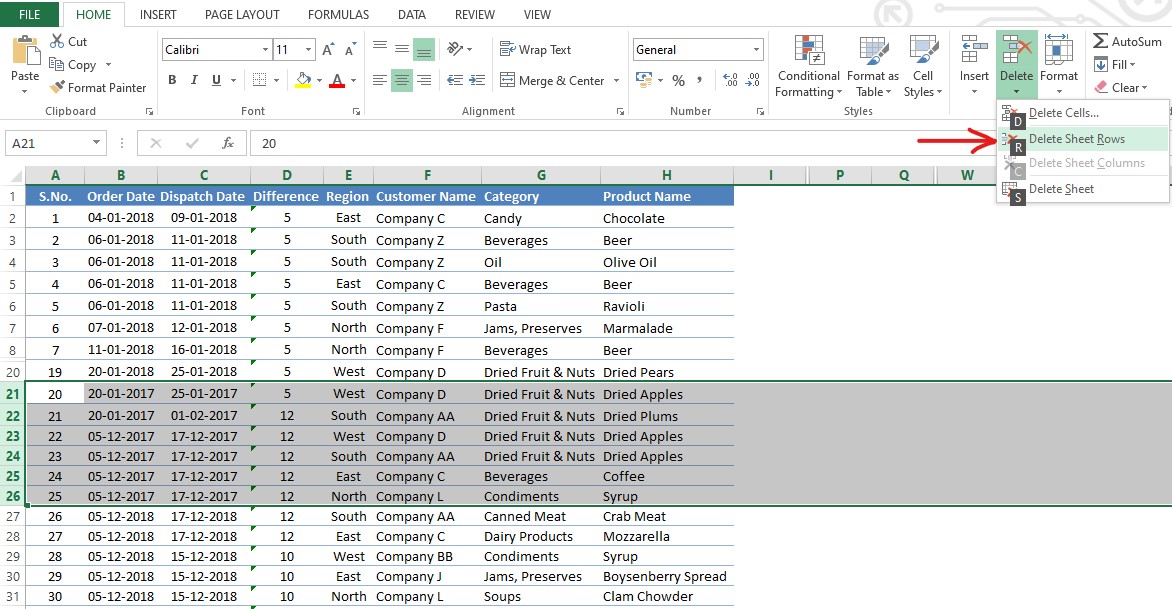
Once done, the selected rows shall be deleted & the successive entries would be replaced in their position as shown below.
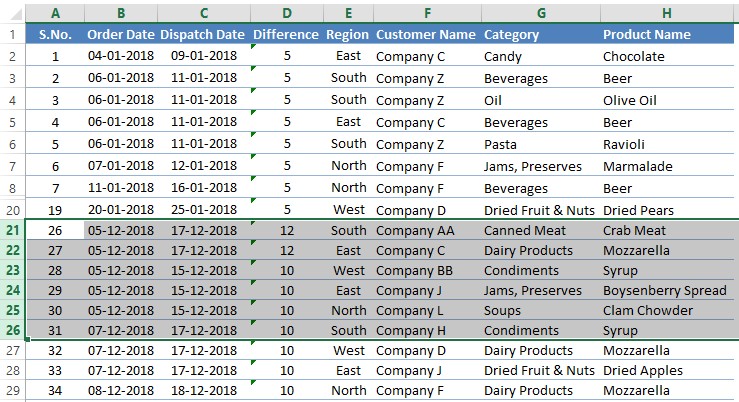
Method 3 – The Keyboard Shortcut:
The first step of selecting the rows to be deleted remains the same here too & after that things work real quick here.
CTRL + ‘-‘ (MINUS SIGN)
The above is the shortcut that is used for deleting cells in MS Excel & the same can also be deployed here for deleting the selected rows. The important thing to note here is that the keys are to be pressed in the same sequence as mentioned above & one after the other.
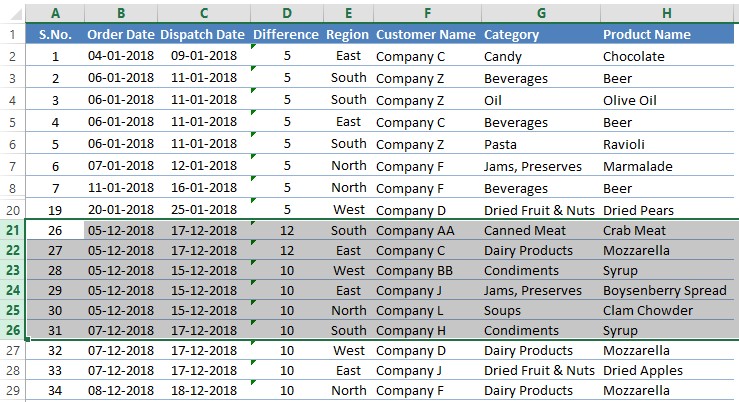
Pressing both keys simultaneously won’t get the job done! The MINUS (-) key is to be pressed only after the CTRL key is long pressed & held that way. The moment one hits the MINUS (-) key, the selected rows shall be deleted & replaced by their succeeding entries.
Summary
Now we have reached the end of this article covering the steps to delete multiple rows in MS Excel. QuickExcel has numerous other articles too that can come in handy for those who are in a quest to do something new with MS Excel. Here’s one which elaborates on how to lock columns in MS Excel. Cheers!
