This tutorial is all about summing data in Excel. Well, it obviously sounds a no-brainer to some of you but, Excel has always got something new to mine out of it.
This article is a detailed guide on summing data in different ways using SUM functions like SUM, SUMIF, SUMIFS, SUMPRODUCT, and AutoSum in order to understand how powerfully we can sum different types and structures of data in Microsoft Excel.
Also read: How to use AutoSum in Excel? [Step-By-Step]
Steps to using the sum functions in Excel
Let’s quickly begin using these powerful functions and learn more about them!
1. Using the SUM function
The SUM function in Excel is simply used to add or sum a series of numbers in a range.
- Type the numbers you want to add in a series of cells.
- Type =SUM( in a blank cell.
- Select this series of numbers and close the brackets.
- Press ENTER to get a sum of the selected numbers.
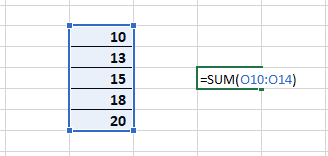
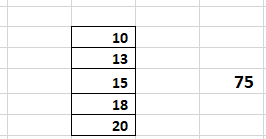
You can see that the SUM function has now added all the selected numbers and provided the sum of those numbers in the formerly blank cell.
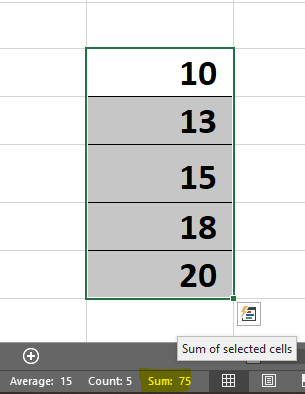
- You can also instantly find out the sum of numbers without using a formula in the status bar below by selecting the numbers.
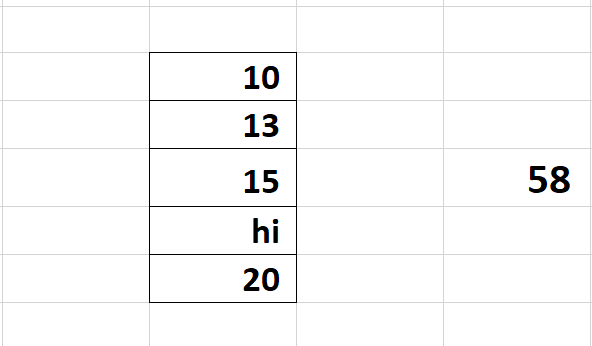
- The SUM function considers all text values as 0.
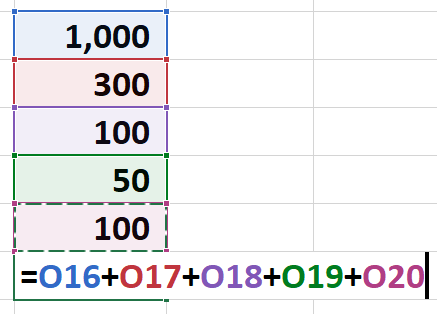
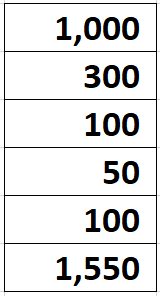
Another way to manually sum numbers in Excel without a formula is as follows.
- Type “=” in a blank cell.
- Select cell with a number you want to add.
- Add a “+” between the numbers to sum them together.
- Press ENTER once you have selected all numbers to sum.
2. Using the AutoSum function
The AutoSum function in Excel is simply used to add or sum a series of numbers at once in a range. You don’t have to manually select the number series; it will do that automatically.
- Type the numbers you want to add in a series of cells.
- Select an immediate adjacent blank cell to the series.
- Press ALT+= to select the range automatically.
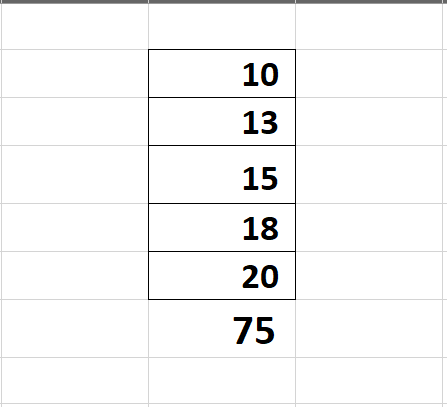
- Press ENTER to get a sum of series.
- You can always manually adjust the selection if it did not select correctly.
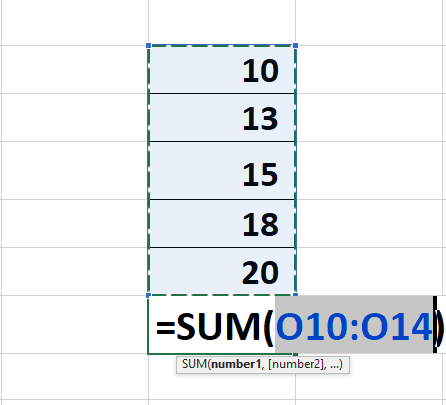
The AutoSum command also uses the SUM function to sum numbers in Excel.
3. Using the SUMPRODUCT function
The SUMPRODUCT function in Excel is used to sum a product of a series of numbers in a range.
- Type a set of numbers in a series of cells.
- Prepare a series of numbers you want to multiply these numbers with.
- Type =SUMPRODUCT( in a blank cell.
- Select the first series of numbers and put a comma.
- Select the second series of numbers and close the brackets.
- Press ENTER to get a sum of the selected ranges of numbers.
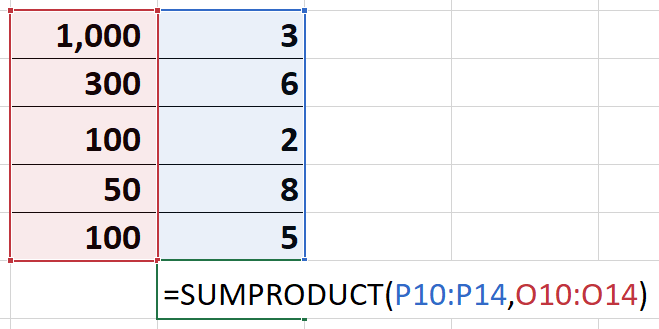
You can see that the SUMPRODUCT function has first multiplied corresponding cells with each other and summed their products.
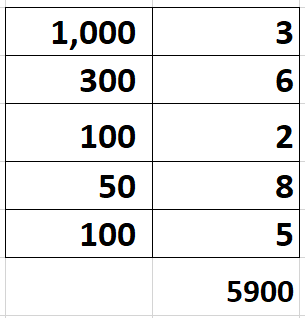
The SUMPRODUCT function works this way- (3*1000) + (6*300) + (2*100) + (8*50) + (5*100) = 5900.
- Make sure to select the equal dimension of series for the function or you may see a VALUE error.
- If only one range of cells is selected the SUMPRODUCT functions as the SUM function.
4. Using the SUMIF function
The SUMIF function in Excel is used to sum a series of numbers in a range when it meets a criterion that you have provided.
- Type the numbers you want to add in a series of cells.
- Type =SUMIF( in a blank cell.
- Select the series of numbers.
- Put a comma and specify a criterion.
- The SUMIF function allows logical operators like >, <, =, <> and wild cards like ? and *.
- You can provide a criterion like this- “>100”, “<50” etc. in the SUMIF function. This will tell the function that it has to sum only those numbers that are greater, lesser, not equal to, or equal to a specified number from the range.
- Close brackets and press ENTER to get a sum of the selected numbers with a specified criterion.
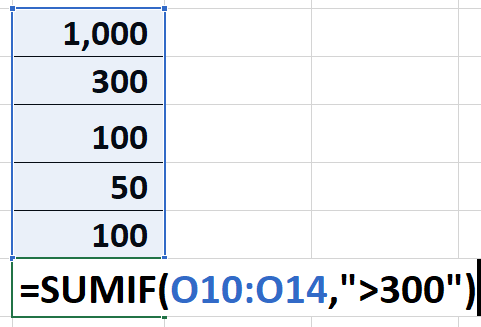
You can see that the SUMIF function has summed a number greater than 300 in the range. There is only one number greater than 300 i.e. 1000, so the result is 1000. But if there were 2 numbers, say 200 and 1000, the result would be 1200.
5. Using the SUMIFS function
The SUMIFS function in Excel is used to sum a series of numbers in a range when it meets one or multiple criteria that you have provided.
- Type the numbers you want to add in a series of cells.
- Type =SUMIFS( in a blank cell.
- Select the series of numbers.
- Put a comma and specify one or more criteria.
- The SUMIFS function also allows logical operators like >, <, =, <> and wild cards like ? and *.
- You can provide criteria like this- “>100”, “<50” etc. in the SUMIFS function. This will tell the function that it has to sum only those numbers that are greater, lesser, not equal to, or equal to a specified number from the range.
- Close brackets and press ENTER to get a sum of the selected numbers with a specified criterion.


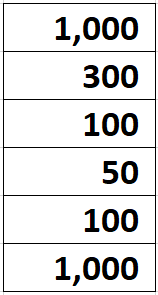
You can see that the SUMIFS function has summed all prices with “Red” color and those that are above 300 quantities. The sum of prices that meet both these criteria is $20 because there is only such cell that meets both criteria together.
6. Sum up time values in Excel
To add or sum time in Excel, follow these steps.
- Type time values in independent cells.
- Use the SUM function to sum time.
- Or manually sum each time value by adding a plus sign between the two.
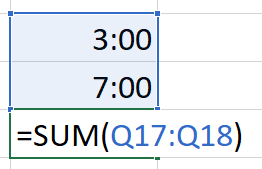
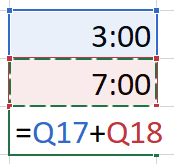
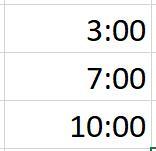
You can see that the 2 time values have been summed together.
Conclusion
This article was all about the important SUM functions that are useful in data handling in Excel. Learn these formulas and master the art of summing like a pro in Excel via this tutorial. Stay tuned for more informative articles like this!
References: Microsoft
