The data which we get won’t always be in the way we desire them to be. At times, we would be needed to extract the wheat from the chaff. While separating the wheat from the chaff can be done using a colander, what shall be used to extract the desired data within a cell? Also, we might face a similar situation not only with numbers but also with text. But the almighty Excel has got us covered on this by providing a list of options to sieve through the contents of a cell.
In this article, we would be demonstrating the extraction of the first names from a list of clients given in the following dataset. The Text to Columns method would be used for this purpose.

Text to Columns Method:
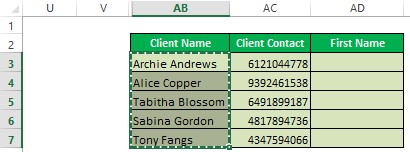
Select all the names in the column AB to get things started.
Paste them in column AD under the title First Name as shown below.
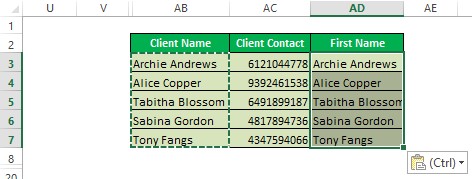
Alright, I get it! This might not be what was expected when you were thinking to extract only the first names of these clients, but trust me on this – it works every time!
Selecting all the names which have been pasted under the title First Name, now we shall navigate to the Data Tab & look for the Text to Columns option as identified in the below image.
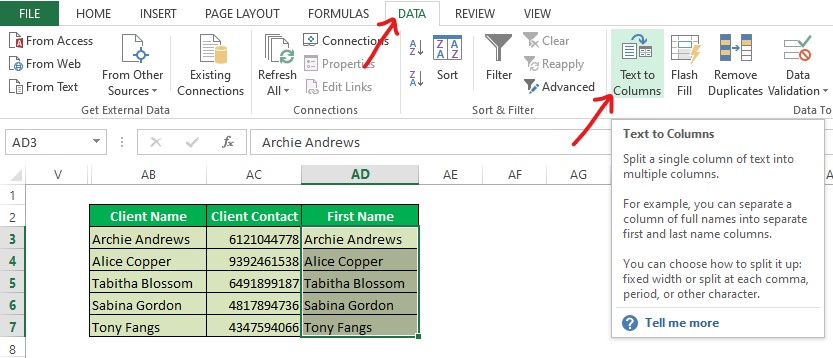
Click on the option as identified in the above image & there shall appear a Wizard. ‘Ten points for Gryffindor!’ – Not that wizard, but it is the Text to Columns Wizard!
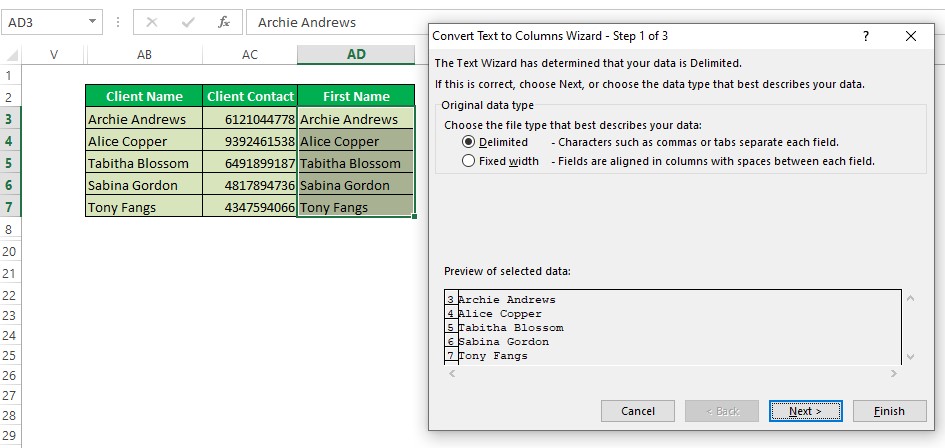
The Delimited option would be chosen by default. If not, please choose it as the desired option & click Next as indicated below.
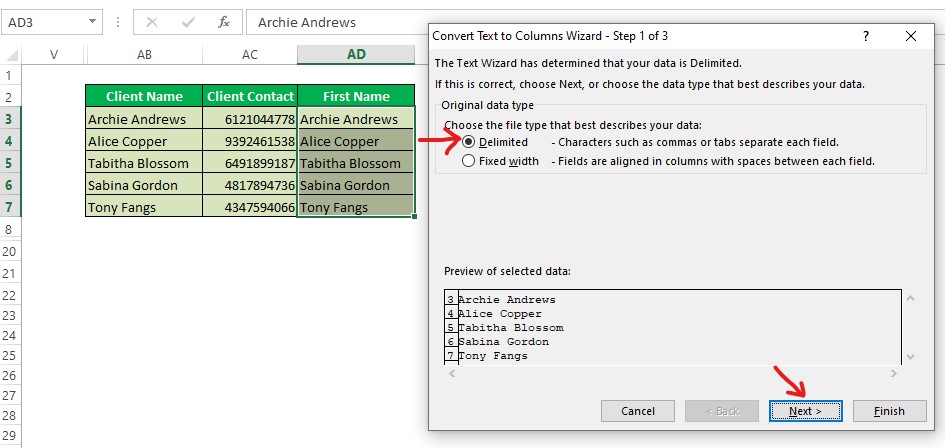
We are now done with the first step & the Wizard shall take us to the next step. Here we would be needed to tick the Space checkbox. The moment the tick is recorded, a line shall appear in the middle, between the two names, separating one from the other in the Preview box. Yeah, it is the exact location where MS Excel draws ‘THE LINE’ as indicated in the image below.
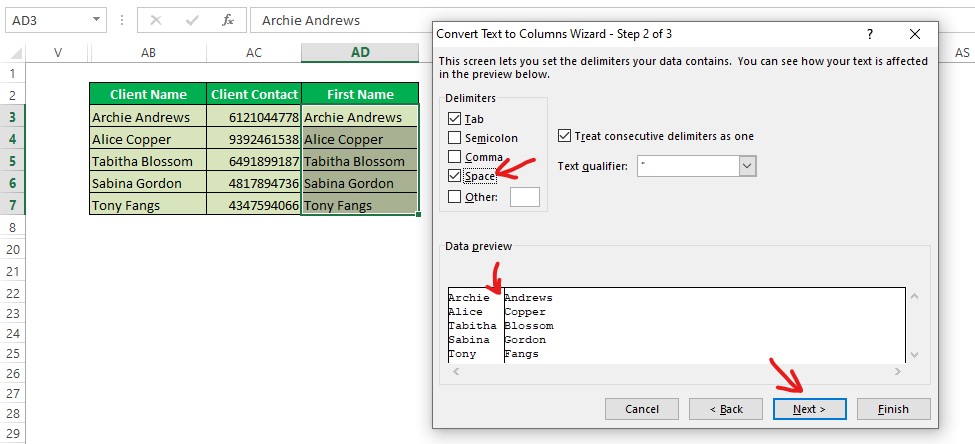
After clicking next again, the Wizard shall now take us to the final step of the text extraction. Here one shall choose the format in which the extracted data should appear. Since we are dealing with names here, we might as well leave it as General which is the option selected by default.
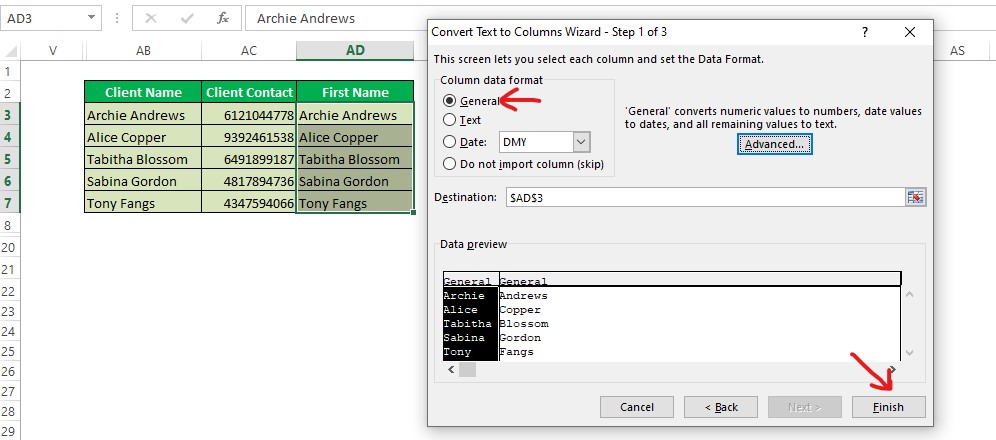
But for cases where dates or numbers are involved, one can very well choose the corresponding options by ticking the respective checkboxes in the final step of this Wizard. Hit Finish & here you go!
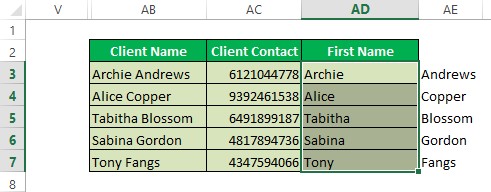
Voila! All the selected client names are now separated & the first names of each client alone remain in column AD titled First Name, whilst the others have been shifted onto column AE. Now, the contents of column AE can be selected as shown below.
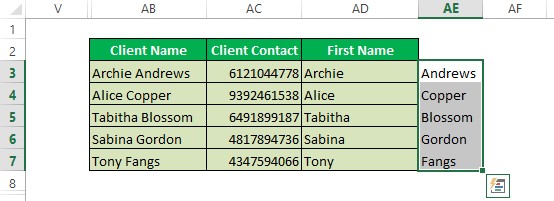
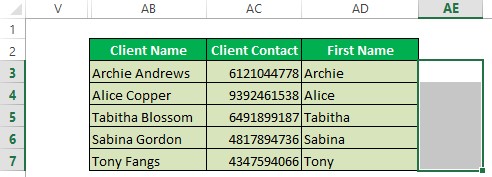
Hit the delete key on the keyboard & all these would be gone in a second.
Conclusion:
Now that we have reached the end of this article, hope it was informative and you have got what you were looking for! Here’s something which elaborates on How to Copy a Formula in MS Excel? There are also numerous other articles in QuickExcel that might come in handy for those who are in a quest to know something more in MS Excel. Adios!
