It may be necessary to print an excel spreadsheet from time to time. Printing can be done in a few steps just by keeping some basic steps in mind and executing them.
Also read: Using Headers and Footers in Excel
Steps to Print an Excel Spreadsheet
Let’s look at the steps to print an excel file. I’ll display multiple methods of printing an Excel spreadsheet today. Feel free to use the one that works best for you.
1. Where is the print preview in Excel? (Print Preview)
Keyboard shortcut to open the print menu in Excel: Press (Control) Ctrl + F2
Another way to open the Print window, where you can preview and print your spreadsheet/workbook is by going to ‘File‘ and then ‘Print‘ in your Excel workbook.
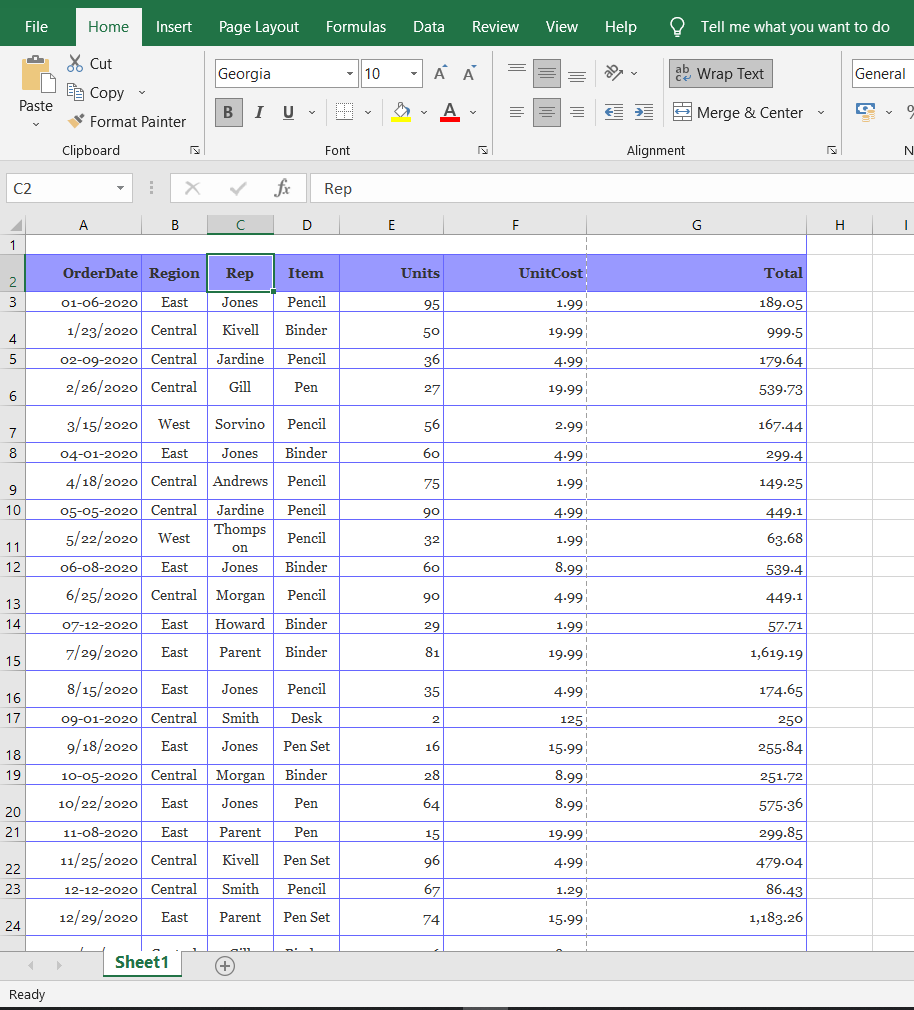
For Example: Let’s take some sets of data on a spreadsheet and then press Ctrl+F2
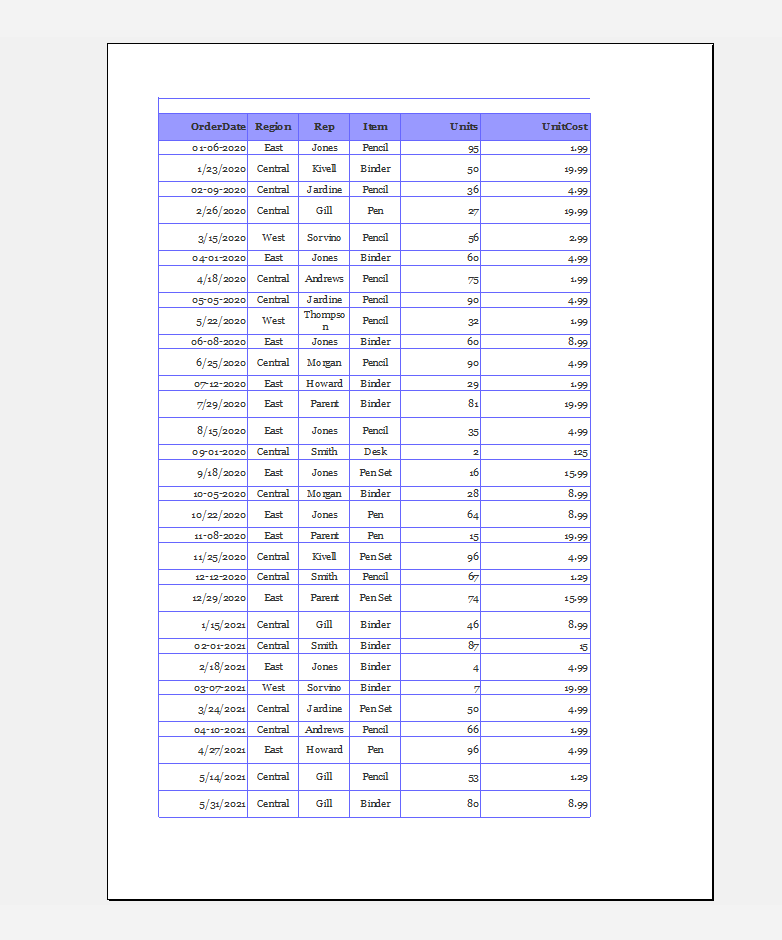
On using the keyboard shortcut, the print preview will display page-break, part of the spreadsheet getting excluded, and how much section is being cut in one page all the preview and adjustment can be done accordingly as per the preview.
The user also gets control over page orientation, size, alignment along with other handy operations. The Final print preview appears as shown below image:
2. Page Setup to Print an Excel Spreadsheet (Understanding the Options)
Having large-scale data in excel can make some problems at the time of printing. But setting the right options can help you get all the data printed without worrying about anything going amiss. Under the Print options, configure the print properties.
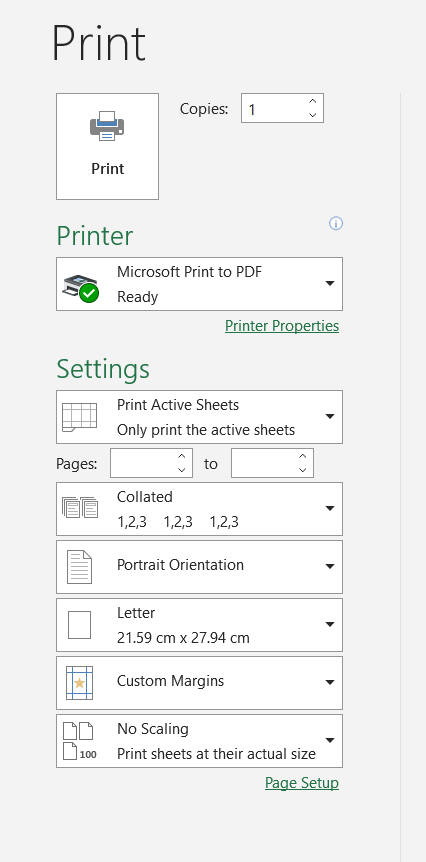
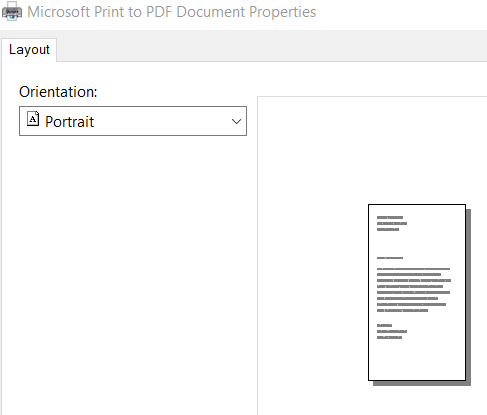
Change your orientation accordingly, As portrait mode or landscape mode as needed for printing or as per the direction of text in the document.
Now understanding the basics of page setup. The 4 most important settings to sort your data are
- Page
- Margins
- Header/Folder
- Sheet
Problems faced when you Print an Excel Spreadsheet (with Solutions)
- Data is unable to fit in the print view or Data overflow.
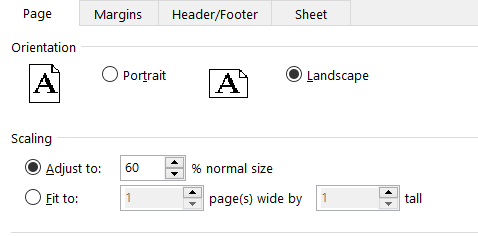
Solution: Go to page setup under orientation change it to landscape mode. - Again, Some data can’t be covered in landscape mode.
Solution: Besides making the column small, try to do scaling under page(in page setup), use adjust tool it will help you in resizing your data. - If you are using small data and some lines are moving out of the page.
Solution: Simply, use the (fit to) tool and it will fit your data according to your input if you set it as 1 then it will fit the data in 1 page, but if you are working on large scale data go through (adjust to) tool.
- Printing large data on 2 different sheets and you would like to have your header the same for both sheets come to page setup select the two rows that lie under the header and copy their address.
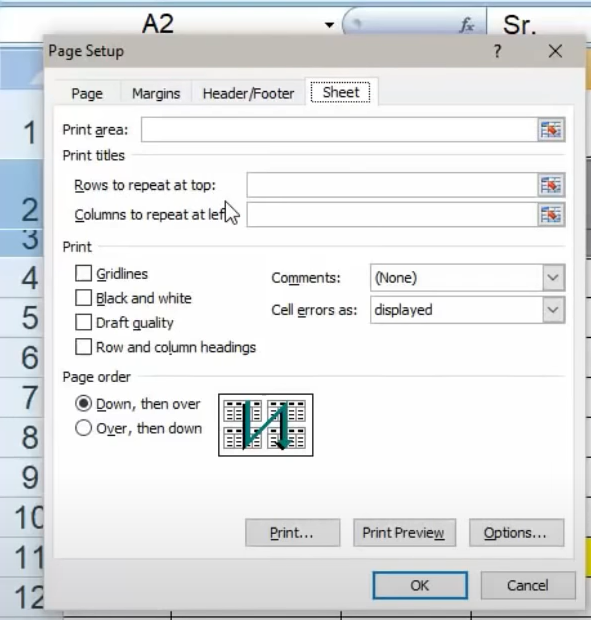
- Paste it in Rows to repeat the section and from there u can easily make rows and column headings common for all pages at printing time.
- Margin, it is basically the shifting and adjustments that can be done in your print part.
Solution: if you wish to print your data from the corner, you have to scale the margins and set the length or otherwise enable the option of show margins. - The last step understanding the header/Footer:

- Under Header, if you select page 1 and change it or give it a name or a heading or subtitle which you would like to show every page as the same top.
- In Footer, you can show the current page or details, addresses or etc.
