One can’t be at truce by knowing only the tricks that are needed to find one’s way around within MS Excel alone. Being the go-to spreadsheet of the era, at times, MS Excel would be needing to heed the requests of its fellow officemates (pun intended!).
One such request shall arise from the requirement to attach MS Excel to an MS Word document. As strange as it seems, this is not a remote possibility & is very common in the corporate world. This article details the sequence of steps involved in inserting an MS Excel file within an MS Word document.
There might be a couple of ways to do that,
- Through the Insert Tab
- The Hotkey Approach
Method 1 – Through the Insert Tab
In this method, the word document within which the excel file needs to be inserted is opened. Now the user has got to navigate all the way to the Insert tab whose position is indicated below.
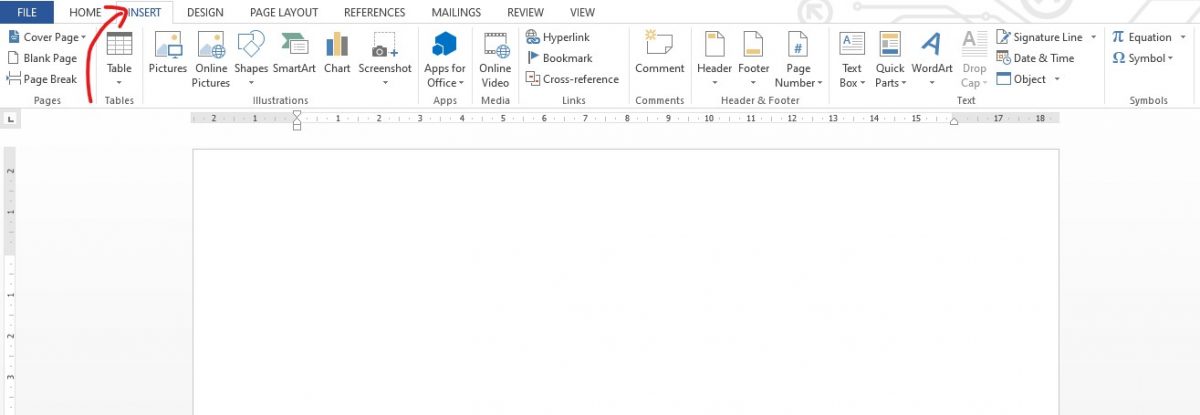
Once done, the next step is to find the Object option available within that tab as shown in the below image.

Click on the Object as shown in the above image and the following dialog box appears.
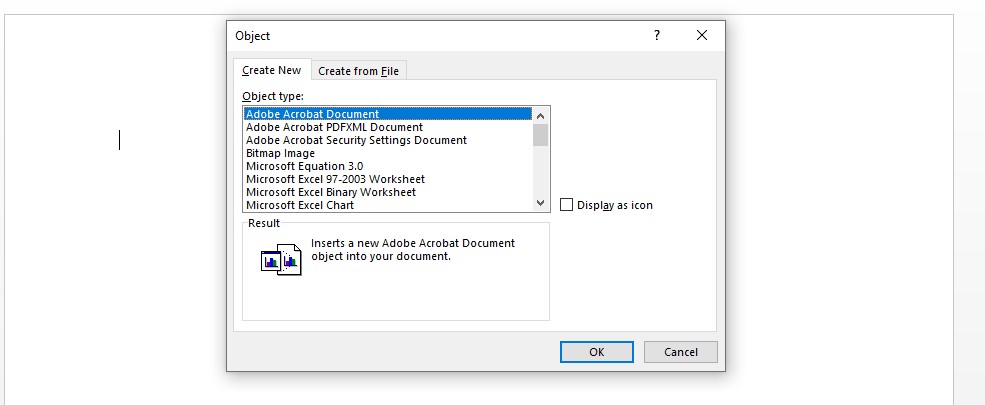
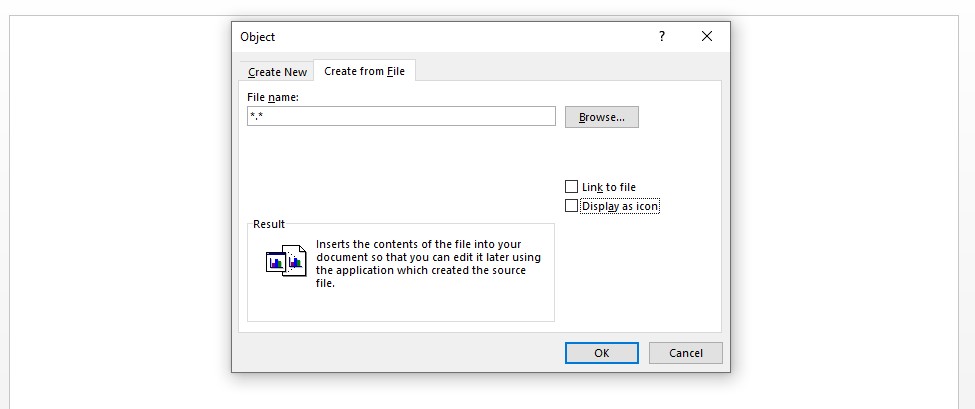
The choice is ours now! Whether we are going to insert a brand new file or pull one from the repository is up to us now. But it is always wise to create a file, store it in a repository & embed it. So, in this example, we are going to do just that.
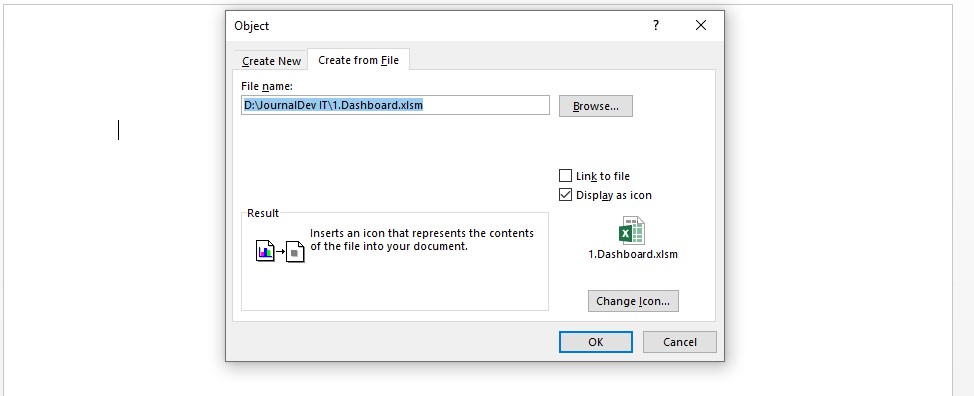
Upon choosing the Create from File tab, the following pop-up appears.
Leave a checkmark over the Display as icon option & an icon would appear just below.
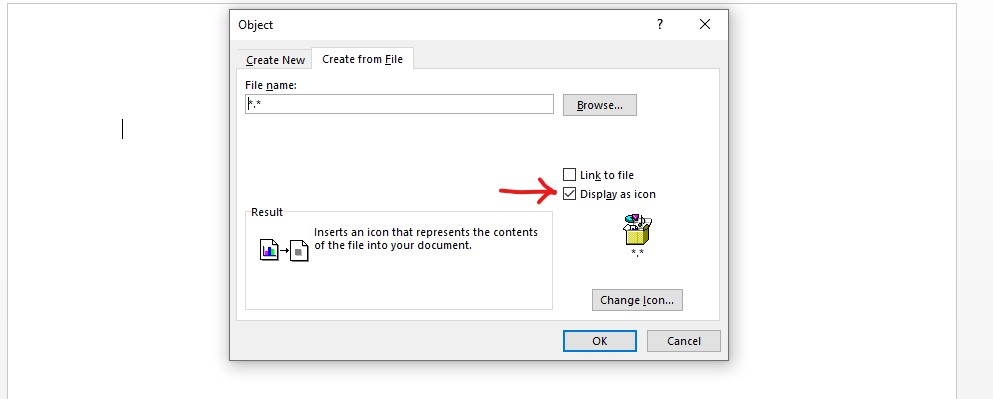
Now click on the Browse button to select the MS Excel file that needs to be attached. A file explorer to select the desired file would pop up.
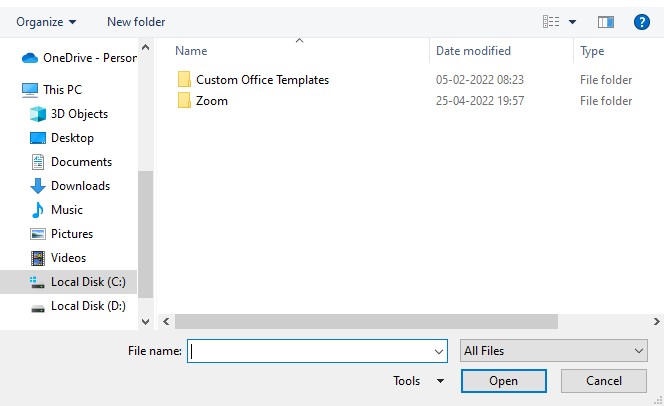
Navigate to the location where the file is located & click open. Following this, click on the OK button as shown in the below image.
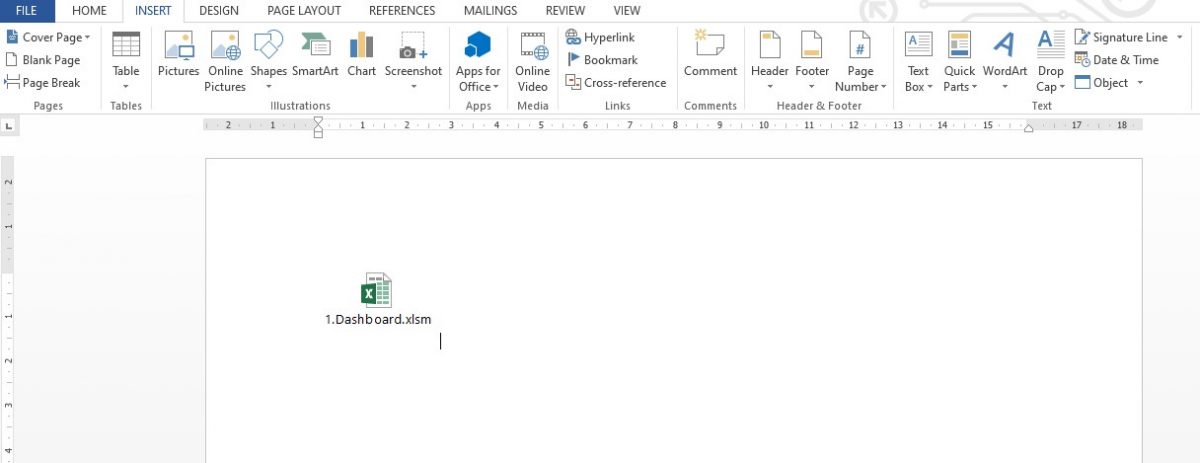
The selected file would be inserted within the MS Word document as shown below.
The same approach can also be used to insert not only MS Excel but other file formats as well as long as they are available in the supported files list of MS Word.
Method 2 – The Hotkey Approach
In this method, the part where we initially search & select the Object option would only vary while all the other steps starting with the pop-up’s involvement would be similar to that of the previous method.
Those who are fond of using the hotkeys in MS Excel can make use of them in MS Word too. Hit the ALT key & see the magic unfold!
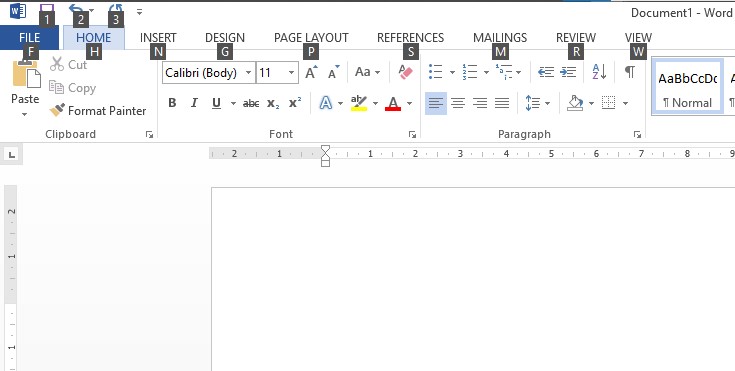
The letters which appear alongside each tab tell us to press a particular letter key to get into a particular tab. In this case, we are looking for inserting an MS Excel file, so we would be needing to go to the Insert tab. So, we hit the letter key ‘N’ & the following appears.

Hit the letter key ‘J’ for the Object option & the pop-up would appear. Follow the same steps as in the previous method from hereon to get the file inserted.
Conclusion
Hope this article was informative. Do have a look at this article, to know how to insert multiple rows in MS Excel. Nevertheless, QuickExcel has numerous other articles, which would be of great help to you when it comes to understanding the nuances of working with MS Excel. Cheers!
