Inserting a column in Excel is a very simple task. Let us see how we can insert a column in Excel in two ways.
Also read: How to unhide and hide columns in Excel?
Steps to insert a column in Excel
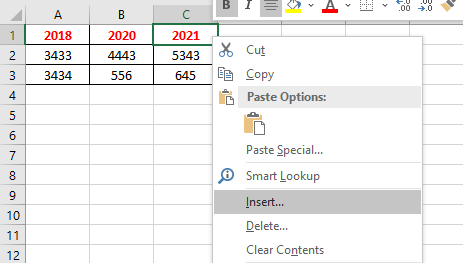
First, let us take an example of a table with 3 columns and then add an extra column anywhere in the middle of the existing columns.

To insert a column in Excel-

- Click on a cell of the column before which you want to insert a column.
- Right-click on the cell.
- Click Insert.
- A new window opens named Insert.
- Select Entire Column.
- Hit OK to insert a column.

You can see that a new column has been added before the column you selected to insert a new column in the database.
Another way you can insert a column in Excel can be as follows-

- Click on a cell of the column before which you want to insert a column.
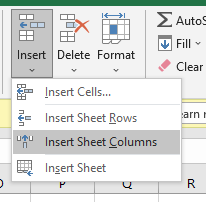
- Go to the Home tab.
- Under Cells group, pull down on Insert.
- Select Insert Sheet Columns.

You can see that a new column has been added to the database.
Steps to delete a column in Excel
To delete a column in Excel, follow these steps.

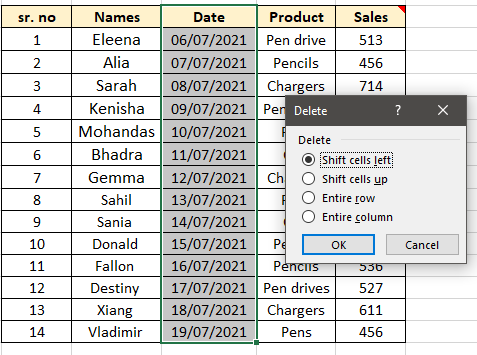
- Right-click the column you want to delete.
- Press Delete.
- The Delete options open up.
- Choose Shift Cells to left to delete the selected columns of the table only.
- Choose Entire Column to delete the column of the entire sheet.
Another way you can delete a column in Excel is as follows.

- Select the column you want to delete.
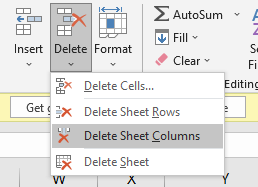
- Go to the Home tab.
- Under the Cells group, pull down on Delete.
- Press Delete Sheet Column.
You can find that the selected columns have been deleted permanently. But, you can always press CTRL+Z on your keyboard to recover all deleted columns.
Conclusion
This was all about inserting a column in Excel in two ways. Feel free to drop a comment if you have any doubts regarding inserting columns in Excel!
