Machines & humans have gotten along with each other over time. But here’s the catch! Humans don’t do well when it comes to recording data & machines don’t do well in taking decisions based on the inferences from recorded data (How comfy would you be when travelling in a self-driving car with no control over your journey?)
Also read: How to Import Data from MS Access into MS Excel?
The data recorded in machines don’t fancy software such as MS Excel, but in its place would be a simple TEXT file! Yeah, you’ve heard that right, all the data would be recorded devoid of all the formatting gimmicks in a file with the ‘.txt’ extension in a machine.
The rows & columns tradition of recording data would be followed by the machines too but tweaked a little bit in which each line of data would correspond to a row & each space between the items in a line correspond to a column.
Let us get on with exploring in detail how to import data from a Text file into an MS Excel spreadsheet. In this article, we shall be demonstrating the extraction of data from the below ‘.txt’ file.
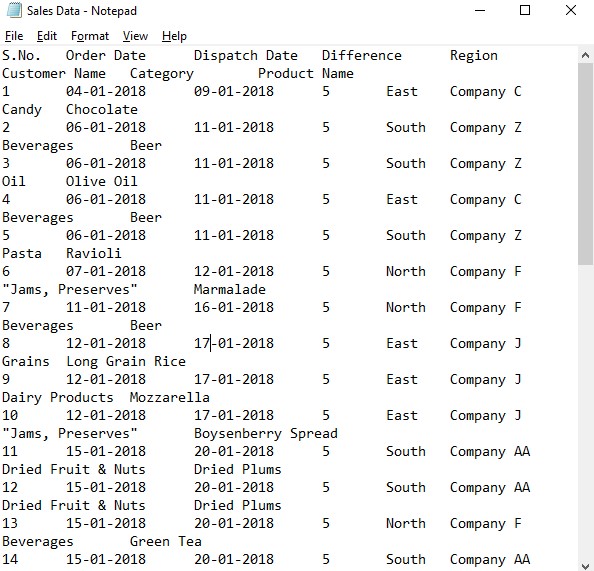
Importing Data from a Text file:
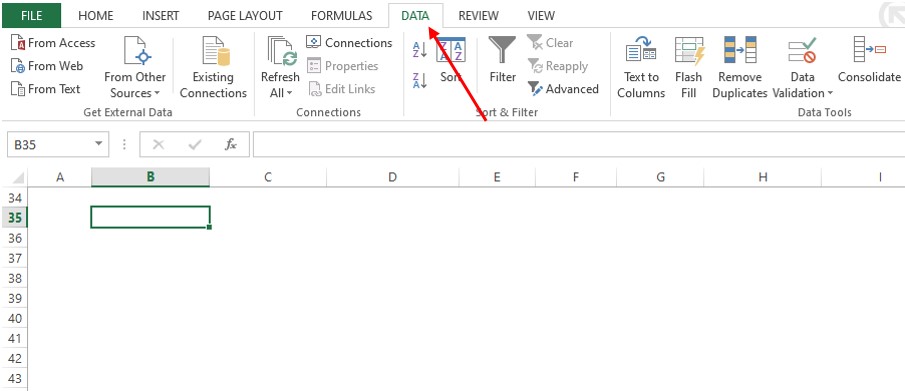
The spreadsheet into which the above data is to be imported is opened & one shall navigate to the Data tab within that sheet as indicated in the image below.
Once within the Data tab, move towards the extreme left where the From Text option could be spotted as shown below.
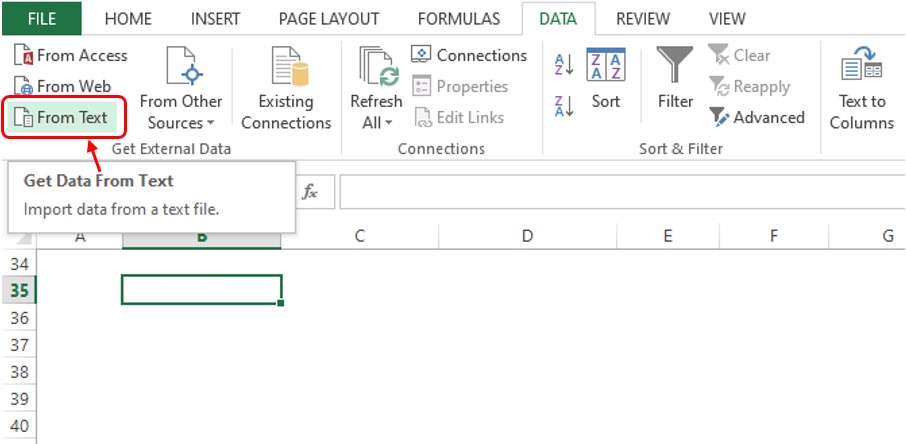
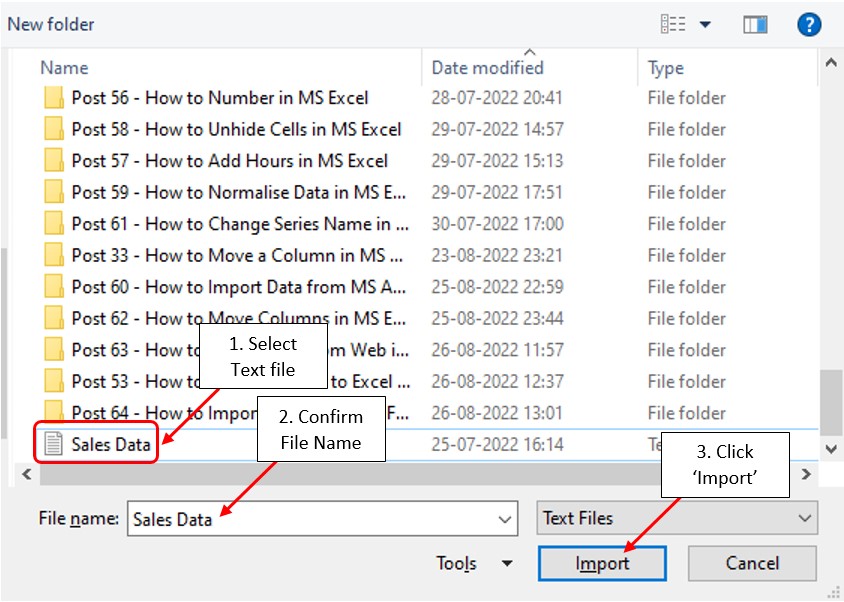
Click on the From Text option & a pop-up prompting to choose the text file within your PC shall appear. Select the ‘.txt’ file from which the data needs to be imported into the spreadsheet & click on the ‘Import’ button in the same sequence as given below.
Clicking ‘Import’ leads you to the Text Import Wizard which has a 3-step sequence for getting the job done and step 1 shall first make its appearance for us to act upon.
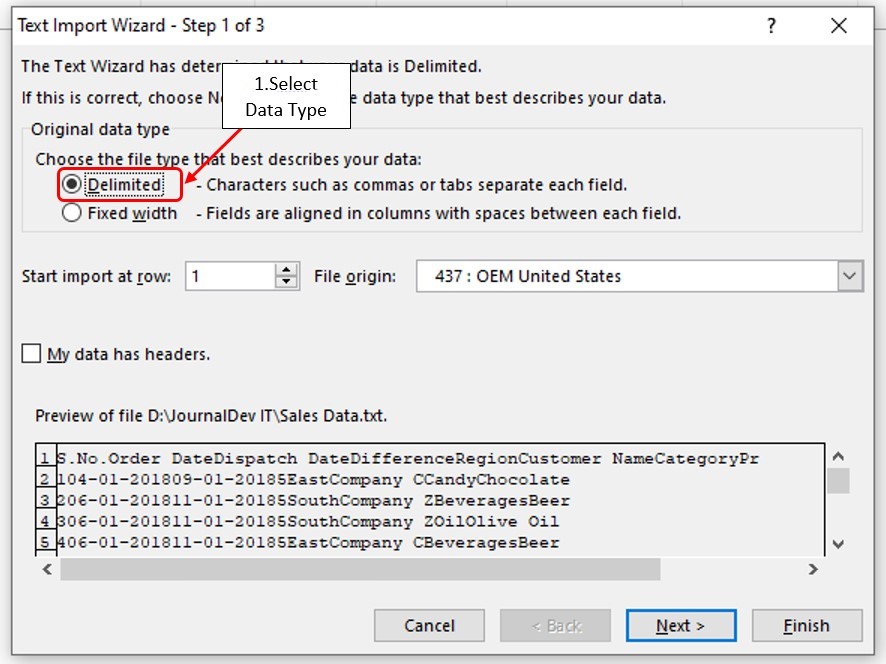
The text file which we have chosen has the data separated by spaces, so the option of ‘Delimited’ shall be chosen under the ‘Data Type’ section. Once done, move a bit down & one shall find a checkbox asking whether the data has headers. The file which we have selected sure has the headers & so, this checkbox needs to be ticked.
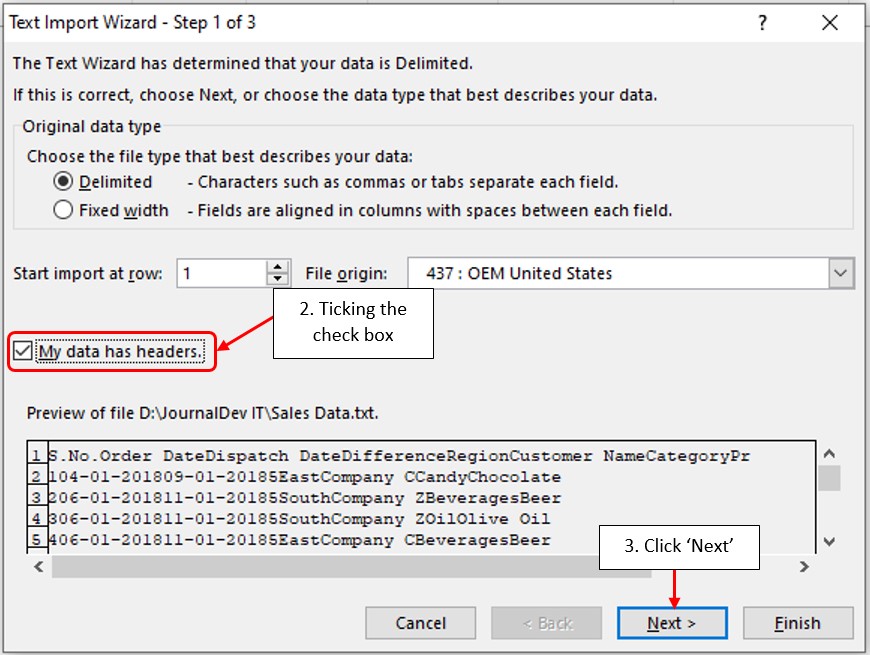
After ticking the checkbox, click the ‘Next’ option seen at the bottom of the Wizard & one shall now venture into Step 2!
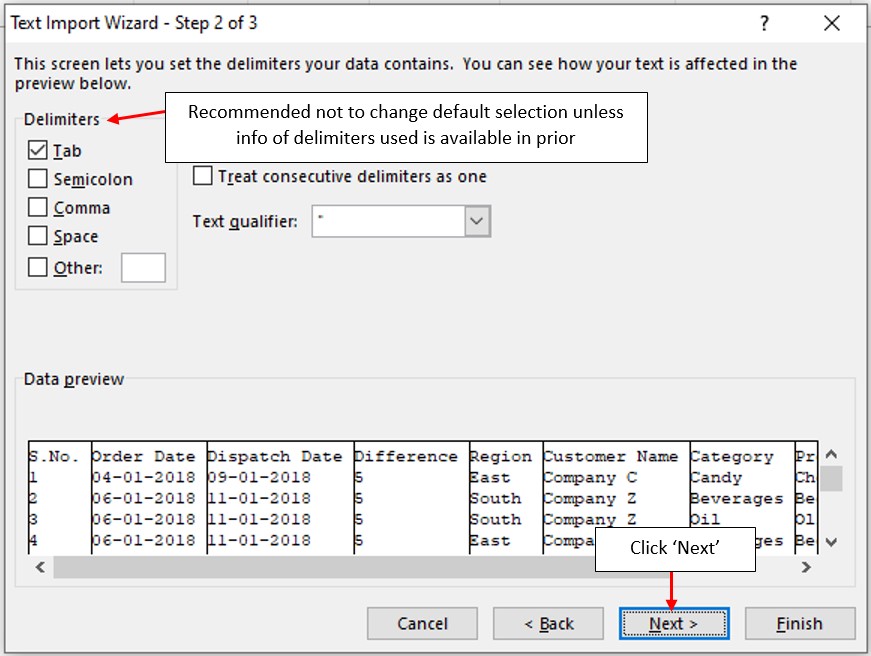
The data separated into a tabulation can be previewed at the bottom of the wizard in this step. Leave the default selection in the ‘Delimiters’ section unless one is sure of the type of delimiters that have been used in the ‘.txt’ file. Click ‘Next’ & the Text Import Wizard shall step into the final stage of this process.
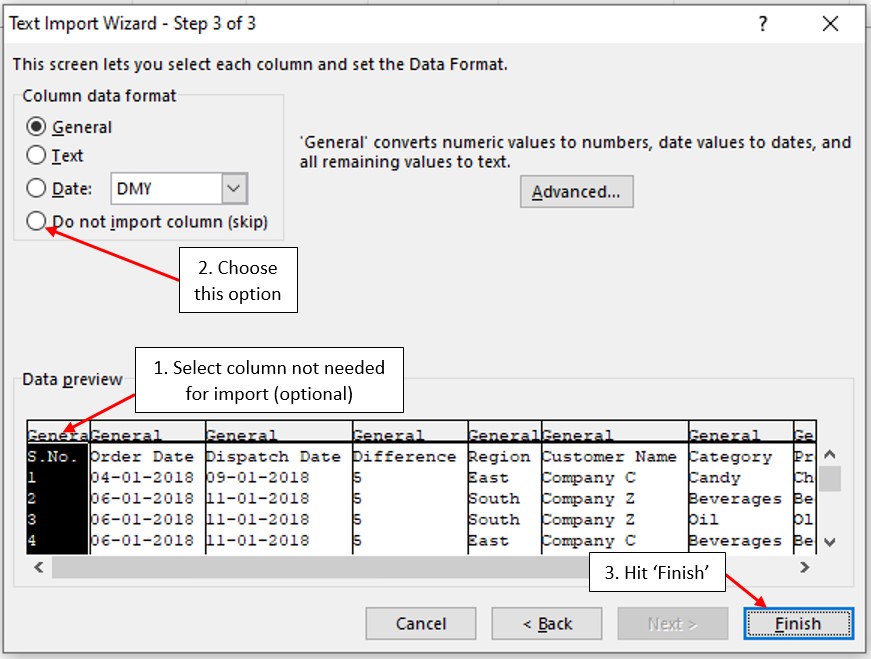
It is advisable to leave the ‘Column Data Format’ selection as ‘General’ since it provides the flexibility to detect the data type, whatsoever there is and accommodate it with the same data type when imported into the MS Excel spreadsheet.
What this means is that the entries in the Date format would be imported following the same Date format into the MS Excel Spreadsheet when ‘General’ is chosen. But in the case of ‘Text’ or ‘Date’ is chosen whatever format the data might be in the same shall be imported as ‘Text’ or ‘Date’ format respectively.
Finally after having decided on the format, hit the ‘Finish’ button.
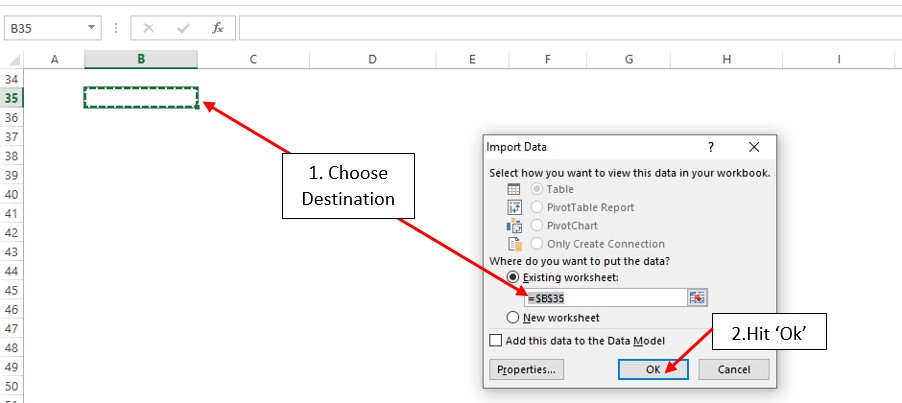
Now the Import Data prompt shall appear seeking the location & the worksheet into which the data is to be imported. It can be observed from the above image that the active cell in the active worksheet would be taken as a default location for importing the data.
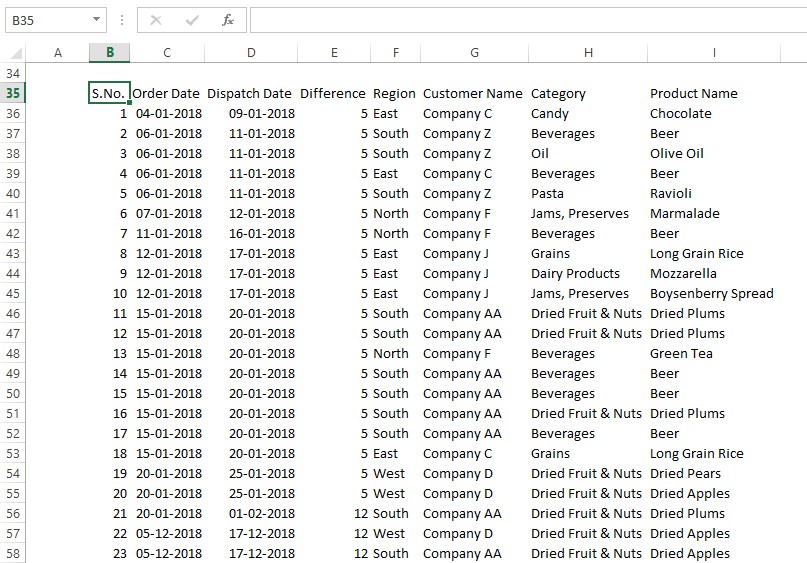
But should it not be the place of import one feels, then MS Excel is all in for flexibility & one can choose any desired location. Hit OK & the data shall be visible right in front of your eyes!
Conclusion:
That brings us to the end of this article & here’s one which details importing data from the internet into MS Excel. There are numerous other articles too in QuickExcel that can come in handy for those who are in looking to level up their skills in MS Excel. Ciao!
