Ever witnessed a row that seems to be in the middle of a tabulation, but in no way serves any purpose being there? Yep, you’ve guessed it right – it’s time that we delete that aberration out of our Excel sheet and we shall explore just that, in this article.
There are a number of ways to delete a row in MS Excel. We would be covering four different methods of carrying it out in this article.
- The Keyboard Shortcut way
- The Hotkey way
- The Accelerator way
- The Old School Right Click
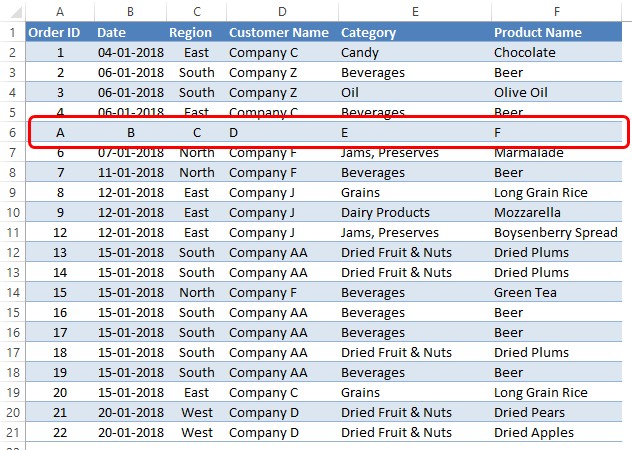
Finding something weird in the below image?

Yeah, you’ve got it right. Row 6 has got out of the box entries in the tabulation (pun intended).
So, let’s get to it & delete this row out!
Method I – The Keyboard Shortcut Way
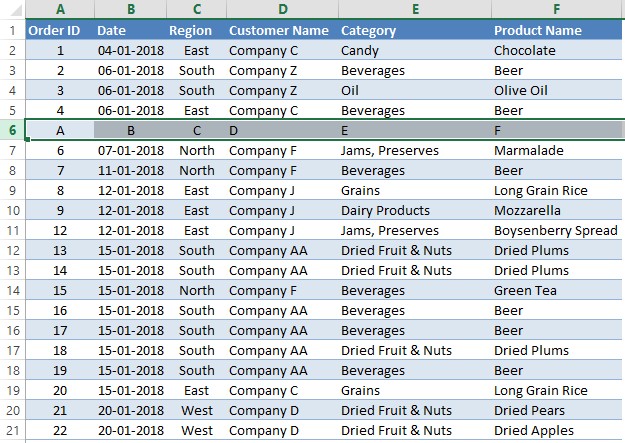
Select the row which you want to remove as shown below.
Press the following keyboard keys one after the other,
CTRL, – (MINUS)
The focus here is on pressing the keys one after the other and NOT SIMULTANEOUSLY. You really don’t want to do it the other way around and trust me on this – It doesn’t work!
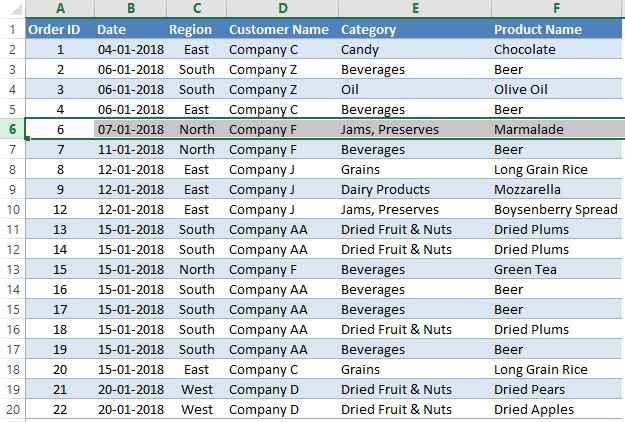
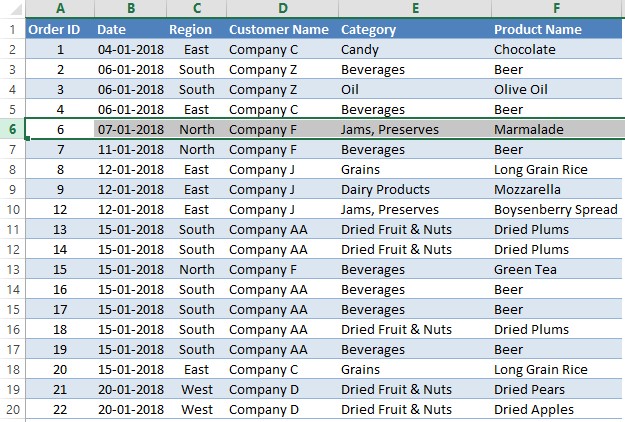
Once done, pop goes the weasel! The entire row gets deleted.
Method II – The Hotkey Way
Now, this is another way to delete that abnormal row from the tabulation. Just like we hop on from one step to the other, we can adopt the same feat here in MS Excel by using the hotkeys.
Let’s see how!
Select the row which needs to be deleted and hit the ALT key on your keyboard. There would be some letters popping up around the tabs in your Excel worksheet as shown below.
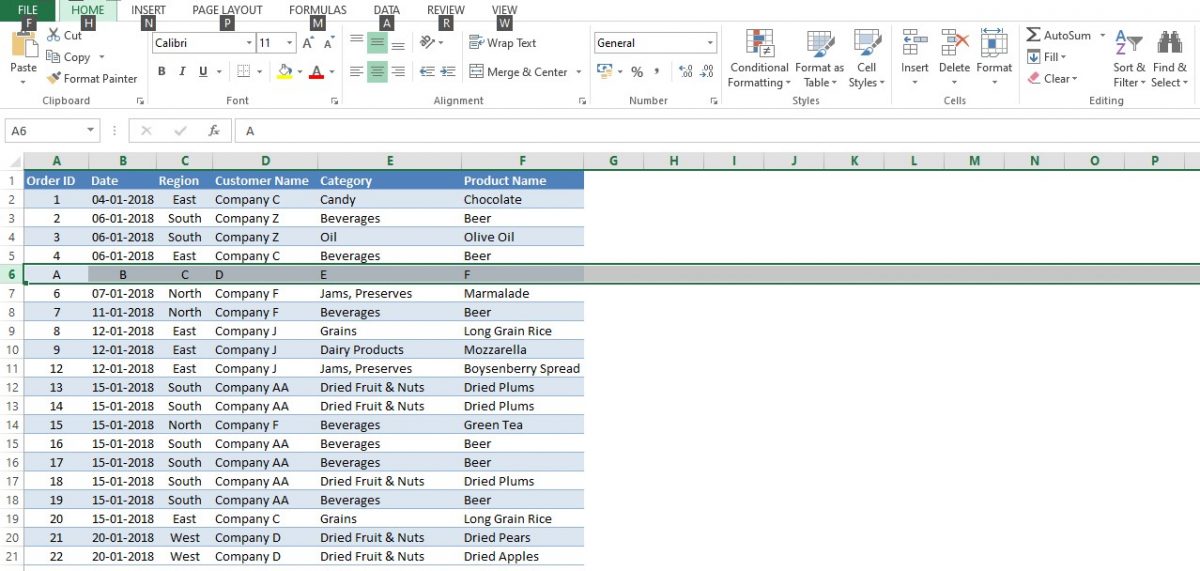
Press any of that letter keys on your keyboard and that would take you to the various tools available within that tab above which the letter appeared.
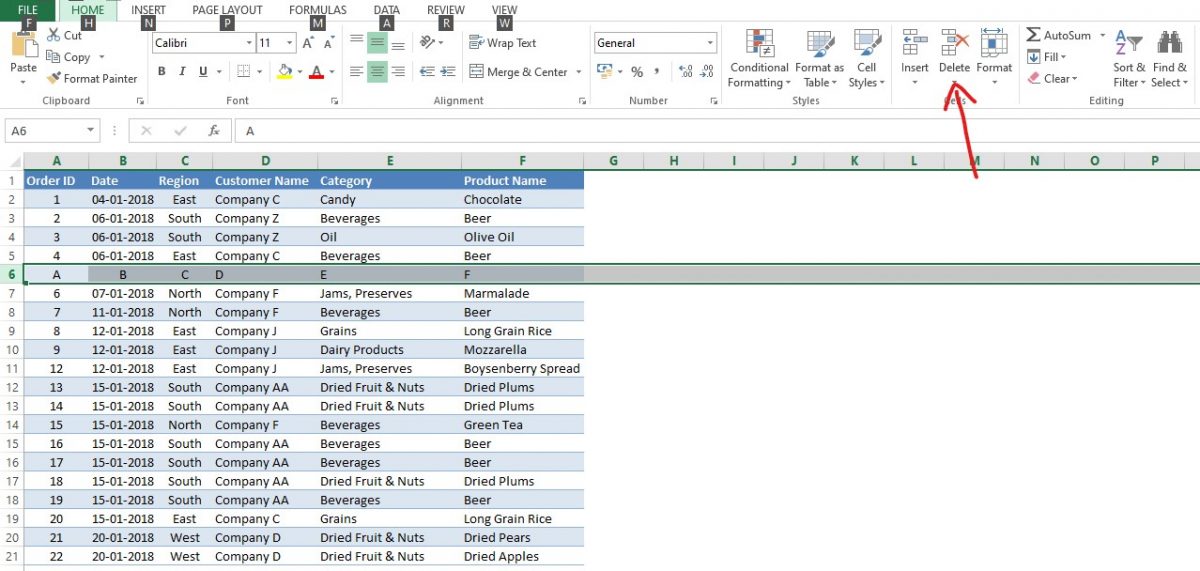
The option to Delete is available within the Home Tab as shown above. So, hit the letter key ‘H’ on your keyboard & the following appears.
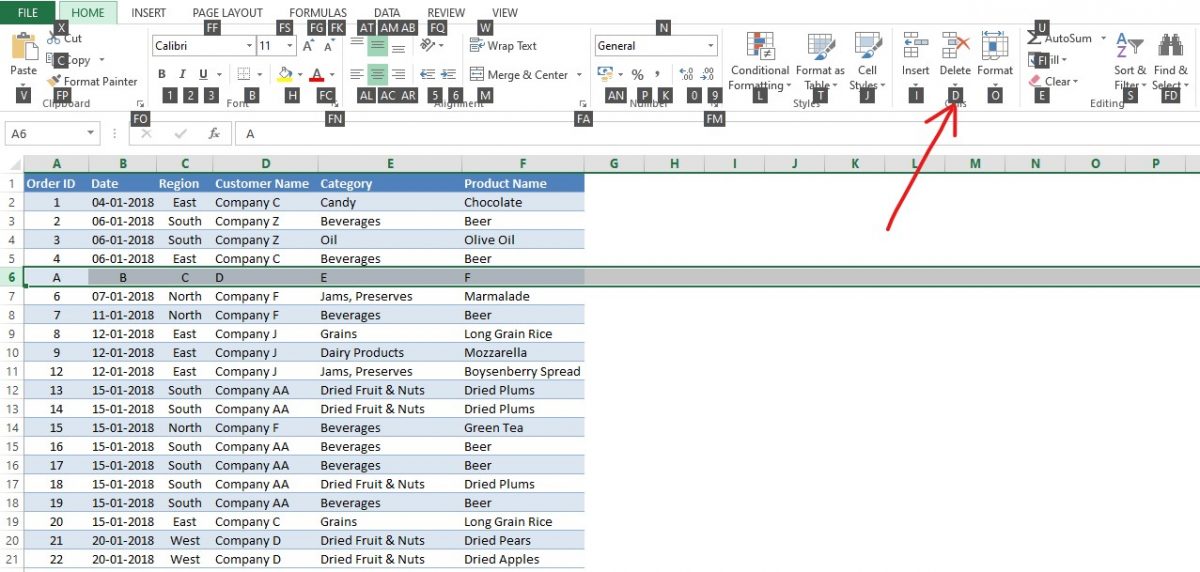
Press the letter key ‘D’, and then ‘R’ on your keyboard as shown below.
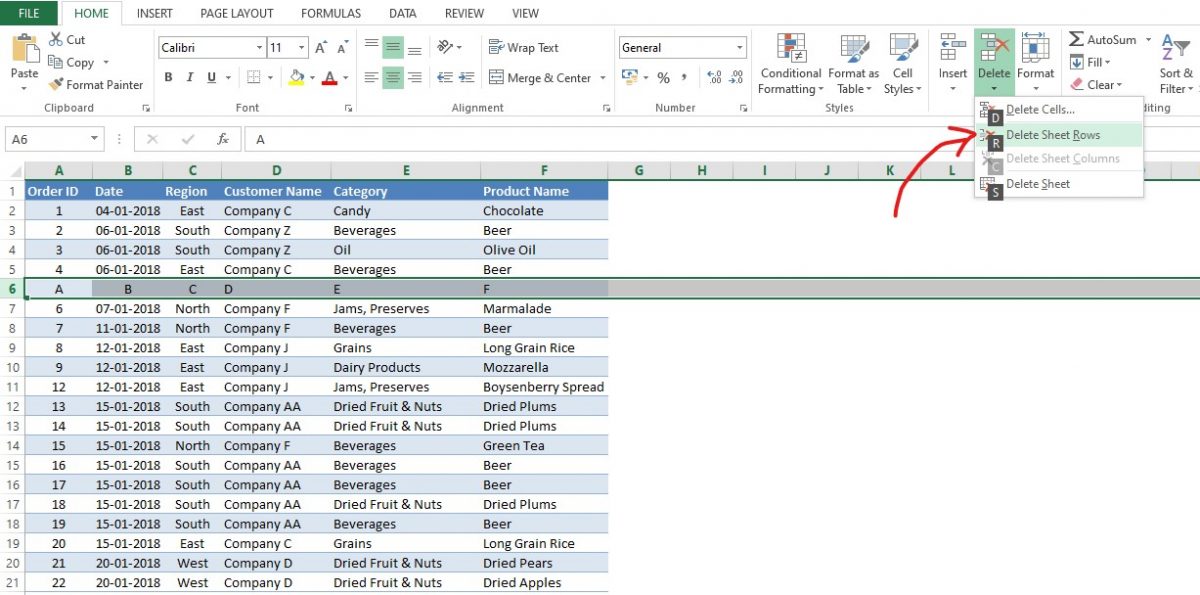
Once done, the selected row gets deleted & now we can get it over with.
Method III – The Accelerator Way
Now we move on to explore one another quick way of getting the job done.
Once the required row that is to be removed is selected, hit the ALT key following which the next target is to press our finger against the letter key ‘E’. This will make a prompt appear in your worksheet as shown in the below image.
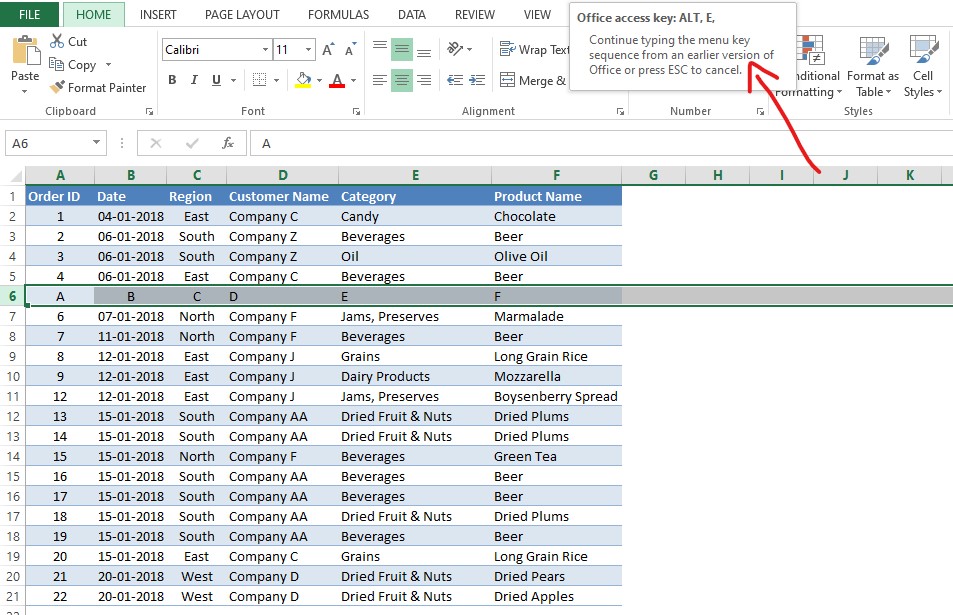
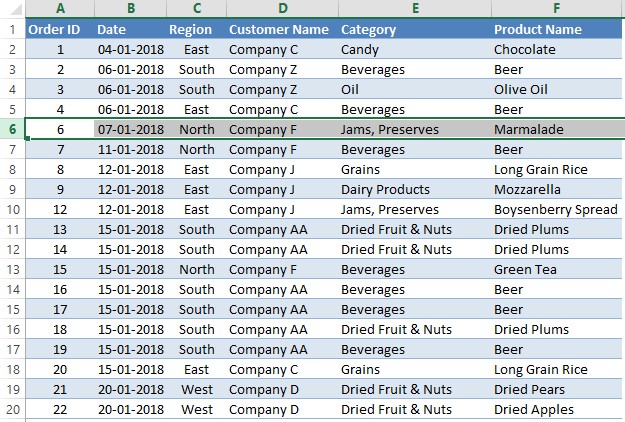
Again, much emphasis on pressing the keys one after the other and NOT SIMULTANEOUSLY. After the above prompt is displayed hit the ‘D’ letter key on your keyboard and the selected row gets deleted.
Method IV – The Old School Right Click
Though this method may seem a bit rudimentary, this also falls under one of the different ways to delete a row. So, let’s get started, shall we?
Select the row which is to be deleted & right-click using your mouse (or is it the mouse-pad for the laptop users?!) anywhere over the contents of the selected row.
A list containing various options to choose from appears as shown in this image.
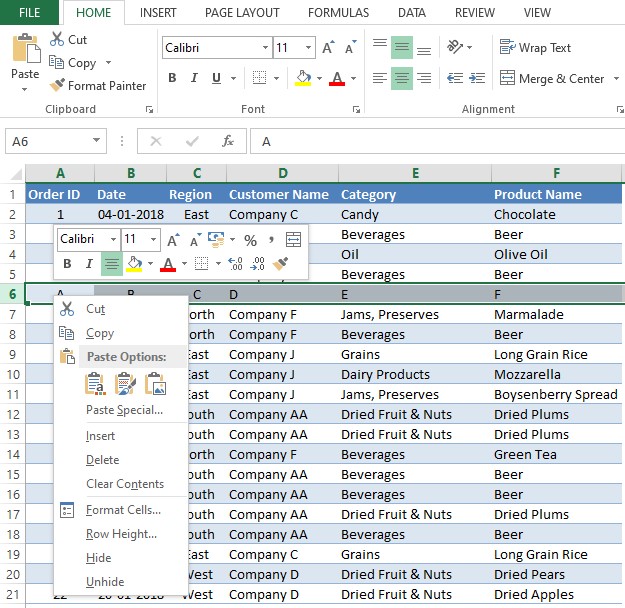
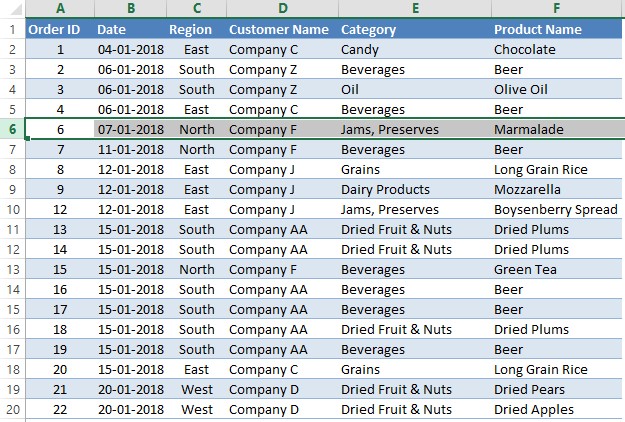
Click on the Delete option available in the list and the selected row gets deleted.
Conclusion:
We’ve come to the end of this article now. Glad that you’d be knowing different ways of deleting a row in MS Excel. Have a look at this article to know how to insert a row in MS Excel.
There are also other articles that might interest you in our QuickExcel space for more suggestions and tips on using MS Excel. For now, Adios!
