In this tutorial, we’ll learn how to use data validation in Excel. To ensure that all data entries are consistent, you may often need to regulate data entry into certain cells. This could be to allow just certain data types in a cell, such as numbers or dates, or limit numbers to a specific range and text to a specific length, etc. Excel provides for Data Validation option in the Data Tools group on the Data tab to avoid errors due to inconsistencies.
Data Validation in Excel – Quick Examples
Let’s start with some of the data validation examples in Excel and see how you can implement them in your Excel sheets.
Also read: How to Clean Data in Excel?
Validate a whole number
You can use data validation in Excel to validate whole numbers. To restrict access to any website to users below the age of 18, one may be asked to enter their age. To accept ages above 18, follow these steps:
- Select the cell you want to apply the rule to.
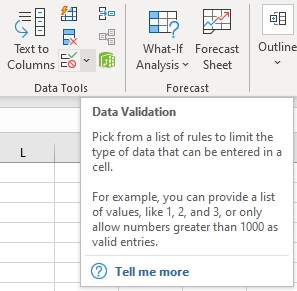
- Select Data Validation from the Data Tools group on the Data tab.
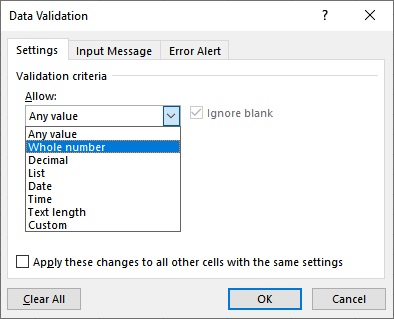
- From the Data Validation dialog box that appears, select Whole number on the Allow: drop-down list.
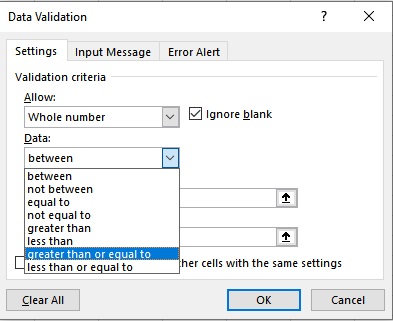
- Select greater than or equal to on the Data: drop-down list.
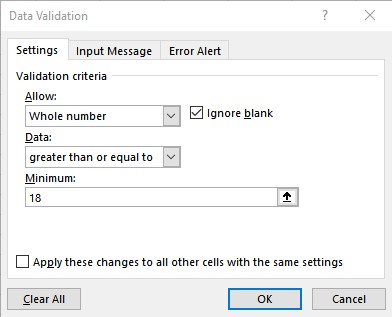
- Specify the Minimum: as 18 and click on OK.
Validate decimal numbers in Excel
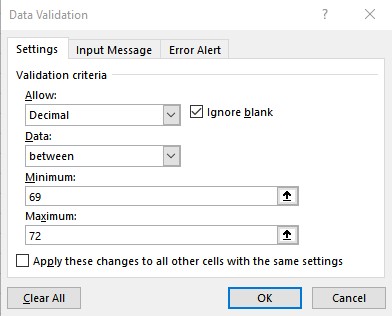
The Army has acceptable weight ranges for different age groups and according to height. For example, 69 – 72 kg is the acceptable weight range for people of age group 23- 27 in the height range 179 -183 cm. To define data validation rule with the above restrictions, follow these steps:
- Select the cell you want to apply the rule to.
- Select Data Validation from the Data Tools group on the Data tab.
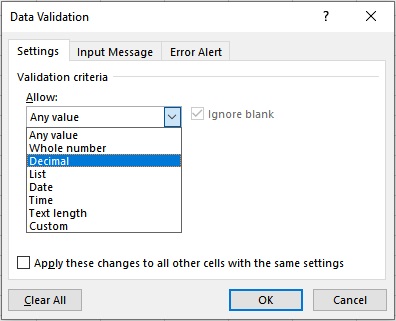
- From the Data Validation dialog box that appears, select Decimal on the Allow: drop-down list.
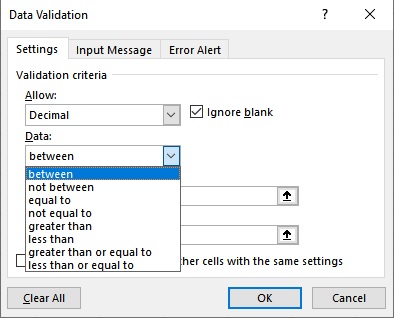
- Select between on the Data: drop-down list.
- Specify the Minimum: as 69 and Maximum: as 72 and click on OK.
Validate list or dropdown
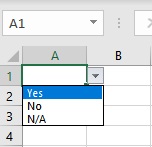
Some questions may require one of the options provided as an answer. For example, a question that takes Yes, No, or N/A as a valid answer. We can use data validation in Excel in such a case. To define data validation rule with the above restrictions, follow these steps:
Also read: How to Make a Drop-down List in Excel?
- Select the cell you want to apply the rule to.
- Select Data Validation from the Data Tools group on the Data tab.
- From the Data Validation dialog box that appears, select List on the Allow: drop-down list.

- Specify the Source: as Yes, No, N/A and click on OK.
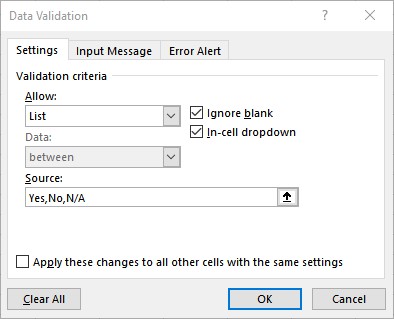
- This is how it appears in the cell. You can also choose a range of cells in the source if you want custom options or add your own custom comma separated values.
Validate date
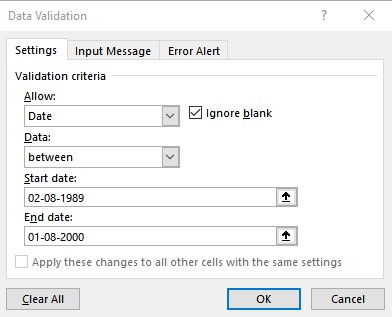
Most of the exams have a lower and upper age limit as part of their eligibility criteria. For example, “A candidate must be of 21 years age and must not have attained the age of 32 years on the 1st of August, 2021 i.e., the candidate must have been born not earlier than 2nd August, 1989 and not later than 1st August, 2000.” We can use data validation in Excel in such a case. To define data validation rule with the above restrictions, follow these steps:
Also read: Change Date Format in Excel: A Complete Step-by-Step Guide
- Select the cell you want to apply the rule to.
- Select Data Validation from the Data Tools group on the Data tab.
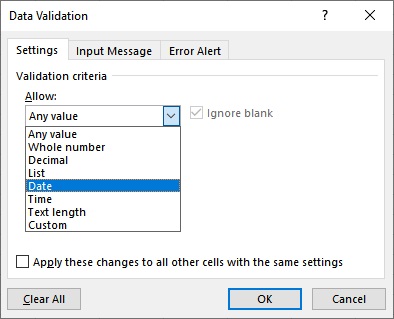
- From the Data Validation dialog box that appears, select Date on the Allow: drop-down list.
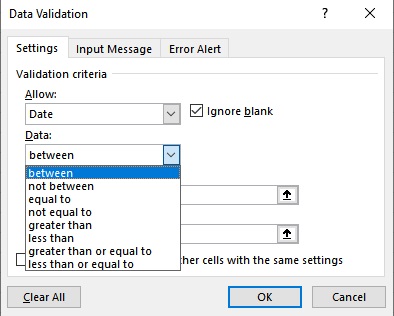
- Select between on the Data: drop-down list.
- Specify the Start date: as 02-08-1989 and End date: as 01-08-2000 and click on OK.
Validate time
To avoid errors arising due to human error in entering time, time validation comes in handy. We can use data validation in Excel in such a case. To only accept time between 00:00 and 23:59, follow these steps:
Also read: Easy Ways To Create A Timeline In Excel Like A Pro
- Select the cell you want to apply the rule to.
- Select Data Validation from the Data Tools group on the Data tab.
- From the Data Validation dialog box that appears, select Time on the Allow: drop-down list.
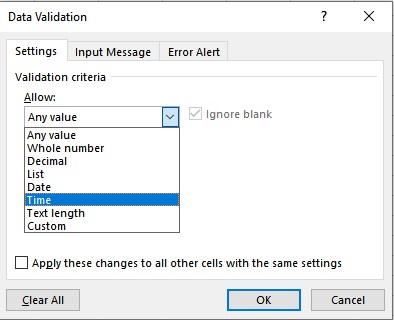
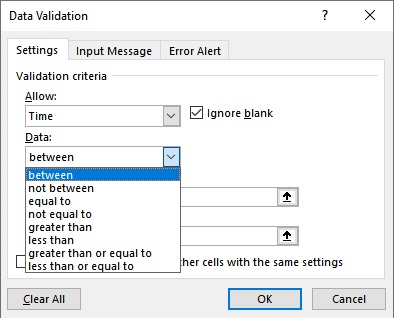
- Select between on the Data: drop-down list.
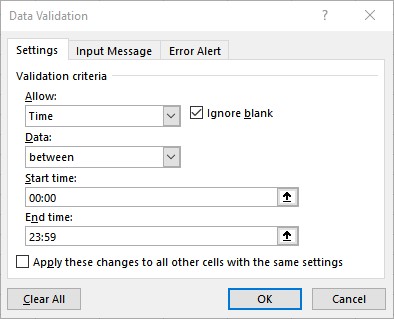
- Specify the Start time: as 00:00 and End time: as 23:59 and click on OK.
Validate text length
We can use data validation in Excel to allow text entry of a specific length for brevity, follow these steps:
- Select the cell you want to apply the rule to.
- Select Data Validation from the Data Tools group on the Data tab.
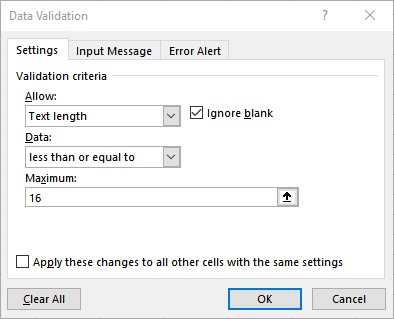
- From the Data Validation dialog box that appears, select Text length on the Allow: drop-down list.
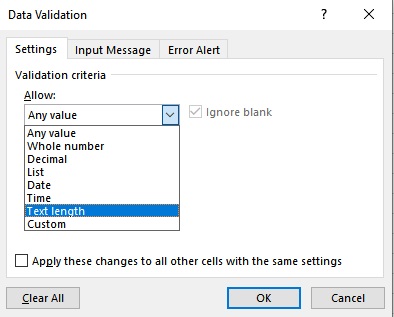
- Select less than or equal to on the Data: drop-down list.
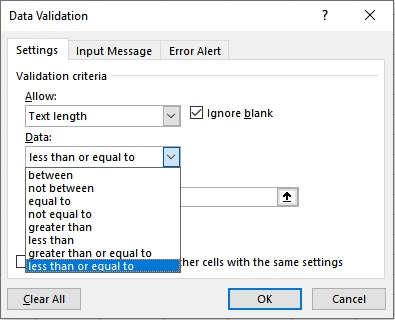
- Specify the Maximum: as 16 and click on OK.
Validate custom data
A valid email address is must contain the user name, the @ symbol, and the domain name with . (dot) extension. To quickly validate email addresses, follow these steps:
- Select the cell you want to apply the rule to.
- Select Data Validation from the Data Tools group on the Data tab.
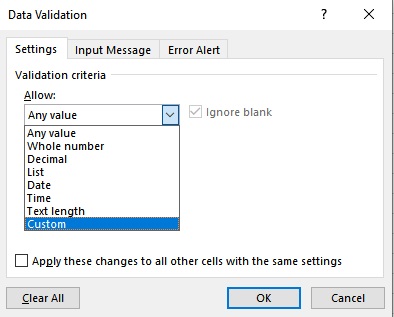
- From the Data Validation dialog box that appears, select Custom on the Allow: drop-down list.
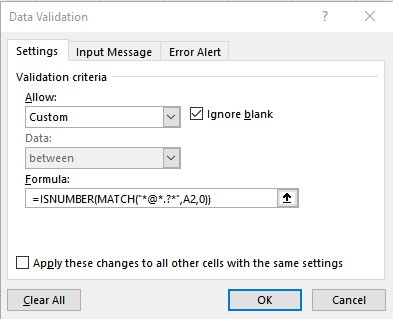
- In the Formula: text box, type =ISNUMBER(MATCH(“*@*.?*”,A2,0)) and click on OK.
Error Alert in Excel
If any entry violates the data validation rules set up for that specific cell, an error message is displayed.

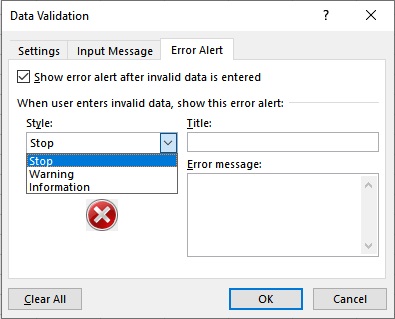
One can customize error alerts according to their requirements using the following steps:
- Click on the Error Alert tab on the Data Validation dialog box.
- Here, you can enter the Title and Error message to be displayed in the error alert after invalid data is entered. Also, you can choose the Style of the error alert from the Stop, Warning, and Information options.
Conclusion
In this tutorial, we learned how to perform data validation in Excel.
