In this guide, we’ll learn how to change date format in Excel. Date and Time data is an integral part of any statistical document or sheet. It is important to accurately track and analyze events, sales, figures, and others.
By convention, Excel uses a general data format that may be as per your need. But in most cases, that format may need to be customized.
Changing the format of Date in a particular cell or all the cells in your Excel sheet is an easy process and doesn’t require any complex methodologies. Excel provides a wide range of formatting options based on Location and Languages which helps in better date formatting in native language and style. Also, For some Languages there is also features to select from different Calendar types.
Steps to Change Date Format in Excel
Follow the below step-by-step tutorial to change date format in Excel quickly and easily.
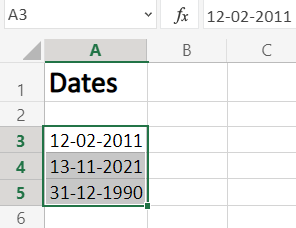
Step 1. Select the range of cells containing the date
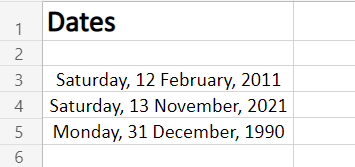
To start with, select the cell values where want to change the date format, as shown in the image below.
Step 2. Go to Number Format dropdown
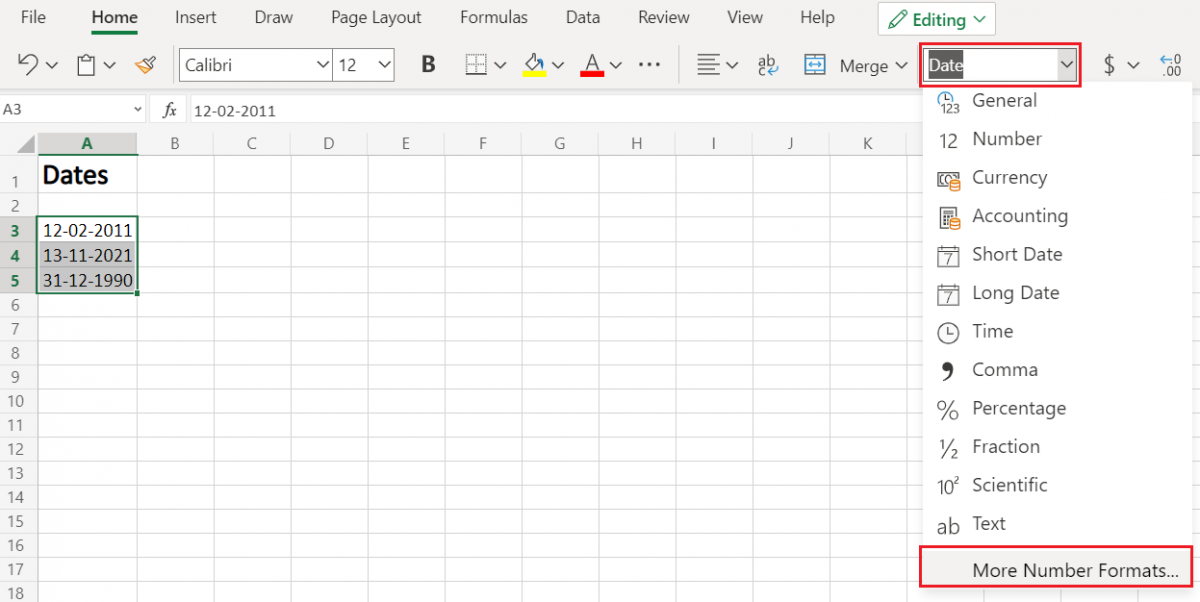
- To select ‘Number Format’, go to ‘Home‘ in the option menu and look for Number Format, as shown below
- Then from the drop-down menu, select ‘More Number Formats‘ to reveal the ‘Number Format’ dialogue menu.
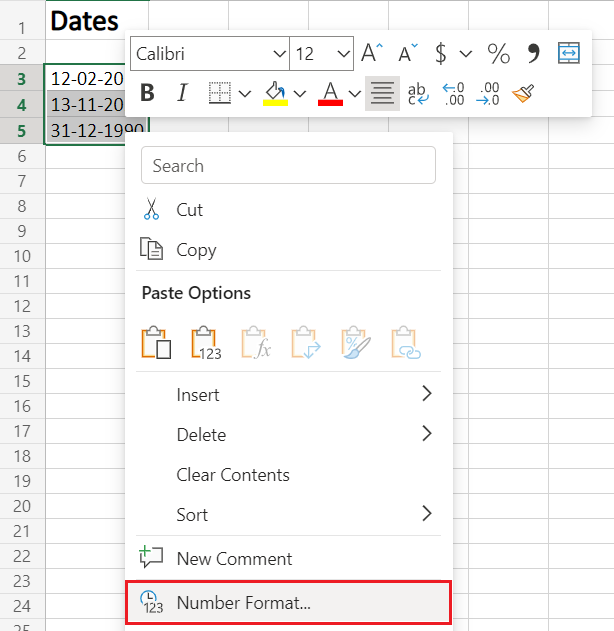
- Alternatively, you may directly go to Number Format, by right-clicking on the selected cell/s
- Click on ‘Number Format’.
Step 3. Choose Date
- From the Category menu on the right, choose ‘Date‘.
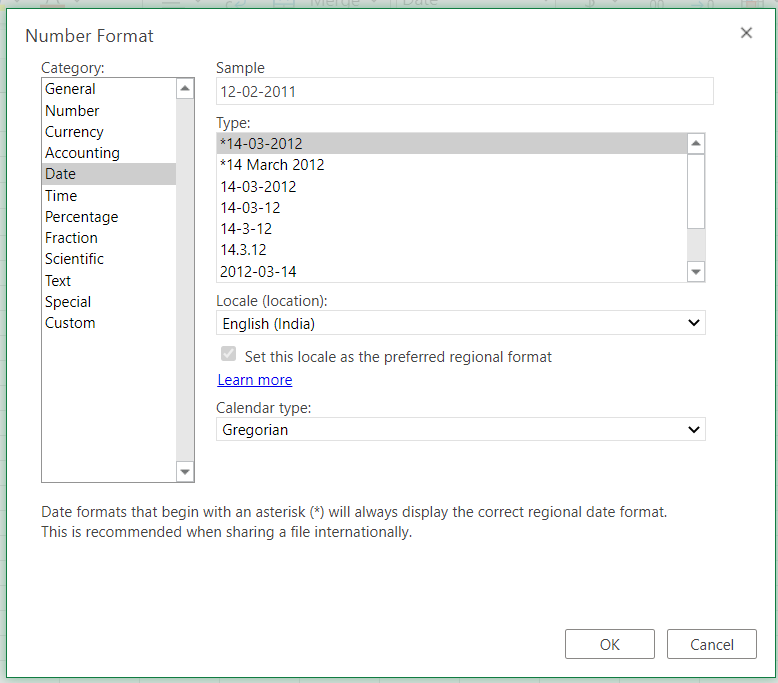
Now, to apply any date formatting type, select it from the right panel of the pop-up menu of Number Format. Click on ‘OK‘ to apply the formatting to the selected cell/s.
Note: You may check the date format implementation in the ‘Sample‘ at the top of the menu option
Choose the Date Type
The general option type to choose from a variety of Date Formatting options. Scroll down in this section to reveal a plethora of options for formatting, ranging from date, text (month name), year, and others.
This option can be perceived as the display menu, as the formatting options in this will keep on changing as per the selection in Locale(Location) and Calendar type.
Choose the Locale (location)
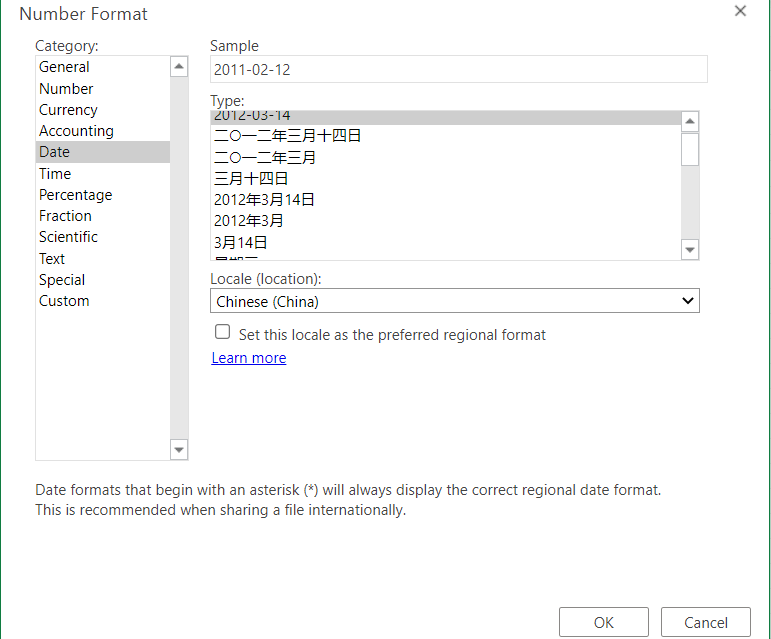
This option features the Location or Language options to help format the date accordingly. This option is probably the most used option as users require to format the date according to their or audience preference as per the native formatting style, based on language and location.
Choose any language or Location from this options menu. After selecting, all the supported date format options available for that particular locale will be available for selecting in the above Type menu.
Choose the type of calendar
This option reveals different calendar types available based on the Locale(Location) selected from the above option menu. This formatting option is only available for certain Locale and not all.
As shown in our example below, the variety of calendar types available for selection are only available for the Locale (location) selected (here, Arabia), for other locales the calendar type might be different or not at all present.
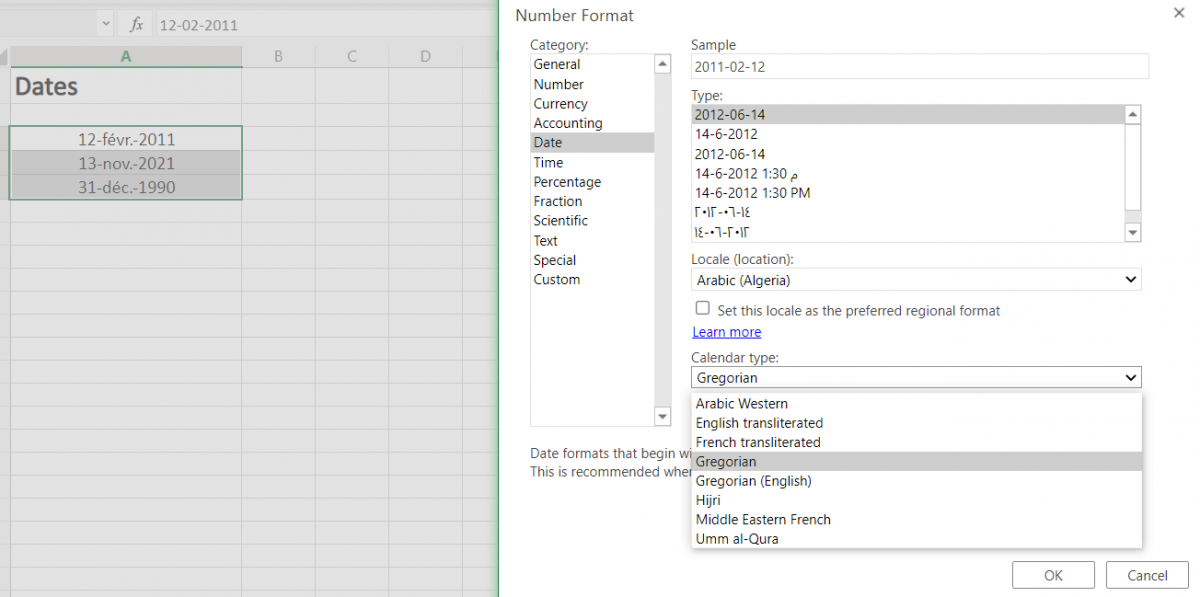
To apply selected formatting, you will need to click ‘OK‘ after selection to apply to your dates.
Conclusion
That’s It! You can now easily convert your dates to your desired format style easily.
We hope you learned and enjoyed this lesson and we’ll be back soon with another awesome Excel tutorial at QuickExcel!
