At first glance, all the cells in a sheet of MS Excel may seem to be separated by the boundaries running top-down & across as shown in the below image. These lines are known as Gridlines, which serve as a reference for a user to locate the contents within any cell & differentiate it from those of the others.

But little do we know that these lines would vanish in a flick when we hit the print preview as shown below.
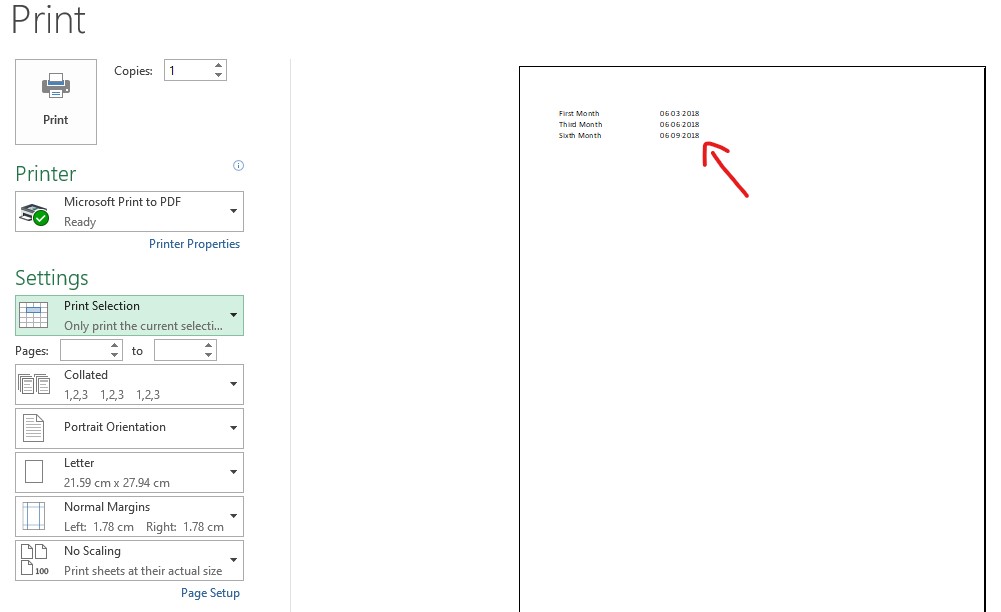
What this means is that the gridlines separating the cells would never see the ink on paper when it comes out of the printer. So, is there a way around it?
That is exactly what we are going to look into in this article. How to make permanent these lines that separate the cells? & what if we need to include these lines only to some spots of the data leaving the remaining blank?
Read on to know the answers to all the above!
Borders in MS Excel:
The permanent lines separating each cell are termed as Borders & there are quite some variants of it in-built in MS Excel. One can choose to apply the desired border of choice to the selected cells using either of the below methods.
- Using the Home Tab
- The Hotkey Way
Method 1 – Using the Home Tab:
Get things started by selecting the cells for which the borders are to be applied as shown below.

Then one shall move the cursor towards the Font section of the Home tab near the highlighted portion as shown below.
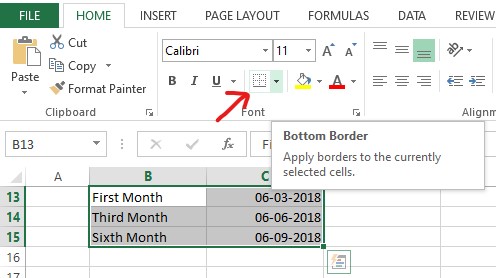
By default, the Bottom Border will be selected but one can always click on the down arrow to view a list of borders in a drop-down as depicted in the following image & choose the border of one’s choice.
In this case, ‘All Borders’ will be selected to include the borders on all sides of the selection. But during times of need, one can also choose the ‘Outside Borders’ or any specific style required from the drop-down list.
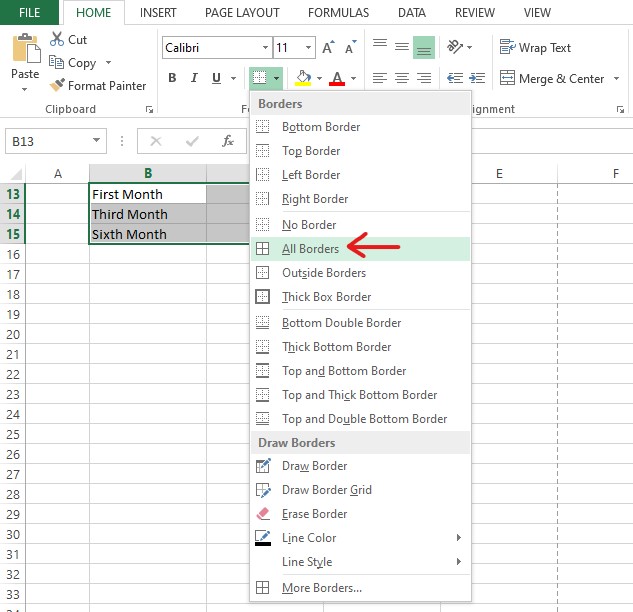
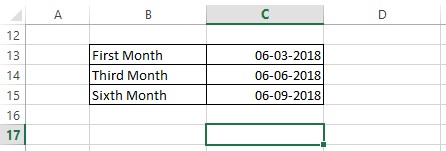
Once the option is clicked upon, the borders get applied to the cell as shown below.
Method 2 – The Hotkey Way:
This technique would be more suited to those who are fond of getting things done using the keyboard. Similar to the previous method one shall get started by selecting the cells to which the borders are to be applied. This shall be followed by hitting the ALT key.
Now one may find noticeable changes in the Excel window where alphabets tend to appear alongside each of the tabs similar to the image below. These alphabets are called the ‘Hotkeys’.
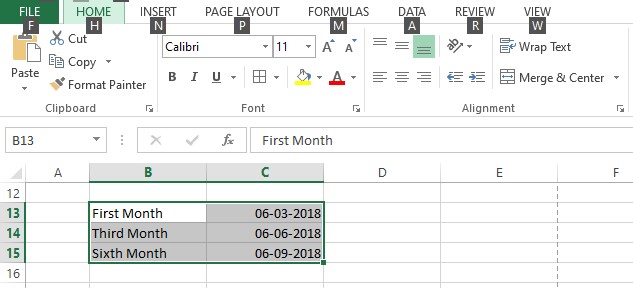
Since the option to select the required border style lies within the Home tab, hit the letter key ‘H’ that appears alongside it. Once done, the hotkeys for all the options within the Home tab shall now appear as shown below.
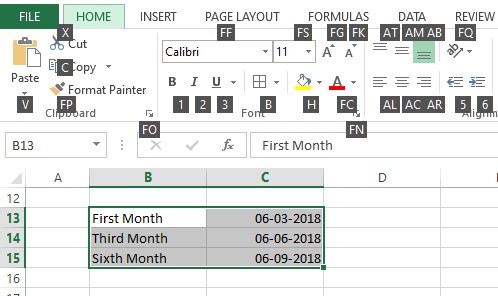
Hit the letter key ‘B’ to choose the Border option & then ‘A’ to select ‘All Borders’ option.
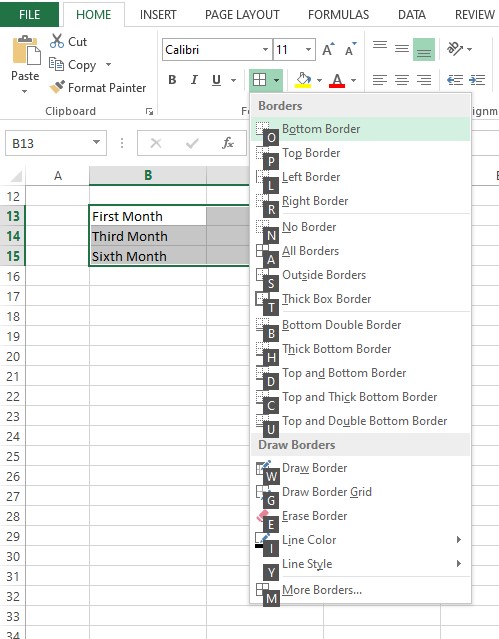
Hit the letter key ‘A’ now to cover all the selected cells with borders.
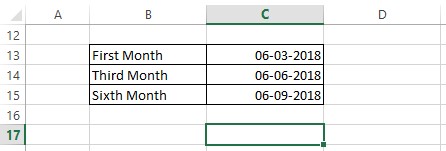
One can also choose any other border style too by hitting its respective hotkey displayed in the drop-down list.
Summary
Hope the article was informative and you have got what you were looking for! Here’s something which elaborates on How to Create an Excel Spreadsheet? There are also numerous other articles in QuickExcel that might help you with knowing the tricks & nuances of MS Excel. Cheers!
