Let us say that there is a tabulated list of data with headers to categorise the entries under each column. But, there might be instances when we would be needing to replace the position of certain entries due to some errors during the recording of the information. This can be done by selecting the cells & moving them from their current position to the required position.
‘How might one get on with this?’ you ask – this article is going to answer just that by uncovering the ways to move cells around MS Excel.

It is evident from the very first glance that some of the entries in the above dataset are misplaced in a different location. We shall use this use case to demonstrate the sequence of steps involved in moving the cells in this article.
Select the Cells to be Moved:
The cells that ought to be moved into a new location are needed to be selected first. This can be done through any of the below techniques.
- Drag & select using a mouse
- Select using Name Box
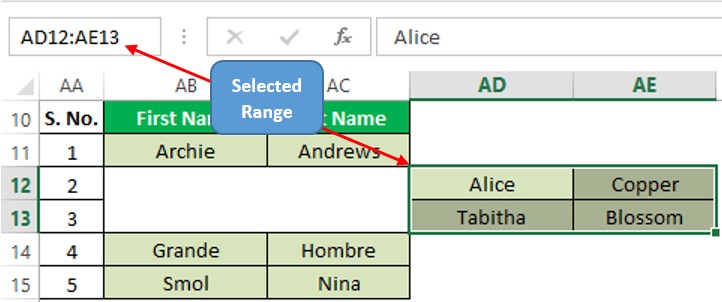
The former is the most rudimentary technique in which the required cells are left clicked & dragged until all the cells are selected. For instance, one shall click on the cell AD12 in the above dataset & drag the cursor until it reaches AE13 so that all the cells between these fall within the selected range as shown below.

The latter technique is rather infamous & would need us to turn our attention towards the least visited Name Box as indicated below.

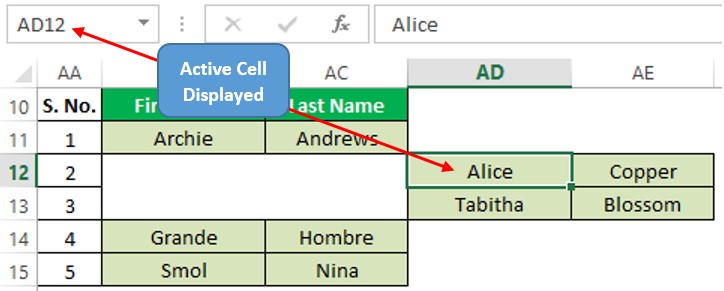
You can observe from the above image that the address of the cell which is currently selected would be displayed in this Name Box. So, we shall ask MS Excel to select the cells by typing the address of the starting & ending cells with a colon (: ) in between such that it selects all the cells that fall within those 2 cells.

Once done we shall now look into the ways of moving these cells.
Moving Selected Cells:
You must be aware of the different forms that the cursor takes within MS Excel in order to move the selected cells within the active sheet. The cursor would turn into a different version of itself indicating a possible operation that can be carried out when it is in that version.
Here’s what a normal mouse cursor would look like.

But the one we are after for moving the cells would be the one below.

One shall now hover the cursor over the boundaries of the selected range & freeze the cursor position right where it turns into a four-headed arrow as shown below.

The requirement here is to move the selected cells in columns AD & AE to columns AB & AC respectively. Now click right where the cursor is & start dragging it towards the left. The selected range of cells shall also move along the direction in which the cursor is being dragged as shown below.

The cursor is dragged until it reaches column AB & is left once the selected cells fit right on their required position as shown below.

Conclusion:
That’s the end of this article. Hope now you would be familiar with the different ways to move the cells within the active sheet. Here’s an article which elaborates on how to unhide cells in MS Excel. For more such tips and tricks on using MS Excel, please do look into our space QuickExcel. Until then, Ciao!
