While one can rejoice in creating eye-catching graphs or charts or tabulated data, the real nightmare starts when one tries to put the ink on the paper. Ever tried printing sheets from MS Excel? Those who did would have known that it does not seem to be child’s play.
Unlike a document in MS Word in which the information is given in the form of paragraphs in a single or double column format, a spreadsheet in MS Excel contains numerous rows & columns all filled with umpteen information.
These are to be aligned in a proper manner for them to make it to print, or else it shall be a nightmare in the making!
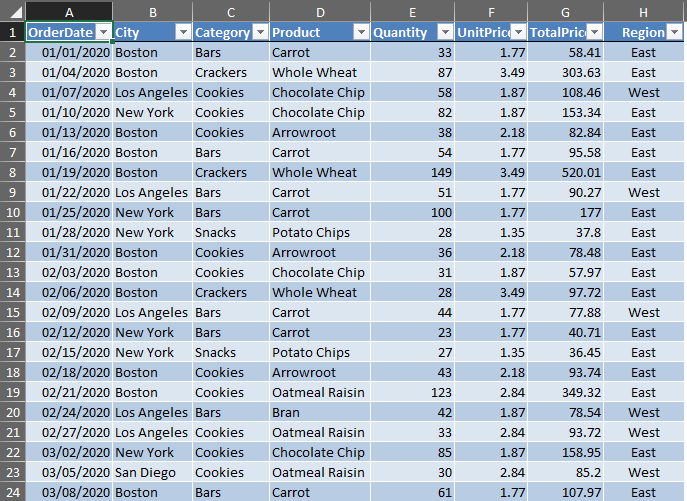
Fear not, for we are going to explore the possible ways of tackling just that in this article. The following dataset shall be used for demonstrating the steps that ought to be followed for aligning a worksheet before printing.
We shall now select the cells that ought to be printed as shown below since without this the entire sheet along with the blank cells will also be spewed out of the printer.
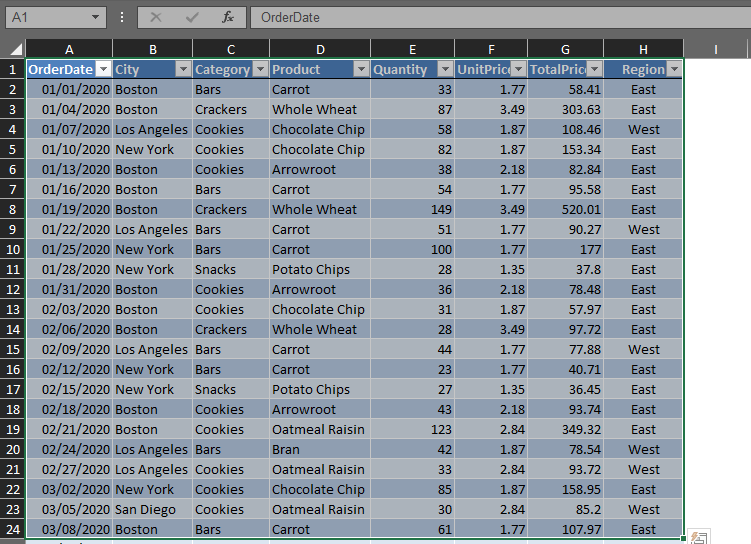
Once done, MS Excel now presents us with a couple of options to proceed further.
- Using the Page Layout Tab
- Using the Print Preview Option
Method 1 – Using the Page Layout Tab:
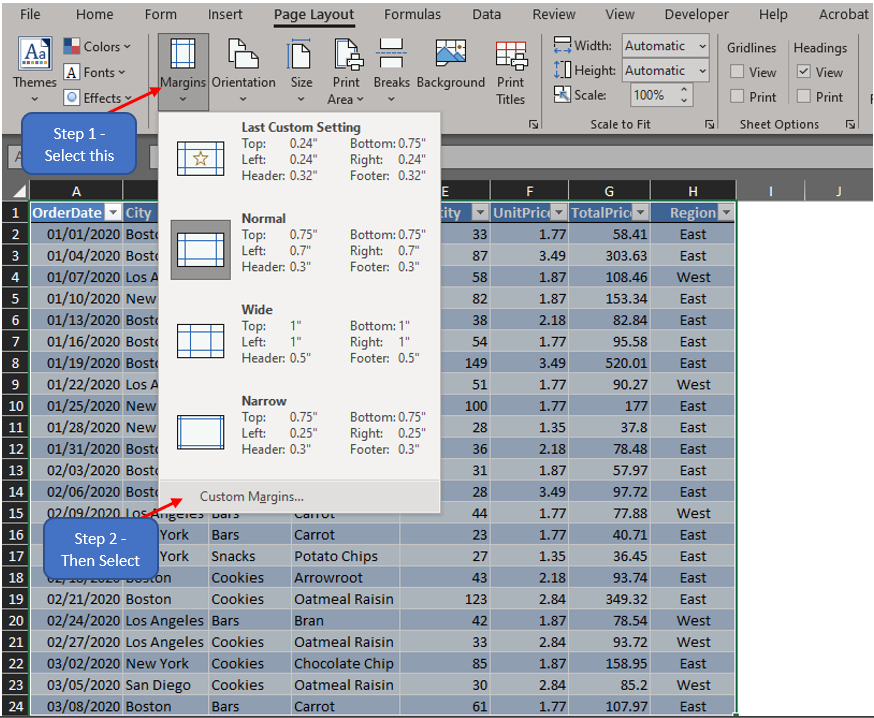
In this technique, one shall use the cursor to reach out & select the Page Layout Tab as shown below.
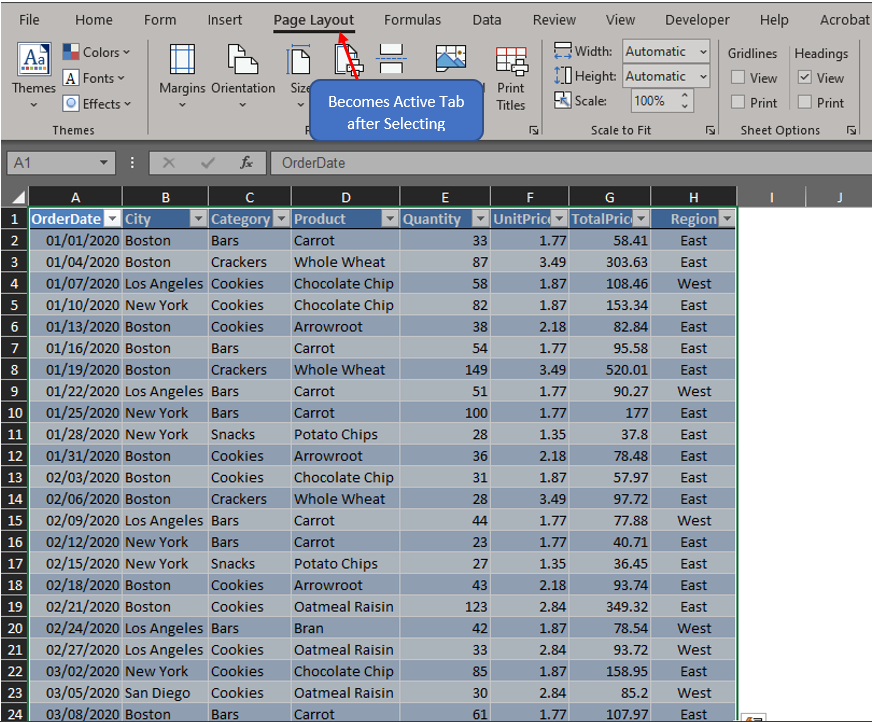
Once done, click on the Margins option available within the tab & a drop-down menu appears. Choose the Custom Margins option in that menu as indicated below.
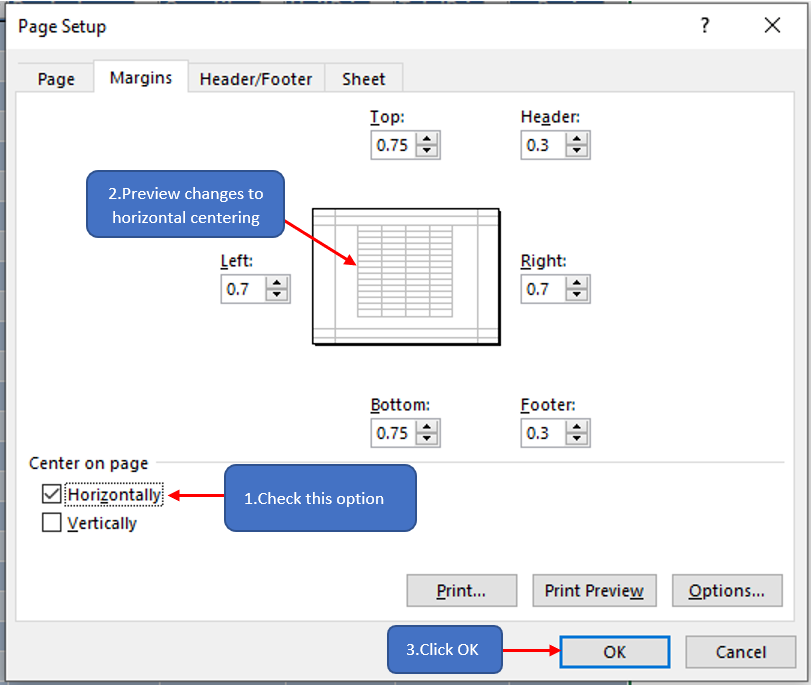
A pop-up titled Page Setup shall now appear as shown below.
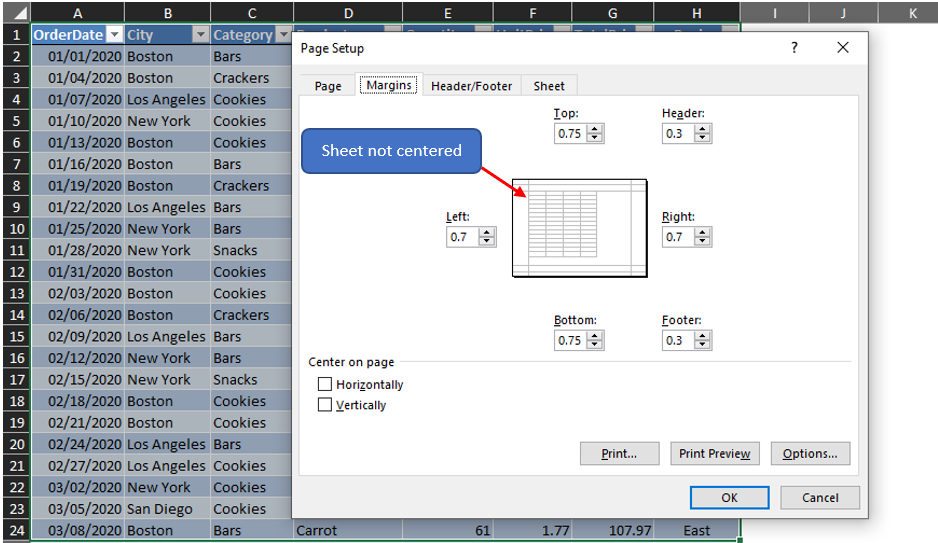
Towards the bottom of this pop-up, one shall locate two checkboxes – ‘Horizontally & Vertically’ under the title Center on the page. Check both these boxes if the worksheet is to be centred in both horizontal & vertical directions or only the box in whose direction the sheet is needed to be centred.
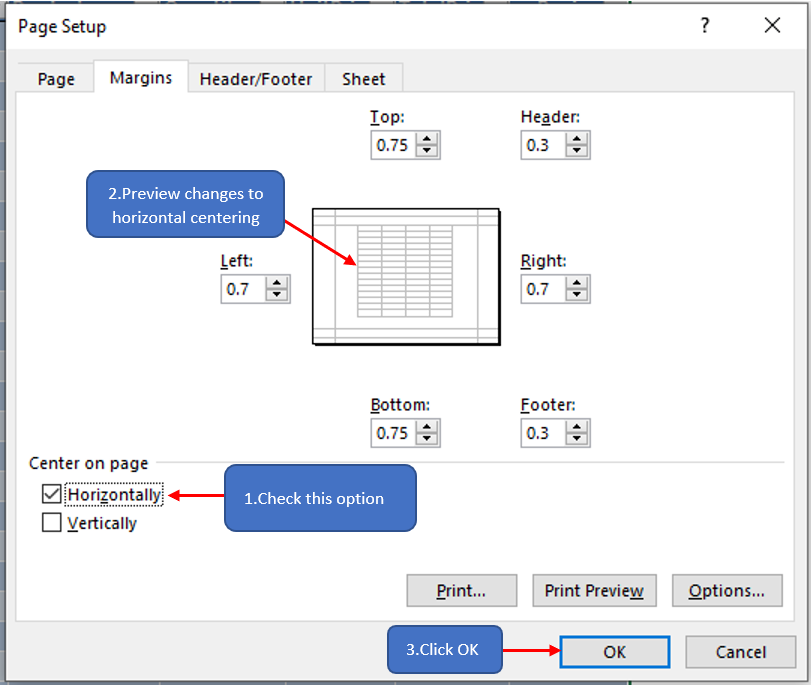
Click OK & the worksheet shall be centred horizontally. Could feel some readers thinking, ‘Well hold on there, smarty pants! How about a preview of the selection being centred rather than a graphic telling that it is?’
The next method might help you with that!
Method 2 – Using the Print Preview Option:
Selecting the data that ought to be printed remains the same as that of the previous step, but after that use the shortcut CTRL+P or click on the File menu as shown below to choose the Print option.
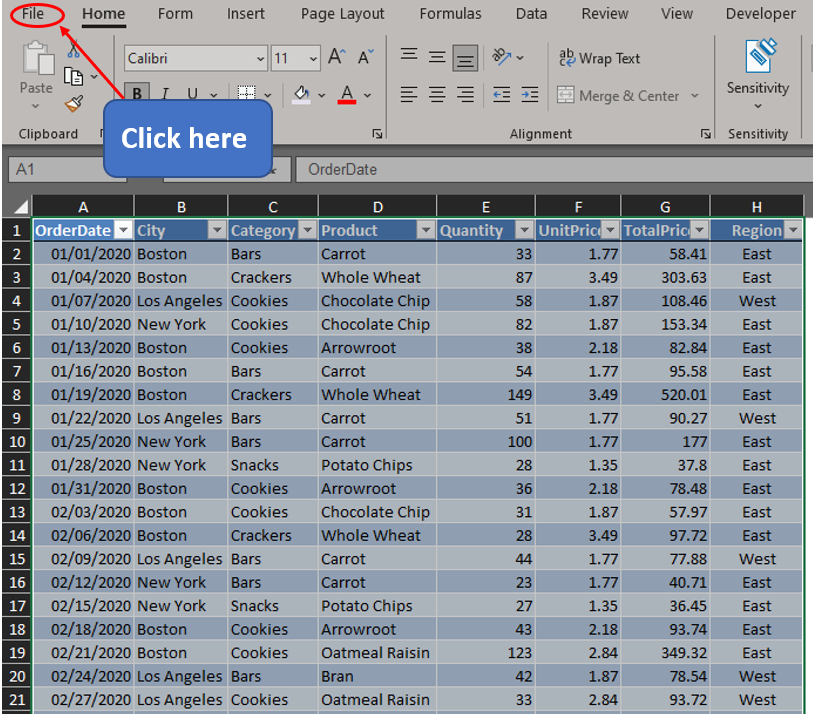
The following pallet shall appear after choosing this.
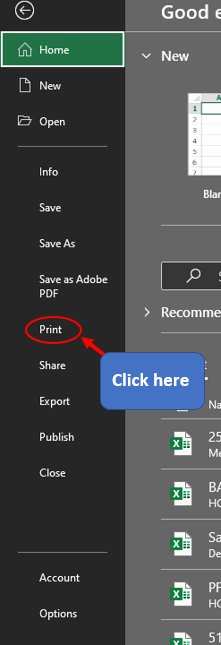
Once done, one shall now be taken to the Print Preview window.
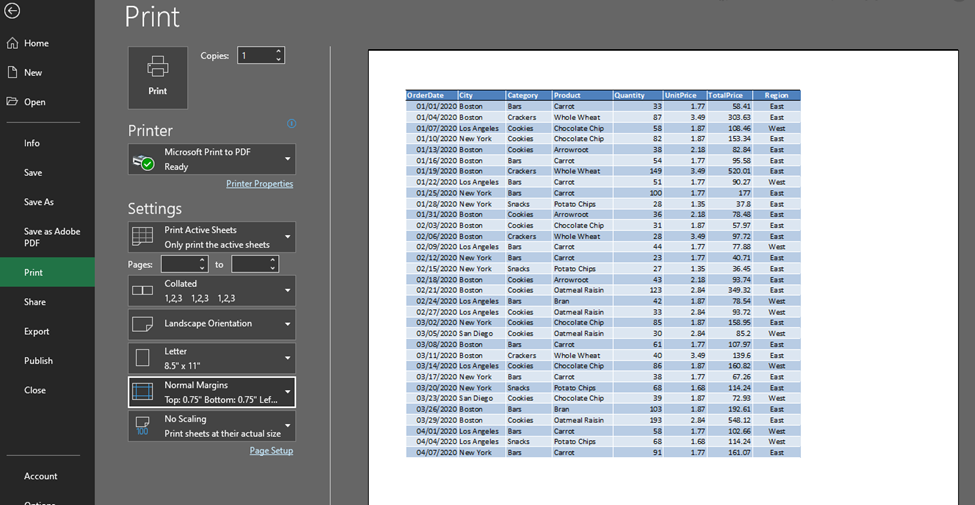
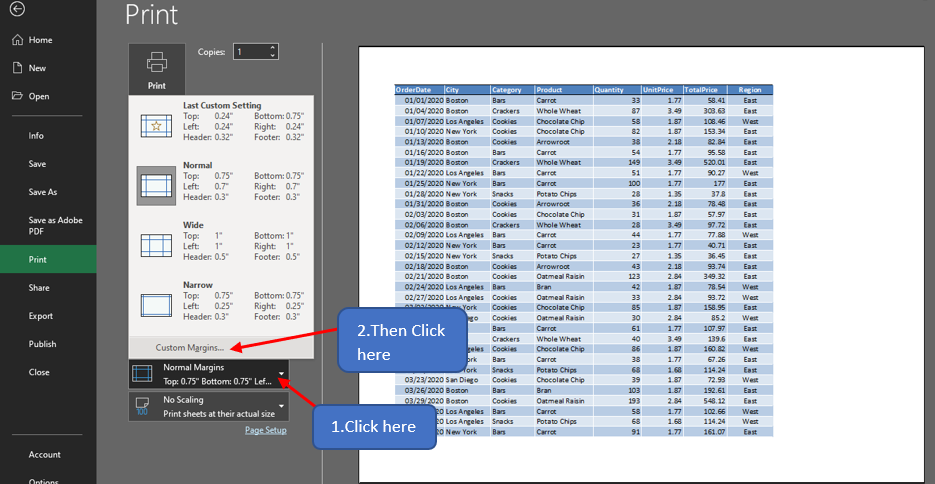
Click on the Normal Margins drop-down menu & choose Custom Margins as indicated in the below image.
Now the process remains the same as in the previous method where the Page Setup dialogue box appears.
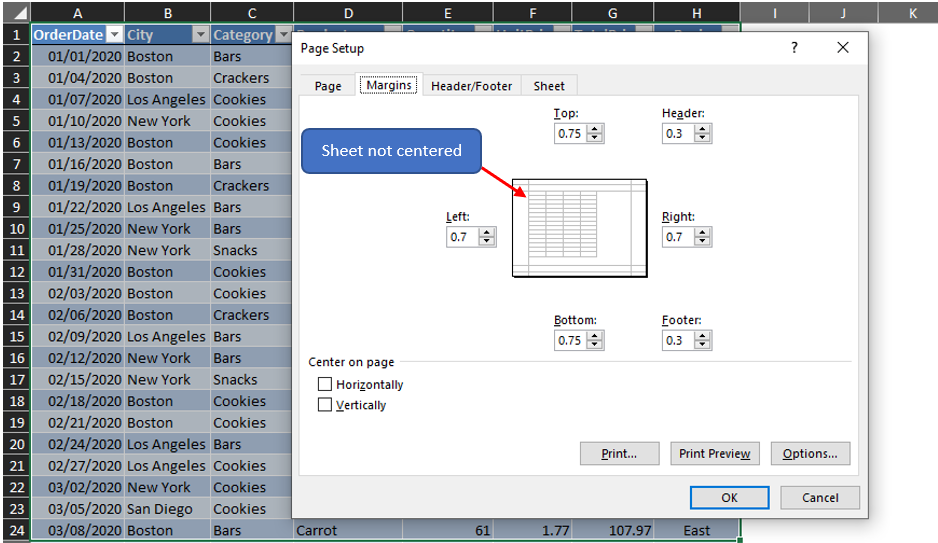
One shall repeat the steps similar to that of the previous method where the orientation in which the selection is to be centred is chosen & click OK.
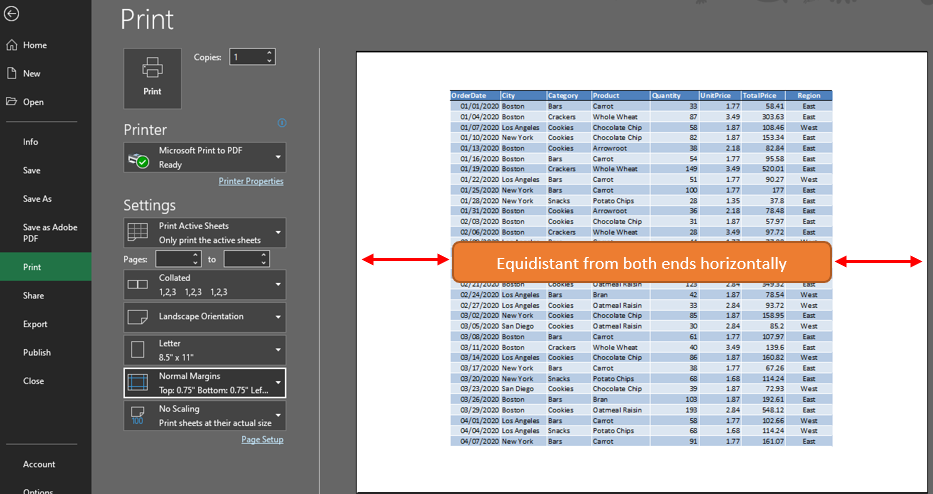
Now the screen resumes back to the Print Preview where the selected data is centred horizontally.
Summary
Hope this article was informative & helped you understand the centring of a worksheet in MS Excel. Here’s one which elaborates on switching between sheets in MS Excel. There are numerous other articles too in QuickExcel that can come in handy for those who are in looking to level up their skills in MS Excel. Ciao!
