In this article, we’ll learn to swap columns in Excel. If you use Excel tables regularly for business, you have organized your data in columns. Sometimes you’ll need to reorganize data, and other times you’ll want to compare particular columns side by side.
If you use Excel tables frequently in your everyday work, you know that you must reorganize the columns from time to time no matter how logical and well-thought-out a table’s structure is.
This article is a step-by-step guide to the top 4 methods for quickly changing the location of your Excel columns with minimal effort.
Method 1. Drag and Drop to Swap Columns
In Excel, whenever you’ll try to drag the column from one place to another, it will only highlight the cells instead of moving them from their position. Instead, while holding down the Shift key, click on the correct position on the cell.
- Open your Microsoft Excel spreadsheet.
- Click on the header (top) of the column to which you want to move its destination. When you click, it should highlight the entire column.
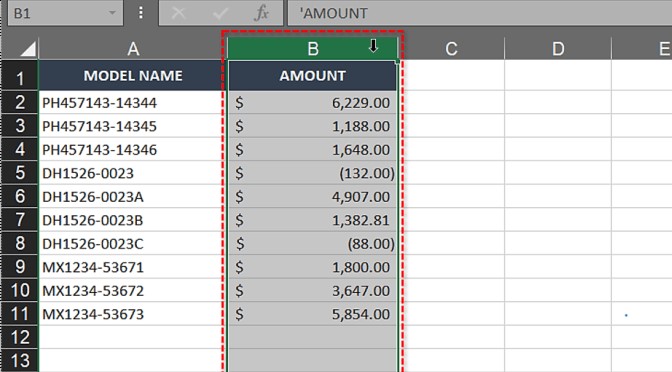
- Move your mouse pointer to the right edge of the column until your tab changes to four arrows directing on all sides.
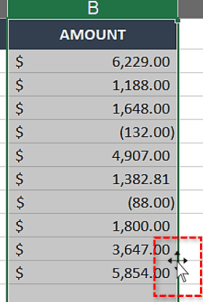
- Now, hold the Shift key while left-clicking on the column’s edge.
- Drag the column to the one you’d like to replace. A ‘|’ line should appear, showing where the next column will appear.
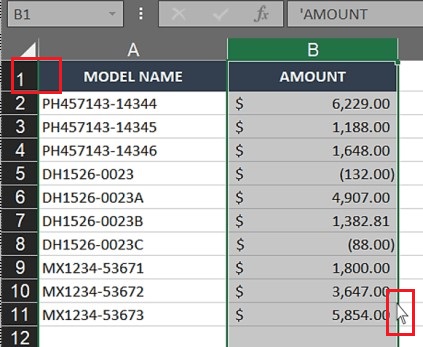
- Remove your fingers from the mouse and the Shift key.
- The second column must now be swapped with the first column (shown in our example below).
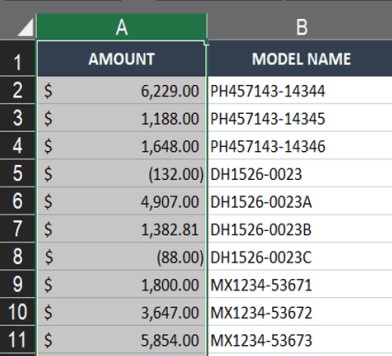
- You may now do the same with any column to swap the positions of columns.
Note: Don’t forget to hold Shift While Attempting this Method. If you perform this method without having the Shift key, all that data will be overwritten in your targeted column.
Method 2. Cut and Paste Columns
If this drag and drop method feels difficult then, Use the cut and paste method. Following are the steps for performing this simple method:
- Open the Excel Spreadsheet.
- Click on the header (top) of the colum, which you want to move. When you click, it should highlight the entire column.
- Then Right-click on the column and select the ‘Cut‘ option. Also, you can cut by simply pressing Ctrl + X.
- Click on the header (top) of the column you want to replace the first one with.
- When the column is highlighted, right-click on the column and select ‘Insert Cut Cells‘ from the option.
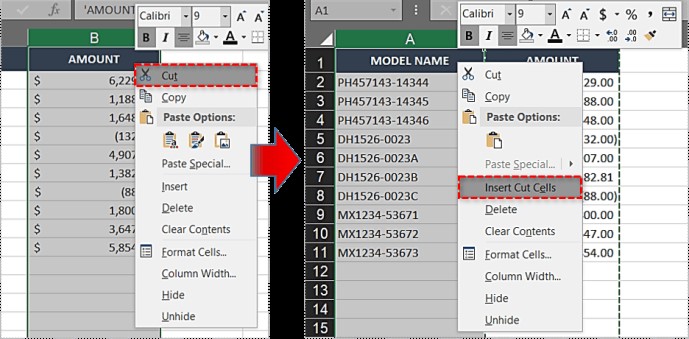
- Through these steps, it will insert the original column with the new one.
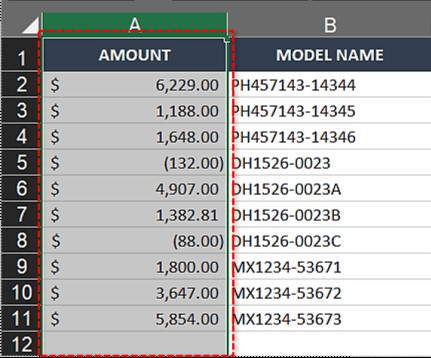
- If you want to move the second column, perform the same steps to do so.
Method 3. Swap columns by Cut/paste/delete
The cut/paste approach, which works perfectly for a single column, does not enable you to switch between many columns at once. If you do this, You will receive the following error: The selected command cannot be carried out with multiple selections.
If moving columns with a mouse does not work for you under any circumstances, you may use the following method to re-arrange numerous columns in your Excel table:
- Select the columns to be switched (Click on the first column heading, hold Shift, and then click the last column heading).
- Copy selected columns by pressing Ctrl + C or right-clicking and selecting Copy.
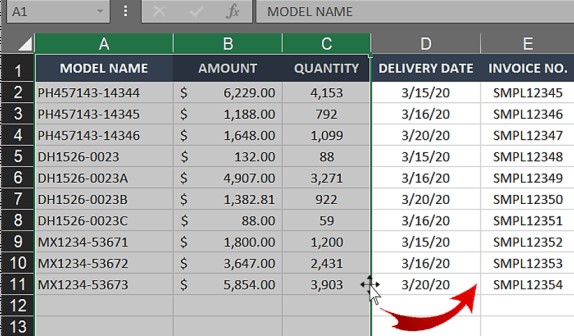
- Choose the column, before which you wish to insert the duplicated columns, then either right-click it and select Insert copies cells, or press Ctrl and the plus sign (+) on the numeric keypad at the same time.
- Choose Insert copies cells after selecting the column before which you wish to insert the copied columns.
- Delete the previous columns.
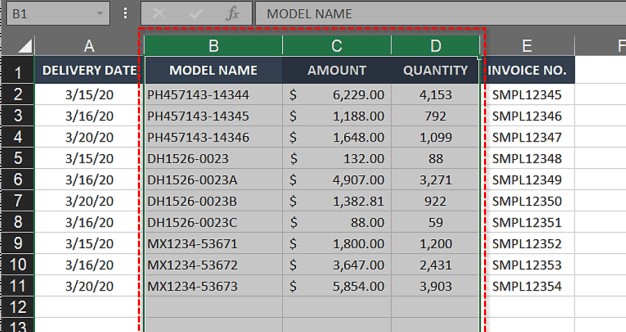
This is a more time-consuming method than dragging columns, but it may be suitable for people who prefer shortcuts to fumble with the mouse. Unfortunately, it also does not function for non-contingent columns.
Method 4. Keyboard shortcut methods
Now, let’s see how you can swap two excel columns with the keyboard shortcut method.
Following are the steps for swapping columns by the keyboard shortcuts method:
- Select any cells in the excel column.
- Hold Ctrl + Space for highlighting the full column.
- Now, press Ctrl + X and cut it.
- Choose the column you wish to replace the first one with.
- Hold Ctrl + Space again for highlighting the column.
- Hold Ctrl + Plus Sign (+) which is on your numeric keypad.
- This will insert the new column in place of the original one.
- Now perform these steps again.
- To highlight the second column, use Ctrl + Space.
- Press Ctrl + X.
- Move the second column to the place of the first one.
- Now, press Ctrl + the Plus Sign (+).
- Through this, you can easily swap the position of both columns.
FAQ’s
Q 1. How can I swap only one cell?
For swapping single-cell columns, use the drag and drop method.
Q 2. How can I exchange data that has been arranged in rows?
The methods discussed in this post work for rows as well.
Conclusion
That’s It! You can now easily Swap two or more columns in Excel by following our step-by-step tutorial.
We hope you learned and enjoyed this lesson and we’ll be back soon with another awesome Excel tutorial at QuickExcel!
