Shapes, Symbols, and Icons are a great way of visual presentation and help in better readability of text and better audience retention for any type of document and the same goes for a Spreadsheet.
To add some visual flair to your spreadsheet, you can use shapes. In Excel, shapes can be inserted by using the shapes menu in the insert bar.
Excel comes with a function called icons that you can use if you require graphics for a project. Icons are a collection of modern, professional graphics that come standard with Office 365 and 2019, and they may be altered to meet your specific needs. Word, Excel, Outlook, and PowerPoint all have in-built support for icons.
Steps to Insert Shapes in Excel
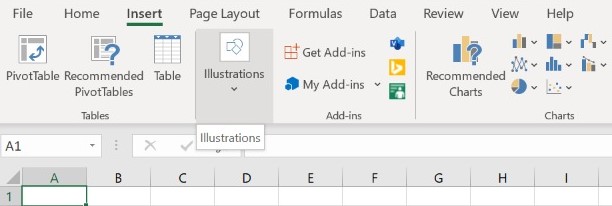
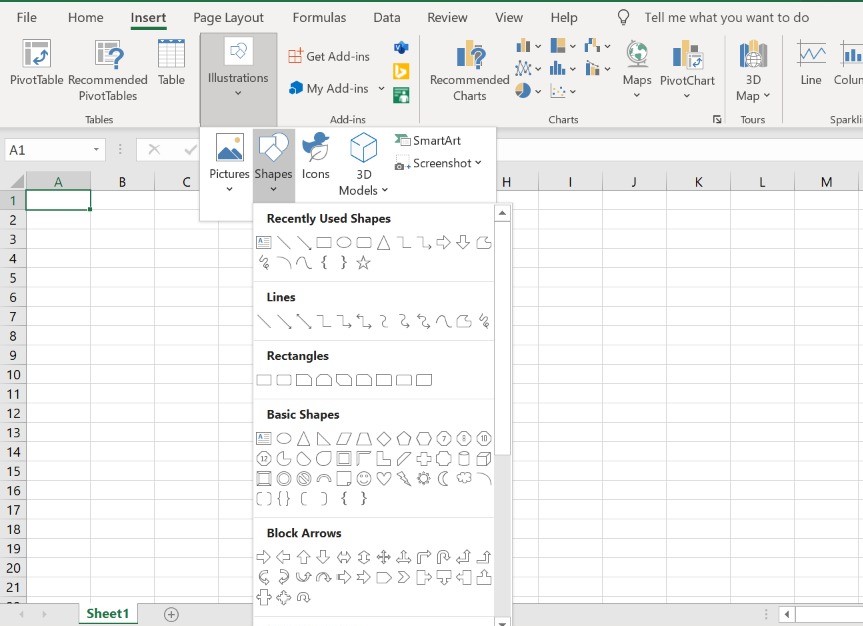
- Select Insert from the top Menu bar
- Now, select Illustrations to reveal a drop-down menu.

- From the menu, Click on Shapes to further reveal open a drop-down menu.

- Now, select the required shape to insert
- The cursor is now changed to a crosshair, and you can begin drawing on the sheet.
You can use one of two methods to insert the shape:
- To insert the shape on the spreadsheet, click anywhere on it.
- To insert the form, customize its size (using the resizer), click and drag anywhere on the page to do so
There will be yellow adjustment handles on some forms that have conspicuous elements that can be modified.
Format a Shape in Excel
You can adjust the style, fill, outline or border color, and effects of a shape after it has been inserted using the format tab.
- Choose a Shape on which you wish to apply the formatting.
- The format option in the drawing tools ribbon group becomes available when you choose a shape. When you double-click a shape, the Format tab appears automatically.
Change the design, fill color, outline, or shape effects using the shape style settings on the Format option.
- Choose a style from the Shape Styles gallery, or use the More button to see all of the available styles.
- Choose a fill color, weight, or dash pattern for the shape.
- To change the color of the selected shape, select a shape outline color. You can also use a gradient, a photo, or a textured pattern to fill it.
Steps to Insert Icons in Excel
- To add an icon, go to Insert in the top menu bar
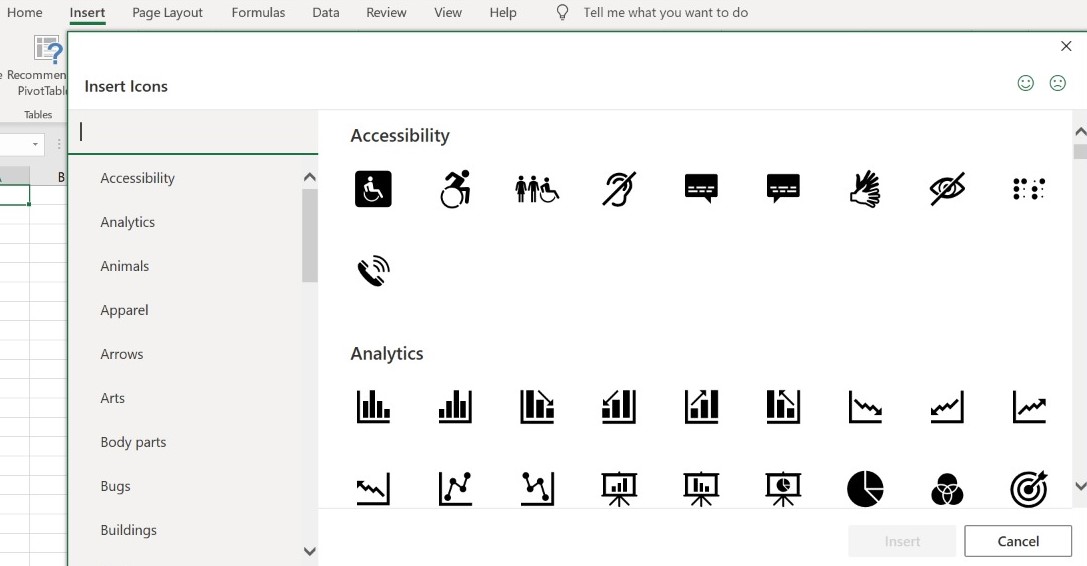
- Go to Illustrations and click on Icons

- A pop-up menu, dispaying icons appears,
- Browse and select from a variety of topics available such as people, technology, trade, arts, and more. Once you’ve found an icon you like, click Insert after selecting it.

Customize Icons in Excel
After you’ve added an icon, you can tweak it in a variety of ways.
- To alter the color of an icon, first, choose the icon you want to change the color of. The Format tab will be displayed. Then select a color from the drop-down menu by clicking Graphics Fill.
- Click Shape Outline and choose a color from the drop-down box to add an outline to your icon.
- You may also adjust the size of a symbol by holding and moving one of the sizing handles. You can make the icons as big as you like without them being pixelated because they’re vector drawings.
Shapes and Icons in Excel give you several options for altering the look of your project and are very useful. If you’re searching for some basic, clean visuals to complement your content, give them a shot.
Conclusion
Hope you have learned how to insert Shapes and Icons in Excel, which are a great way from visual representation in your spreadsheet.
Stay tuned for more Excel tutorials to QuickExcel!