This tutorial is a detailed guide to creating interesting actionable buttons in Excel. If you want to learn to automate your Excel sheets by adding interactive buttons to your records, then this tutorial is made for you. Once we have created macros, we will learn to edit them in Excel.
Wait, what? You don’t know what macros are? Go ahead and read this article -> How to Record Macros in Excel?
If you’re still reading, I assume that you know what macros are and how to record them. So, let’s get started with this fun guide to creating some actionable buttons that you can use in your sheets to automate your data.
The best part is, you don’t have to be a VBA guru to create actionable buttons in Excel because this tutorial requires you to have zero knowledge in VBA to get started! Here are the steps to create actionable buttons without VBA in Excel.
Steps to create interactive buttons in Excel
This button will allow you to store the values from a user form to the database in the backend, refresh the table, or do whatever you want them to do for you. Isn’t it cool? You can get the experience of turning your spreadsheets into professional software.
To get started, let’s take an example of a user data entry form with a non-interactive button illustration below it.
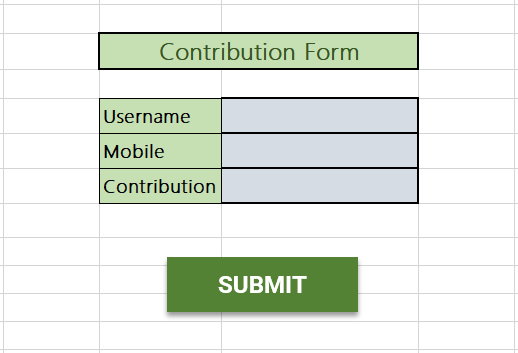
You need to create two worksheets, one with the user form and the other with the database table where the user form data will be stored.

We will first record a macro in which we manually execute the action that is going to be done by the Submit button.
Here’s how to create interactive buttons in MS Excel 2016.
Here are the steps to create buttons in MS Excel 2019. Please follow the steps carefully. I have used a simpler example to help you understand better.
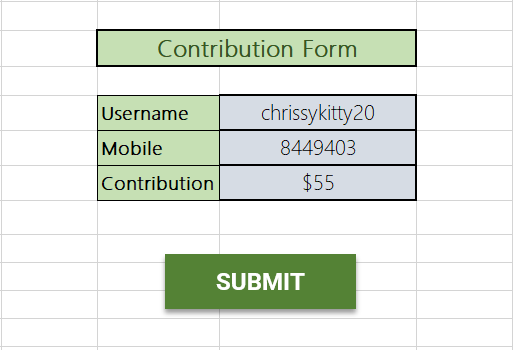
- Fill in random user details in the form.
- Go to the View tab.
- Pull down on Macros.
- Click Record Macro.
- Give your macro a name.
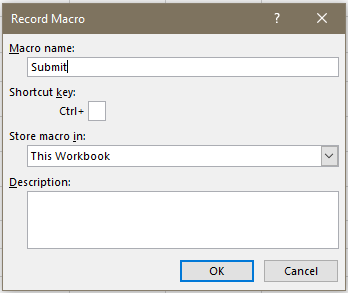
- Click OK. Now that the macro recording has started, follow these steps carefully without clicking anywhere else.
- After clicking OK, copy the random user data you just filled in.
- Go to the Database worksheet.
- Right-click on the first empty cell in the table.
- Pull right on Paste Special.
- Choose the Transpose icon.
- Don’t click anywhere yet!
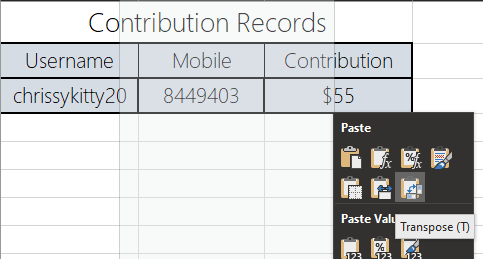
Now that the first user entry is pasted horizontally, follow these final steps before ending the recording.
- Go to the Home tab.
- In the Cells group, pull down on Insert.
- Click on Insert sheet rows.
- Lastly, click on the first empty cell of the table again.
- Don’t click anywhere yet!
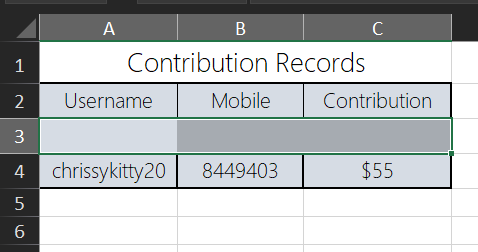
- Navigate back to the user form sheet.
- Delete the random entries you created from the cells.
- Click on an empty cell in the sheet.
- Stop recording the macro from the ribbon below, use your custom shortcut key, or choose Stop Recording from Macros in the View tab.
Woohoo, our macro is ready to be assigned to the Submit button!
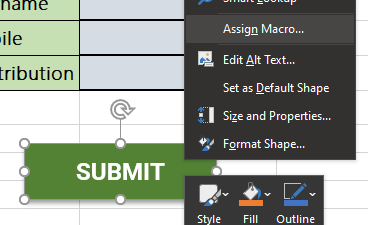
- Right-click on the submit button.
- Click Assign macro.
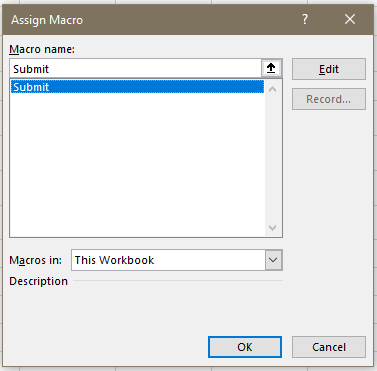
- Choose This workbook from the Macros in option below.
- Choose the macro you just created.
- Click OK.
Yay! It’s time to test your interactive button!
- Clear all entries from the database sheet.
- Fill in random user data in the form and click on the Submit button.
- Navigate to the database sheet to check if the data is stored correctly.
- Check with multiple user data to ensure everything working smoothly.
Conclusion
This tutorial was a detailed guide to creating interactive and actionable buttons in Excel without VBA. With this tutorial, you can easily automate any dataset and transform your works into smart and manageable records. Stay tuned at QuickExcel to learn more about smart Excel automation!
