In this article, we’ll learn more about ANOVA in Excel in a step-by-step manner. Before we begin, let’s understand what is ANOVA.
What is ANOVA?
ANOVA is known to be an inferential analysis. It is the formal method of explaining that we would like to take a sample of analyses and make an educated prediction about what all of the available measurements would be like if only we could take all of them.
ANOVA can be used for a variety of different types of analysis.
One-way ANOVA and two-way ANOVA are two instances of analyses with names related to the number of factors. A random-effects model or a mixed-effects model is used when the levels of a factor are chosen at random from a large number of options.
There are many different types of ANOVA, but the ultimate goal of this family of analyses tools is to watch out for a relationship between factors and an outcome variable.
The variables you’ll use to categorize the outcome variable into groups are called factors.
What does ANOVA do?
An Anova test is used to determine whether or not the results of a survey or experiment are significant. In other words, they assist you in determining whether the null hypothesis should be rejected or the alternate hypothesis should be accepted.
We can use Anova to determine when we can be confident that perhaps the actual average of one group varies from the real average of more than one group based on the rules of mathematical sets that hold certain specified assumptions.
Anova establishes these criteria that the means are equal, a concept known as the Null Hypothesis.
How to Turn On Anova in Excel ?
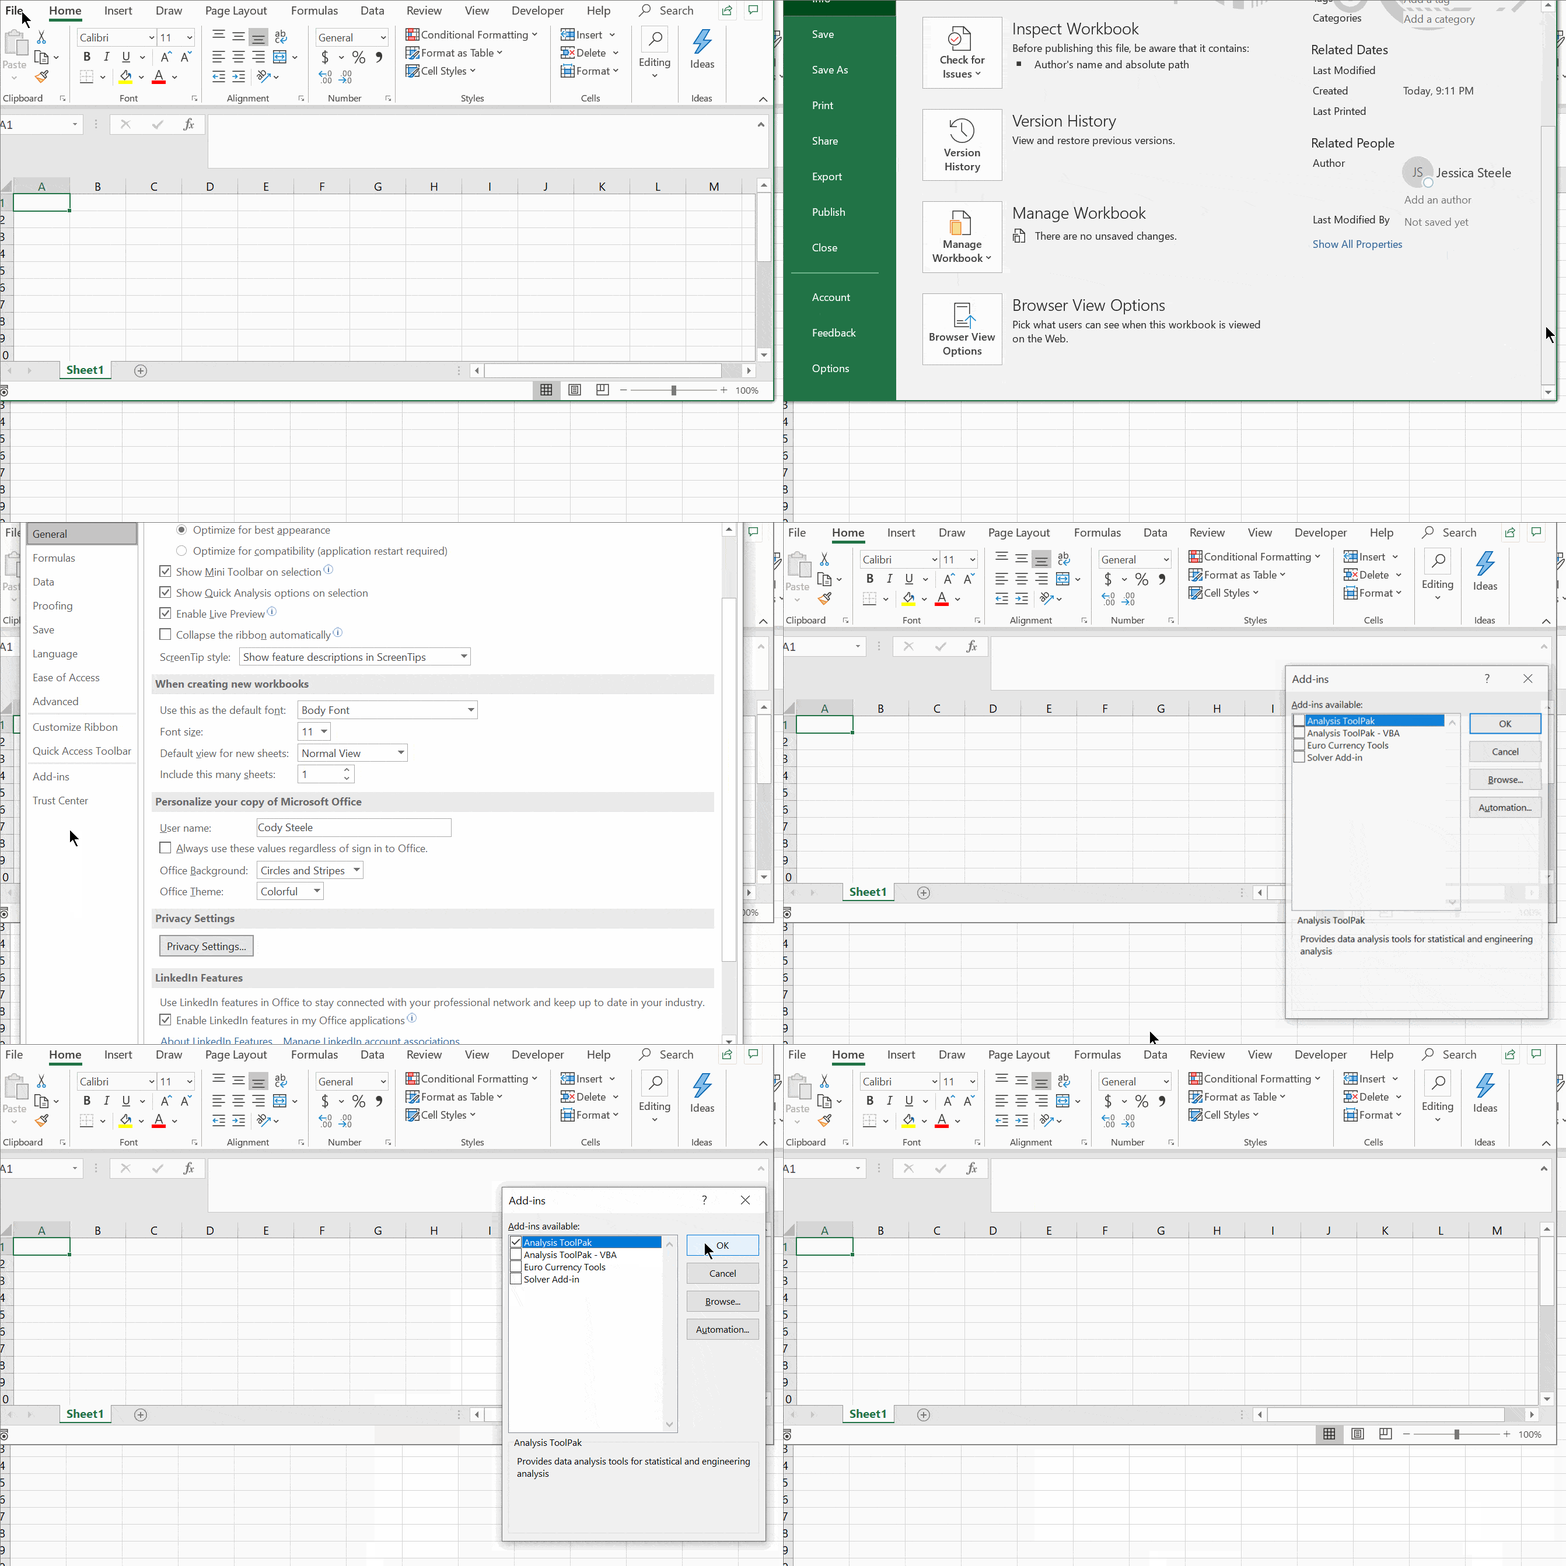
In the Microsoft Windows operating system, here’s how to enable Anova :
- Select file and then options.
- Choose Add-ins from the Excel Options window.
- Go to Excel Add-ins from the Manage drop-down menu and click GO.
- Select Analysis from the Add-ins window.
- Select ToolPak from the drop-down menu and select OK.
- On your data ribbon, a new button will appear.

How to Use One-way Anova in Excel?
You can do the following procedures in Excel to acquire the results of One-Way ANOVA analysis if you have the DATA analysis Toolpak activated and the data in columns.
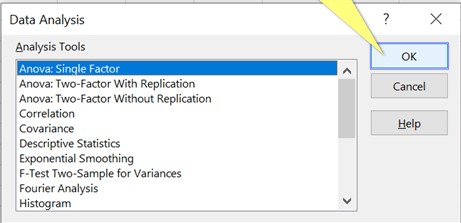
- Navigate to the Data tab
- Select Data Analysis from the top menu bar

- Click OK after selecting ANOVA: Single Factor

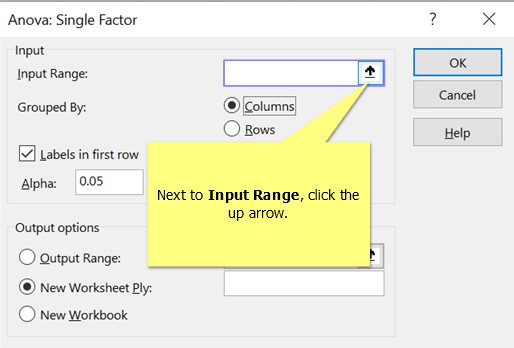
- Click the up arrow next to the input range

- Now, click the downwards arrow after selecting the data for which you want to calculate

- To run the analysis, click OK.
How to Use Two-way Anova in Excel?
You can do the following procedures in Excel to acquire the final results of the Two-Way ANOVA analysis if you have the data analysis Toolpak installed and the data in columns. You will start the same way you did for the one-way ANOVA (kindly refer to the above images as for how to enable anova and perform One-way Anova)
Follow the instruction given below for the two-way ANOVA.
- Navigate to the Data tab.
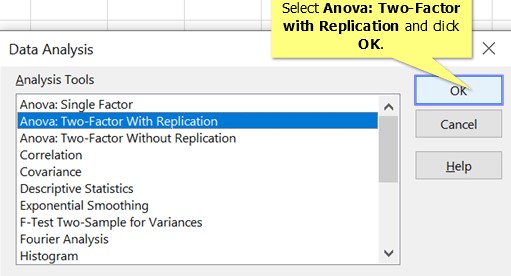
- Select Data Analysis from the menu bar.
- Click OK after selecting ANOVA: Two Factor With Replication

- Now, select the upward arrows next to the Input Range.
- Click the down arrow after selecting the data.
- Enter the number of readings in the group in rows for each sample, then select OK to run the program.
Conclusion
That’s It! You can now easily do Anova of your data in Excel by following our step-by-step tutorial.
We hope you learned and enjoyed this lesson and we’ll be back soon with another awesome Excel tutorial at QuickExcel!
