The fear of the unknown!
We all have it embedded & deeply rooted within us. This fear transcends across every decision we make in our daily routine & thus this applies also to those which we do with the data in MS Excel too. What if I do some modifications & get to a point where I can no longer return the data to its original state? The fear is reasonable, but MS Excel as nice as it has always been showing us a way around it.
MS Excel helps us to retain all the information in a particular worksheet as-is & transfer all those contents identical into a new sheet which can be placed in the same workbook or even a different workbook of our choice.
Enter COPYING a SHEET!
In this article, we would be exploring the different methods which we can deploy to copy the contents of a worksheet as listed below.
- Using the Home Tab
- The Accelerator Way
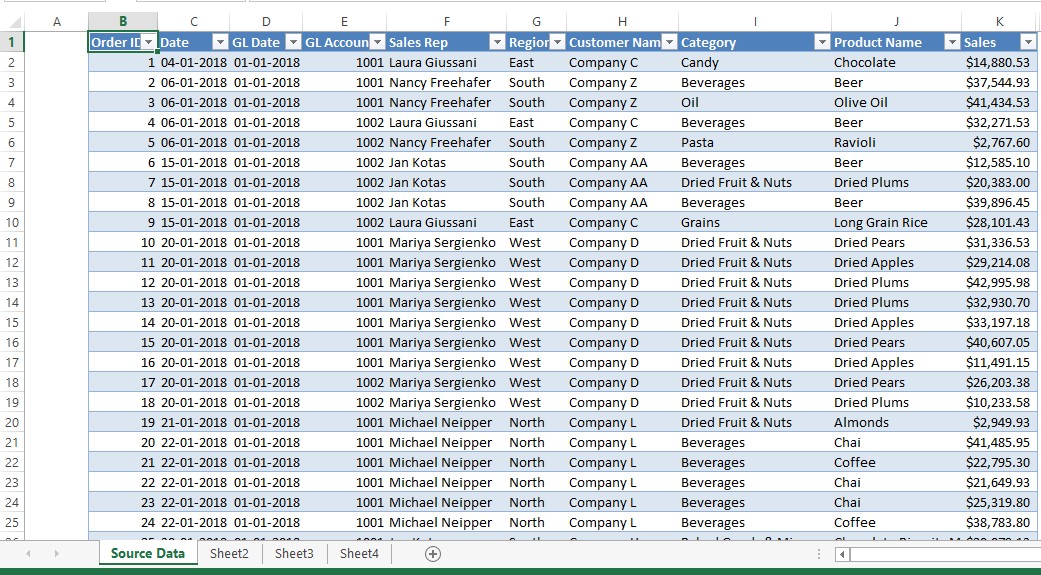
Following is the sheet that will be put into use for carrying out each of the above-mentioned methods.
Method 1 – Using the Home Tab:
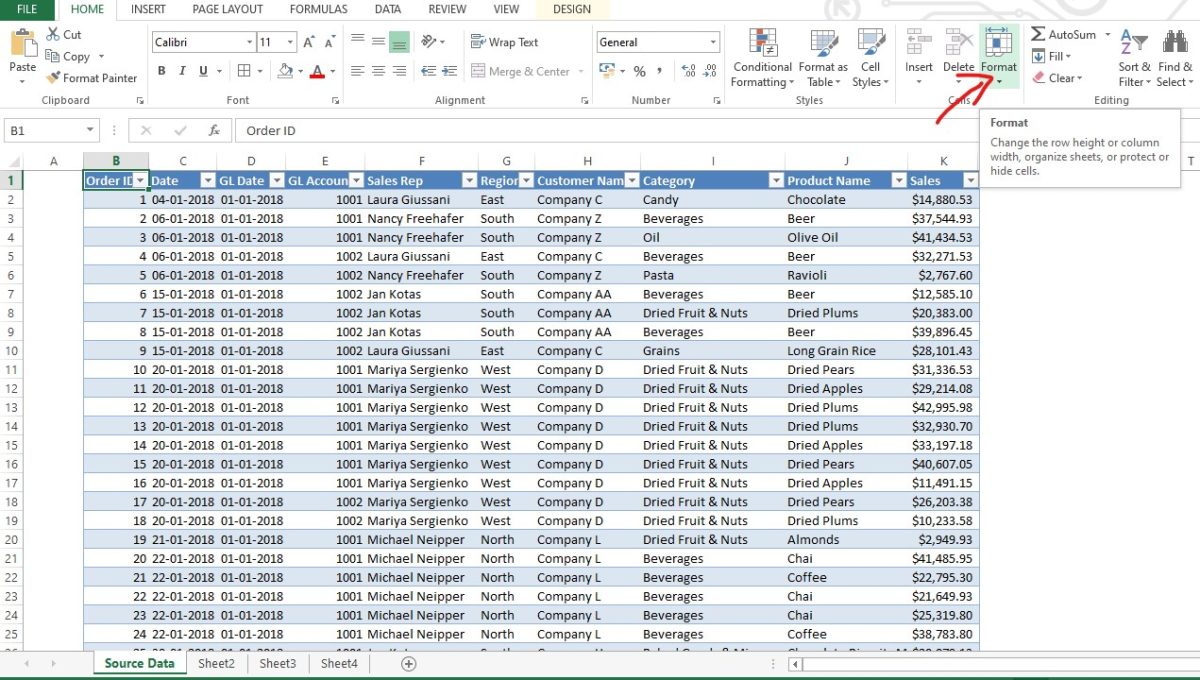
In this method, we shall rely upon our mouse to do the job for us. Hover the cursor over the Home Tab until it reaches the Format option under the Cells section as shown in the below image.
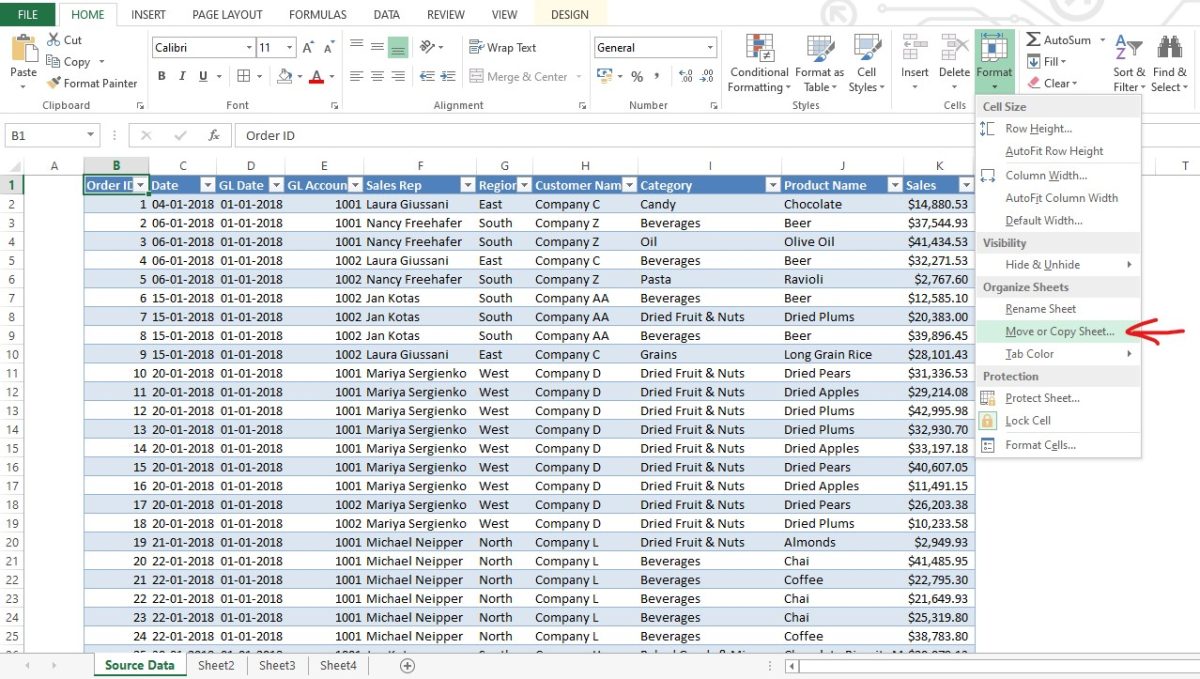
Clicking on the Format option would drop down a list of choices where we need to select the Move or Copy Sheet option as shown in the following image.
Once done, it makes a pop-up appear as shown below.
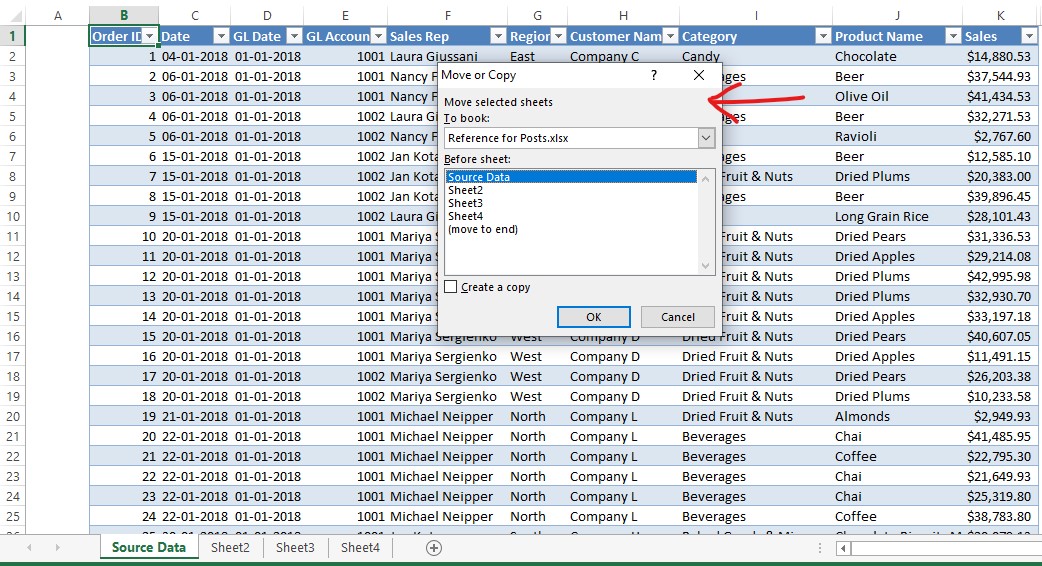
The important thing one has got to bear in mind here is that this pop-up is common for both moving & copying the selected sheet, it is critical that one has to check the box which states Create a copy as shown in the below image.
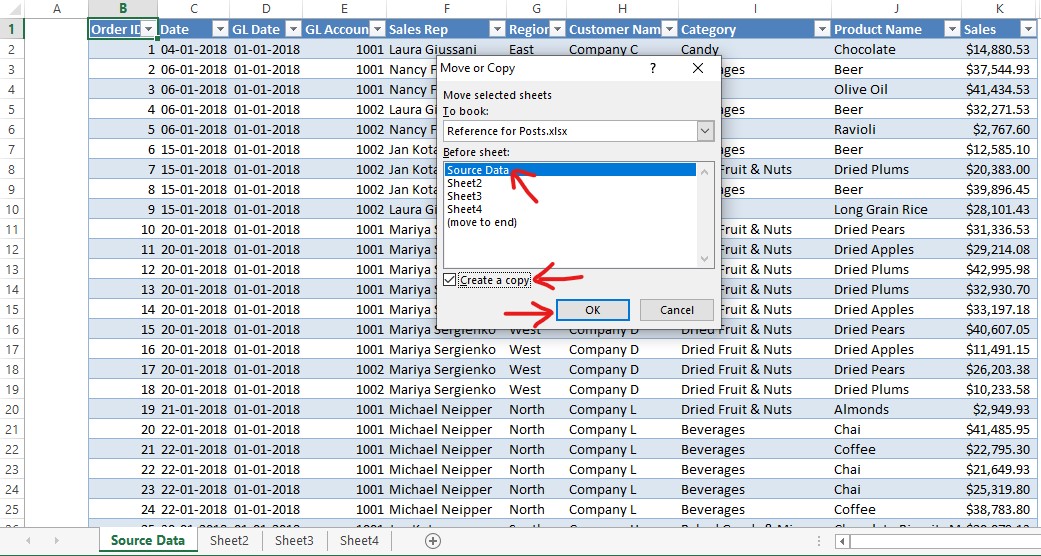
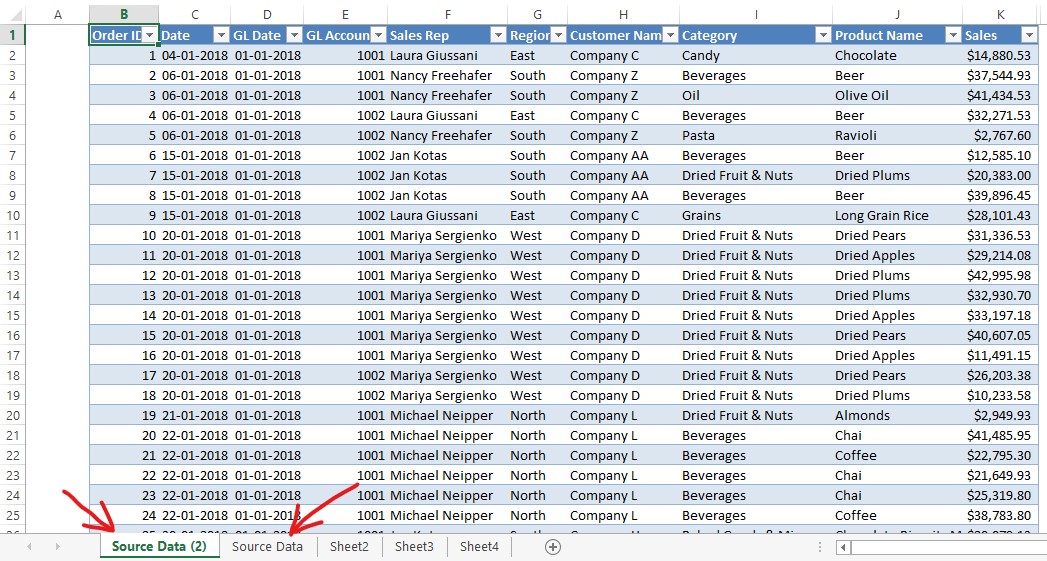
Apart from checking the Create a Copy option, one can also choose the sheet before which a copy of the active worksheet needs to be made from the Before sheet section as displayed in the above image. Finally, after all these are set, OK is clicked & a copy of the active worksheet gets included in a blink of an eye as shown below.
Method 2 – The Accelerator Way:
The navigation part is entirely removed & that is the best thing about using this method. It gets you bang on into the place where you want, rather than making you look around for directions. Following is the key sequence that is to be used.
ALT, E, M
These keys are to be pressed one after the other & not simultaneously for the accelerator to work. Besides, it is also not necessary for prolonged pressing of a key until all the keys in the sequence are being pressed. One can press a key, take the finger off & then proceed to pressing the next key in the sequence.
After successfully pressing the keys in the sequence, it takes us directly to the Move or Copy Pop-up!
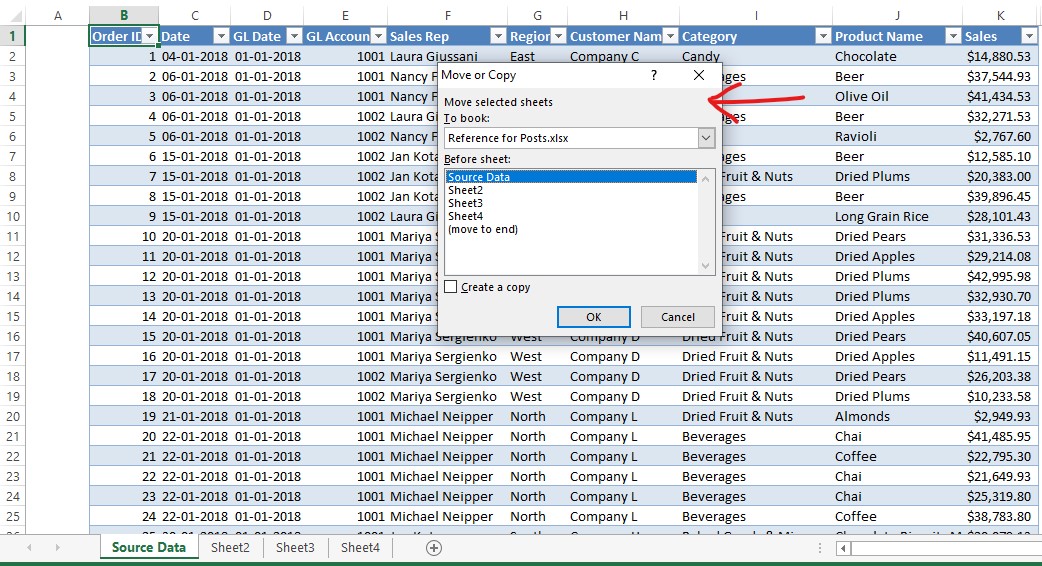
The other sequence of steps remains the same as in the previous method & a copy of the sheet gets inserted in a similar manner.
Conclusion:
Now we have reached the end of this article on how to add cells in MS Excel. QuickExcel has numerous other articles too that can help those who are looking to explore the depths of MS Excel. Here’s an article that elaborates on how to count cells in MS Excel. Cheers!
